background image

80

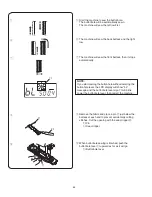
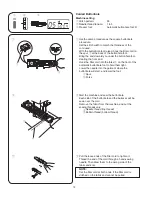
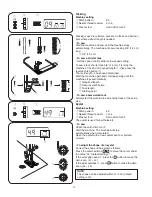
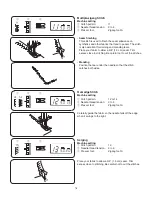
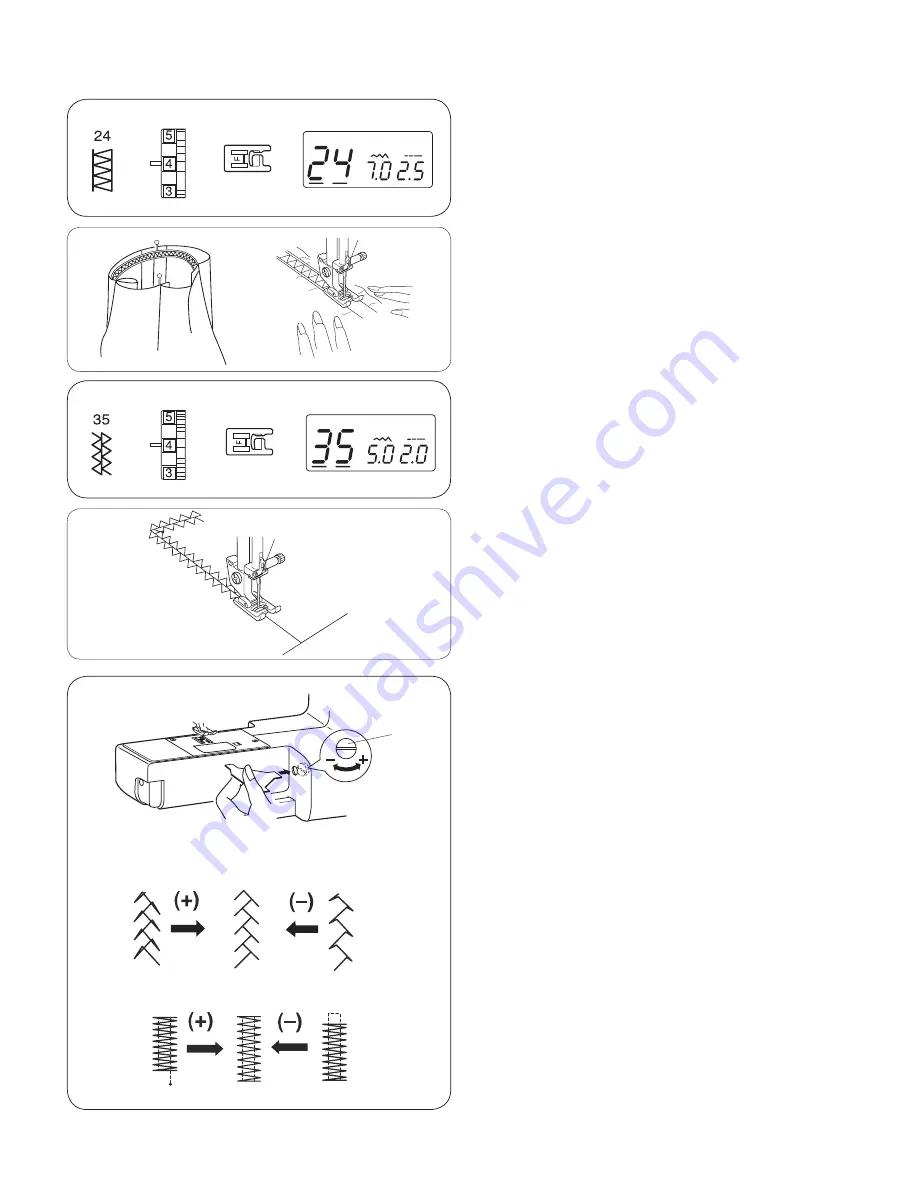
Choose this stitch to attach elastic to garments. Mark elas-

tic into quarters and match these to the center front, center 

back and side seams.

Place the middle of the elastic under the center of the 

presser foot and stitch into place, making sure the elastic is 

evenly distributed.

q

e

w

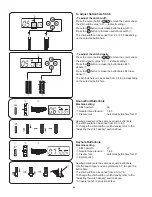
Elastic Stretch Stitch

Machine setting

Stitch pattern:  

24

w

 Needle thread tension:   3 to 6

e

 Presser foot:  


Satin stitch foot: F

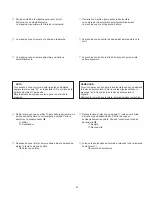
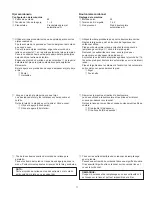
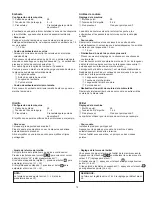
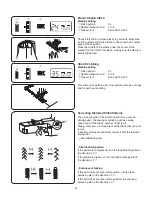
This stitch is for patching worn out garment elbows or knees 

and for patchwork quilting.

Stretch Patching

Machine setting

Stitch pattern:  

35

w

 Needle thread tension:   3 to 6

e

 Presser foot:  


Satin stitch foot: F

q

e

w

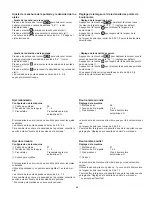
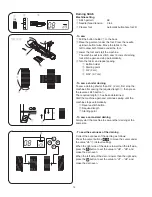
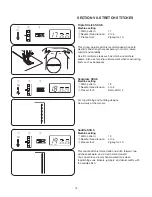
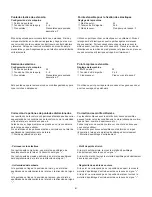
Correcting Distorted Stitch Patterns

The sewing results of the stretch patterns may vary de-

pending upon the sewing conditions, such as sewing 

speed, type of the fabric, number of layers etc.

Always test sew on a scrap piece of the fabric that you wish 

to use.

If stretch patterns are distorted, correct it with the feed bal-

ancing dial.

Feed balancing dial

q

• Stretch stitch pattern

If the pattern is compressed, turn the feed balancing dial in 

the direction of “+”.
If the pattern is drawn out, turn the feed balancing dial in 

the direction of “–”.

• Evenness of tacking

If the stitch does not meet start position, turn the feed 

balancing dial in the direction of “+”.
If the stitch does not meet return position, turn the feed 

balancing dial in the direction of “–”.

Содержание Hello Kitty 18750

Страница 1: ...Instruction Manual Manual De Instrucciones Livre D Instructions...

Страница 2: ...chments recommended by the manufacturer as contained in this owner s manual 3 Never operate this sewing machine if it has a damaged cord or plug if it is not working properly if it has been dropped or...

Страница 3: ...tes el ctricos o mec nicos 4 No utilice nunca la m quina si tiene bloqueada alguna v a de ventilaci n Mantenga las v as de ventilaci n de esta m quina y el pedal de control libres de pelusa polvo y tr...

Страница 4: ...le fabricant tel qu indiqu dans le pr sent manuel 3 Ne jamais faire fonctionner cette machine si le cordon d alimentation ou la fiche ont t endommag s s il y a un probl me de fonctionnement si elle es...

Страница 5: ...to lock Stitch 40 Stretch Stitch 40 Zipper Sewing 42 44 To snap on the zipper foot 42 Fabric preparation 42 To sew 42 44 SECTION IV ZIGZAG STITCH SEWING Zigzag Stitch 46 48 To adjust the stitch width...

Страница 6: ...cremalleras o cierres 43 45 C mo colocar el prensatelas para cremalleras 43 Preparaci n de la tela 43 Para coser 43 45 SECCION IV PUNTADAS DE ZIG ZAG Puntada de zig zag 47 49 Ajuste de la anchura de l...

Страница 7: ...e des fermetures glissi re 43 45 Pour fixer le pied fermeture glissi re 43 Pr paration du tissu 43 Pour coudre 43 45 PARTIE IV POINTS ZIG ZAG Zig zag simple 47 49 R glage de la largeur de point 47 R g...

Страница 8: ...4 Cursor buttons 5 LCD display 6 Speed control slider 7 Needle position up down button 8 Auto lock button 9 Reverse stitch button 0 Start stop button 1 Hook cover plate 2 Presser foot Zigzag foot A 3...

Страница 9: ...d extension bo te de rangement d accessoires w Plaque aiguilles e Enfile aiguille r Coupe fil t Plaque frontale y Levier releveur de fil u S lecteur de tension du fil i Porte bobine o Disque fixe bob...

Страница 10: ...gzag foot A r Satin stitch foot F t Zipper foot E y Automatic buttonhole foot R u Seam ripper Buttonhole opener i Screwdriver o Large spool holder 0 Small spool holder 1 Spool stand 2 Spool pin felt 3...

Страница 11: ...carrete 2 Fieltro para porta carretes 3 Portacarretes adicional 4 Cepillo de limpieza q Canettes w Jeu d aiguilles e Pied zig zag A r Pied pour point pass F t Pied fermeture glissi re E y Pied boutonn...

Страница 12: ...e machine plug r into the power inlet t Insert the power supply plug y into the wall outlet u Turn on the power switch q The foot control sign i will be displayed when the foot control is connected to...

Страница 13: ...e alimentaci n e Introduzca el enchufe de alimentaci n r en la toma de la pared t Encienda el interruptor q q Interruptor de encendido w Enchufe de la m quina e Toma de alimentaci n r Enchufe de alime...

Страница 14: ...attaching or removing parts when cleaning the machine Do not place anything on the foot control otherwise the machine will run inadvertently Operating Instructions The symbol O on a switch indicates t...

Страница 15: ...urnez la Si elle ne se branche toujours pas faites appel un lectricien qualifi qui installera une prise appropri e N essayez pas de modifier la prise La p dale de contr le YC 485EC 1 s utilise avec la...

Страница 16: ...stitches the machine will immediately sew locking stitches and automatically stop If you press the reverse stitch button w when stitch pattern 00 01 10 or 11 is selected and the foot control is not co...

Страница 17: ...o dependiendo de la posici n que determinada por este bot n q Touche de d marrage start stop Abaissez le rel ve pied Appuyez sur la touche de d marrage start stop q pour d marrer la machine La machine...

Страница 18: ...ons to change the set value Move the cursor under the digit you would like to change Press button to increase the value Press button to decrease the value u t y Speed Control Lever Sewing speed can be...

Страница 19: ...gauche y Touches de programmation Utilisez ces touches pour modifier une valeur programm e Placez le curseur sous le chiffre que vous souhaitez modifier Appuyez sur la touche pour augmenter cette val...

Страница 20: ...m Sewing Free arm sewing is used for stitching sleeves waistbands pant legs or any other tubular garments It is also useful for darning socks or mending knees or elbows Presser Foot Lifter The presser...

Страница 21: ...ccesorios w Pasador e Orificio r Caja de accesorios Costura con el brazo libre La costura con el brazo libre se utiliza para coser mangas cinturillas perneras y dem s prendas con forma de tubo Tambi n...

Страница 22: ...e permanent snags or runs in knits fine silks and silk like fabrics q w e r q Fabric Light Thread Medium Heavy Lawn Georgette Tricot Wool Polyester Cotton Polyester Fine jersey Wool Denim Jersey Coati...

Страница 23: ...se continue d ennuis et de points saut s de fils tir s dans les jerseys et les soies naturelles ou artificielles Ligera Media Pesada Lin n Cresp n georgette Tricot Lana Poli ster Seda 80 100 Algod n 8...

Страница 24: ...the presser foot q Pin w Slit To Remove and Attach the Foot Holder CAUTION When attaching or removing foot holder turn OFF the power switch and remove the needle from the needle clamp To remove Remove...

Страница 25: ...ire la aguja de su alojamiento tirando de ella hacia abajo Retrait et installation du porte pied ATTENTION Mettez l interrupteur d alimentation en position d ARR T avant de retirer ou d installer le p...

Страница 26: ...n z Push the hook cover plate release button q to the right and remove the hook cover plate w q Hook cover plate release button w Hook cover plate x Lift out the bobbin e Bobbin q w B Additional spool...

Страница 27: ...ertura de la placa de cubierta del portacanillas q y saque la palaca de la cubierta del portacanillas w q Bot n de apertura de la placa de cubierta del portacanillas w Placa de la cubierta del portaca...

Страница 28: ...Push the bobbin winder spindle to the right The bobbin sign q appears on the LCD display b Hold the free end of the thread in your hand and start the machine Stop the machine when the bobbin has been...

Страница 29: ...cristaux liquides c Inserte el hilo por el agujero de la canilla pas ndolo del lado interior al exterior Ponga la canilla o el huso del devanador v Empuje la canilla hacia la derecha El signo de la bo...

Страница 30: ...ue to draw the thread lightly until the thread slips into notch e Pull out about 6 15 0 cm of thread v Attach the hook cover plate Check the threading by referring to the diagram r shown on the hook c...

Страница 31: ...atr s y por encima de la placa de aguja Observe el esquema de enhebrado r situado en la tapa de acceso a canilla y compruebe si ha enhebrado correctamente Insertion de la canette q Extr mit du fil w...

Страница 32: ...k w through the needle eye Paying close attention to the needle point draw the thread around the guide e and under the hook w c Release the knob slowly while holding the thread end r with your hand A...

Страница 33: ...ebrador e Gu a r El extremo del hilo NOTA El enhebrador de agujas se puede utilizar con las agujas 11 a 16 o con una aguja 11 azul Se recomienda un hilo de tama o 50 a 90 q Bouton w Crochet e Guide r...

Страница 34: ...edle thread lightly with your left hand q Needle thread q z c x x Press the needle position up down button w twice to lower and raise the needle to pick up the bobbin thread w Needle position up down...

Страница 35: ...ne dos veces el bot n para subir bajar la aguja w para hacer bajar y subir la aguja y agarrar el hilo de la bobina w Bot n para subir bajar la aguja x Appuyez sur la touche de position haute basse de...

Страница 36: ...bric number of fabric layers type of stitch Tension is too tight q Needle thread Top thread w Bobbin thread Bottom thread e To loosen tension r Right side Top side of fabric t Wrong side Bottom side o...

Страница 37: ...ois s entre les deux paisseurs de tissu comme illustr gauche agrandi pour montrer les d tails En regardant le dessus et le dessous de la couture vous remarquerez qu il n y a pas d interruption Les poi...

Страница 38: ...side Bottom side of fabric Minimize the amount of needle thread visible on the wrong side Bottom side of the fabric without causing excessive puckering or causing the bobbin thread to show on the righ...

Страница 39: ...rte de abajo de la tela El hilo de la aguja pasar por la parte de abajo de la tela y se jalar quedando cas junto R glage de la tension du fil de l aiguille pour le point zig zag Lorsqu un point zig za...

Страница 40: ...the value set keys to change the stitch pattern number until the pattern number of the desired stitch is indicated The number will increase or decrease by 1 each time you press the value set key c Pr...

Страница 41: ...o bajo patr n de la puntada indica tipo conveniente del prensatelas para la puntada seleccionada patr n Motis de points L alphabet sous le motif de point indique type appropri de pied de presser pour...

Страница 42: ...and turn the fabric counterclockwise 90 4 Lower the presser foot and begin stitching in the new direction CAUTION Do not place near to the presser foot when guiding fabric or the needle clamp screw ma...

Страница 43: ...quez plusieurs points en arri re Relevez le pied presseur Retirez le tissu tirez les vers l arri re et coupez les l aide du Les sont ainsi coup s la bonne longueur pour le d but de la prochaine coutur...

Страница 44: ...0 0 to 5 0 q Cursor w Stitch length 2 2 NOTE Reverse stitch length cannot be set longer than 4 0 w q To adjust the needle drop position The needle drop position can be adjusted for straight stitch pat...

Страница 45: ...resione el bot n para mover la aguja hacia la izquierda w q Anchura de puntadas 3 5 w Izquierda 0 0 e Centro 3 5 r Derecha 7 0 Ajuste de la longitud de la puntada Presione los botones del cursor para...

Страница 46: ...Stitch pattern 03 w Needle thread tension 2 to 6 e Presser foot Zigzag foot A r Reverse stitch button Lower the needle close to the front edge of the fabric The machine will sew several locking stitch...

Страница 47: ...w Tension du fil d aiguille 2 6 e Pied presseur Pied zig zag A r Touche de marche arri re Ce point sp cial est utile lorsqu un point de blocage invisible est n cessaire Abaissez l aiguille proximit du...

Страница 48: ...m seam e 7 8 2 2 cm from the right edge to the estimated zipper bottom stop position r Sew in reverse a few stitches to lock Increase the stitch length to 4 set needle thread tension to 0 and sew bast...

Страница 49: ...metros para dejar el camino libre para la puntada Quite la tela y cierre la cremallera Pour coudre q Marge du tissu 0 4 cm 1 8 de pouce w Dents de la fermeture clair e Ruban de la fermeture clair z Fi...

Страница 50: ...1 2 distance from the basting stitch line Turn fabric 90 and sew a seam the entire length of zipper tape Before reaching pull tab stop the machine with needle in fabric and raise the foot Use seam rip...

Страница 51: ...de coser ambos lados de la cremallera utilice un abrecosturas para abrir la puntada de hilvanado La couture des fermeture glissi re suite x Soulever et rel cher le pied puis le fixer nouveau du c t ga...

Страница 52: ...thread tension 2 to 6 e Presser foot Zigzag foot A To adjust the stitch width Press the cursor buttons to move the cursor w under the stitch width value 5 0 q default setting Press the button to decr...

Страница 53: ...bot n para reducir la anchura de la puntada e Presione el bot n para aumentar la anchura de la puntada r La anchura de la puntada puede variar entre 0 0 y 7 0 Ajuste de la longitud de la puntada Pres...

Страница 54: ...om both sides of the fabric q e w r Button Sewing Machine setting q Stitch pattern 10 w Needle thread tension 3 to 6 e Presser foot Satin stitch foot F r Feed dog Dropped To Drop or Raise the Feed Dog...

Страница 55: ...a tela de modo que la aguja caiga fuera del borde cuando oscile a la derecha Ce point est utile pour le montage des v tements et pour finir les bords bruts de tous les ouvrages de couture Guidez le ti...

Страница 56: ...st Then fold the hem as illustrated leaving 1 4 0 6 cm of the hem edge showing q e w Blind Hem Stitch Machine setting q Stitch pattern 15 w Needle thread tension 1 to 4 e Presser foot Zigzag foot A e...

Страница 57: ...forma indicada en la ilustraci n de jando de 0 6 cm 1 4 del borde cosido a la vista q Tissu fin w Tissu pais e C t envers du tissu r 0 6 cm 1 4 Sur les tissus pais qui s effilochent on devrait d abor...

Страница 58: ...Wrong side of fabric w Right side of fabric x Press the seam allowance to open Sew stitch pattern 21 on the right side of the garment centering over the seam line Stitch patterns 22 25 and 30 can als...

Страница 59: ...00 q Envers du tissu w Endroit du tissu x Ouvrez la r serve de couture au fer Piquez le motif de point 21 l endroit du v tement en le centrant sur la ligne de couture Vous pouvez galement utiliser le...

Страница 60: ...ribute the gathers w evenly Sew the smocking stitches between the gathered rows Remove the straight stitches by pulling them out q Knotted edge w Gathers NOTE Pull up the bobbin thread and draw a 4 6...

Страница 61: ...orativa y delicada que se utiliza en ropa infantil o blusas para mujer Elija una tela suave y liviana por ejemplo batista guinga o chal Corte la tela a una anchura tres veces mayor que la proyectada A...

Страница 62: ...ton to decrease the stitch width r Press the button to increase the stitch width t The stitch width will be varied based on the centered needle drop position y e Stitch width 3 5 r Stitch pattern 31 s...

Страница 63: ...a da de la aguja centrada R glage de la largeur de point S lectionnez le motif 31 Appuyez sur les touches pour d placer le curseur sous la valeur de largeur de point 3 5 e r glage par d faut Appuyez s...

Страница 64: ...ould take if embroidered by hand If you press the auto lock button before sewing the machine will sew one unit of the cross stitch and stop automatically q e w Decorative Satin Stitches Machine settin...

Страница 65: ...re la machine coud un exemplaire du motif au point de croix puis s arr te automatiquement Point de croix R glage de la machine q Motif de point 36 w Tension du fil d aiguille 3 6 e Pied de presseur Pi...

Страница 66: ...it is completed q Auto lock button x Select stitch pattern 41 Press the auto lock button and start sewing c Machine will sew one unit of pattern 41 and stop automatically v Repeat the procedure above...

Страница 67: ...automatiquement q Touche d arr t automatique x S lectionnez le motif 41 Appuyez sur la touche d arr t automatique et commencez coudre c La machine coud un exemplaire du motif 41 et s arr te automatiq...

Страница 68: ...ur setting Place the button on the fabric and mark the top and button to determine the position of the buttonhole on the fabric Use interfacing on stretch fabrics SECTION VI BUTTONHOLE Various Kinds o...

Страница 69: ...es boutonni res et leurs utilisations q Boutonni re carr e Cette boutonni re carr e est tr s utilis e sur les tissus moyennement pais pais La dimension de la boutonni re est automatiquement d termin e...

Страница 70: ...buttonhole on an extra piece of the fabric If it is difficult to fit the button through the test buttonhole you can lengthen the buttonhole by pulling the button holder back a little The length of the...

Страница 71: ...o Tope 0 Sin espacio 1 Espacio de costura Boutonni re carr e R glage de la machine q Motif de point 05 w Tension du fil d aiguille 1 5 e Pied presseur Pied boutonni re automatique R r Symbole du levi...

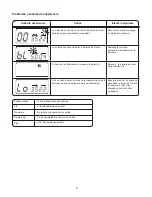
Страница 72: ...start sewing the buttonhole without lowering the buttonhole lever the LCD display will show bL message and the buttonhole lever sign 2 will blink Lower the buttonhole lever then restart the machine R...

Страница 73: ...ure de la boutonni re se fait automatiquement La machine coud le c t gauche d abord n La machine coud ensuite la bride d arr t arri re puis le c t droit m La machine coud enfin la bride d arr t avant...

Страница 74: ...onhole width w Press the button to increase buttonhole width e The stitch width can be varied from 2 5 to 7 0 depending on the selected buttonhole To adjust the stitch density Press the cursor buttons...

Страница 75: ...la densidad de la puntada consulte la secci n anterior Ajuste de la densidad de la puntada El puntero para ojalillos es un accesorio opcional R glage de la largeur et de la densit des points de bouto...

Страница 76: ...rks w on the front of the automatic buttonhole foot to hold them tight Lower the needle into the garment where the buttonhole will start and lower the foot q Spur w Forks x Start the machine and sew t...

Страница 77: ...dos extremos si el cord n est cosido en la tela y no se puede tirar z Utilisez la m me proc dure que pour la boutonni re carr e R glez la largeur de point en fonction de l paisseur du cordonnet utili...

Страница 78: ...p the machine after sewing the required length y then press the reverse stitch button t The required length y has been determined Start the machine again and continue sewing until the machine stops au...

Страница 79: ...presione el bot n para seleccionar un valor entre d1 d4 y emparejar el zurcido Pour coudre z Tirez le porte bouton q vers l arri re x Placez le v tement sous le pied Appuyez deux fois sur la touche d...

Страница 80: ...stops automatically w Required length e Reverse stitch button r Tack length t Starting point To sew a same sized tack Simply start the machine to sew another tack at the same size Eyelet Machine sett...

Страница 81: ...de ceinture pour les rendre plus solides Pour coudre D marrez la machine et cousez jusqu ce qu elle s arr te automatiquement La machine coud automatiquement un arr t de couture sur une longueur de 1 5...

Страница 82: ...and strength are necessary in order to insure comfort and durability Use it to reinforce areas such as crotch and armhole seams Also use for extra reinforcement when constructing items such as backpa...

Страница 83: ...sturas a la vista y dise o de contornos Cosa lentamente en las esquinas Puntada de refuerzo Configuraci n de la m quina q Patr n de puntada 18 w Tensi n del hilo de la aguja 3 6 e Prensatelas Prendate...

Страница 84: ...tches q e w Multiple zigzag Stitch Machine setting q Stitch pattern 11 w Needle thread tension 3 to 6 e Presser foot Zigzag foot A Overedge Stitch Machine setting q Stitch pattern 12 or 14 w Needle th...

Страница 85: ...ssu en place en pr voyant une ressource de couture de 1 5 cm 5 8 Recoupez la ressource la fin de la piq re Faites attention de ne pas couper les points Puntada de sobrehilado Configuraci n de la m qui...

Страница 86: ...6 e Presser foot Satin stitch foot F q e w Correcting Distorted Stitch Patterns The sewing results of the stretch patterns may vary de pending upon the sewing conditions such as sewing speed type of t...

Страница 87: ...os pueden variar dependiendo de las condiciones de la costura como la velocidad el tipo de tela el n mero de capas etc Antes de coser haga siempre una prueba en un trozo sobrante de la tela que vaya a...

Страница 88: ...Cleaning the Hook Race and Feed Dogs z Remove the presser foot and needle Remove screw on the needle plate with the screwdriver Remove the needle plate and take out the bobbin q Screw c q w e r z x v...

Страница 89: ...sortez la canette q Vis x Relevez le porte canette et d posez le w Porte canette Limpieza del recorrido del portacanillas y los dientes de arrastre z Retire el prensatelas y las agujas Retire el torn...

Страница 90: ...on the race q Knob w Stopper c Replace the bobbin Attach the needle plate Tighten the screw firmly with the screwdriver e Screw CAUTION Do not pull the fabric or turn the handwheel when threads or fa...

Страница 91: ...ogement de crochet q Bouton w But e c Remplacez la canette Installez la plaque aiguille Resserrez fermement la vis avec un tournevis e Vis CUIDADO No tire de la tela ni gire el volante cuando los hilo...

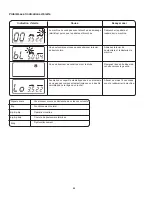
Страница 92: ...foot control is connected Disconnect the foot control and start the machine Warning sign Lower the buttonhole lever and restart the machine A buttonhole cannot be sewn without lowering the buttonhole...

Страница 93: ...parada porque el pedal est conectado Desconecte el pedal y ponga en marcha la m quina Se al de advertencia Abaissez le levier de boutonni re et red marrez la machine Los ojales se cosen sin bajar la...

Страница 94: ...rce que la p dale est branch e D brancher la p dale et red marrer la machine Indication d alerte Abaissez le levier de boutonni re et red marrez la machine Une boutonni re est cousue sans abaisser le...

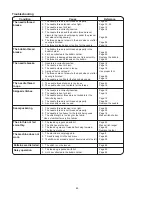
Страница 95: ...dle and or thread are not suitable for the fabric being sewn 4 The needle thread is not threaded properly 5 A poor quality needle is used 1 The needle thread tension is too tight 2 The needle thread i...

Страница 96: ...2 El tama o de la aguja no corresponde al del hilo 1 La aguja no est insertada correctamente 2 La aguja est doblada o da ada 3 La aguja y o los hilos no son adecuados para la tela que se va a coser 4...

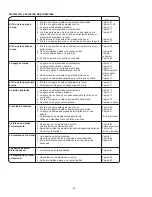
Страница 97: ...pas tir vers l arri re apr s la couture 6 L aiguille est trop fine pour le tissu utilis 1 Le fil de l aiguille n est pas assez tendu 2 La taille de l aiguille ne convient pas au fil 1 L aiguille est m...

Страница 98: ......

Страница 99: ......

Страница 100: ...Used Under License www sanrio com JANOME AMERICA INC 10 Industrial Ave Suite 2 Mahwah NJ 07430 USA 1 800 631 0183 ext 774 custrel janome america com copyright JANOME AMERICA INC 808800648 E S F...

Отзывы: