DIRECTIONS FOR USE
The towel warmer radiator must be used only for the purpose described in the manual. In particular, children must not play with the appliance.
Do not apply on the towel warmer radiator accessories other than those prescribed or recommended by the manufacturer.
Connect the radiator to the mains power supply only after it has been fixed to the wall.
Children under 3 must be kept at a distance unless under continuous surveillance.
Children between 3 and 14 years of age and persons with reduced physical, sensory or mental capacities, or who lack experience or the necessary
knowledge can use the radiator on condition that it has been positioned or installed in the normal position contemplated and they have been instructed
and trained in its safe use and are aware of the potential risks.
Children under the age of 14 must not connect the power plug, nor adjust or clean the appliance.
Children and persons with reduced physical, sensory or mental capacities, or who lack experience or the necessary knowledge must not perform
cleaning or routine maintenance of the towel warmer radiator.
It is absolutely prohibited:
-
To power the heating element control before having checked the correct installation of the thermostat on the towel warmer radiator.
-
To cut the power supply cable to disconnect the appliance
-
To damage the power supply cable. If the power cable is damaged the complete electric heating element must be repaired or replaced by the
manufacturer or by their technical assistance service, or by a qualified person authorised by the manufacturer, so as to prevent any risk.
WARNING:
-
Before powering the electric heating element, make sure that the towel warmer is completely filled with water.
-
During operation of the electric heating element, the complete filling of the towel warmer with water and the free expansion of the internal liquid
content must be constantly guaranteed, so the valve and the lock shield must never be turned off at the same time.
-
DURING OPERATION, THE RADIATOR PRESENTS HOT SURFACES, SOME PARTS CAN GET VERY HOT, AND CAUSE BURNS UNLESS
PARTICULAR CARE IS TAKEN. Particular attention should be paid to the presence of children and vulnerable people
-
During operation it is normal for the last two pipes at the bottom and the first one at the top to remain lukewarm.
-
Only fabrics washed with water can be dried on the towel warmer).
-
Do not use corrosive or abrasive products or solvents to clean towel warmer) or the plastic parts that contain the electrical parts.
METHOD OF USE AND OPERATION
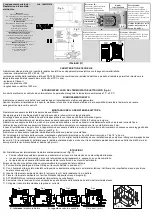
1. ON/Stand-by
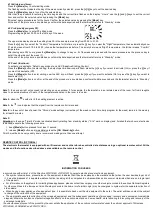
Press the [ON/Stand-by] key (Fig.1) to switch on the appliance or to activate "Stand-by" mode.
When it is active, the bottom area of the display shows the current time, while the top shows the set mode and the temperature. During “Stand-by”, the
display shows the letters “Stb”, the current time and the day of the week.
NOTE: When the device enters "Stand-by" mode, 2 bips are produced lasting 0.5 seconds. When the thermostat is on, it emits 1 bip per second.
Example of "Comfort" mode
Example of "Stand-by" mode
2. OPERATING MODES SETTABLE FROM THE THERMOSTAT
Press the [Mode] key (fig.1) to select the desired mode.
An icon on the display will indicate the active operating mode (see table below).
Table of operating modes
2h
Chrono
Pilot-wire Comfort
Night
Antifreeze
Holiday
2h Timer
Sequence of modes:
Chrono -> Holiday -> Pilot-wire -> Comfort -> Night ->
Antifreeze
-> 2h Timer
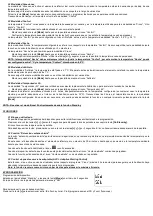
2.1 Chrono Mode
This operating mode allows the user to configure different temperature values for each hour of each day of the week. The “Comfort”/”Night”
temperatures and the related time intervals can thus be programmed.
To activate this function press the [Mode] key until the “Chrono” icon is displayed.
To select pre-set programming of the week P1, P2 or P3, hold down the [Mode] key for 3 sec.
Pre-set programs:
-
P1 = from day 1 to day 5 “Comfort” mode from 8 a.m. to 6 p.m. and “Night” mode in the other periods;
-
P2 = from day 1 to day 5 “Comfort” mode from 6 to 9 a.m. and from 5 to 11 p.m.; from day 6 to day 7 “Comfort” mode from 7 a.m. to 11 p.m. and
“Night” mode in the other periods;
-
P3 = totally configured by the customer.
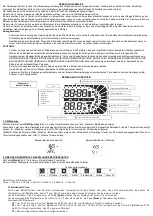
Clock
Operating mode
icons
- Chrono
-
Pilot-wire
- Comfort
- Night
- Antifreeze
- Holiday
Lock keys icon
Detect open window
Chrono Program
Day of the week
Comfort/Night Bar (Chrono mode)
IR receiver indicator
Set temperature
Active heating element indicator
Rear-lit display

