32
33
CLEANING AND MAINTENANCE
CLEANING AND MAINTENANCE
iV-Compact ventilation system
•
Installation and operating instructions
iV-Compact ventilation system
•
Installation and operating instructions
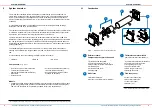
6.2
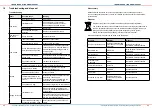
Cleaning/replacing dust filters
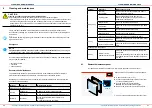
TIP:
inVENTer
dust filters of class G4 are highly durable and can be washed repeatedly. We
recommend cleaning the dust filter regularly.
For specific requirements, pollen filter and activated carbon filter are available as accessories.
You can find assembly instructions in the filter operating instructions provided.
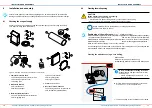
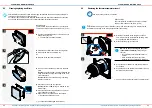
Requirements:
The reversible fan is switched off on the controller.
The inner cover's panel has been removed. (
6.1)
CLICK
►
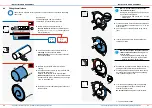
Pull the contaminated filter out of the inner cover
base plate by the tab.
Ö
The dust filter has been removed.
►
Insert a new
or
cleaned dust filter into the base
plate.
Ensure
you push the filter ring firmly between the
fixing projections and the inner edge of the inner
cover base plate.
Ensure
that the tab on the filter ring is pointing
towards the interior.
►
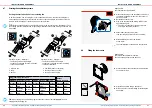
Place the cover on the four spacers.
Ensure
that the inVENTer logo is located on the
bottom right.
►
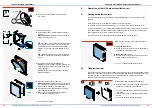
Press the side detent lugs inwards on the inner
cover base plate's spacers.
►
Slide the inner cover panel onto the spacers.
Ö
All spacers noticeably snap in.
Ö
You have cleaned/changed the dust filter.
►
Clean the dust filter under warm running water.
►
Wait until the filter is completely dry.
or
►
Dispose of the dust filter if defective.
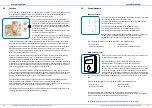
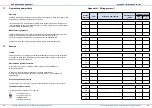
6.3
Removing the thermal accumulator insert
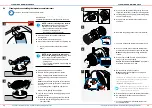
Pen to mark the connector orientation
Requirements:
The reversible fan is switched off on the controller.
The dust filter has been removed. (
6.2)
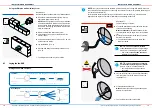
TIP:
Before removing, mark the orientation of the green controller plug. This will prevent the
reversible fan spinning in the wrong direction after reassembly.
►
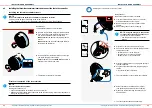
Step 1: Remove inVENTron from the wall sleeve
by the knob.
►
Step 2: Remove the thermal accumulator from the
wall sleeve by the handle.
►
Mark the orientation of the plug-in connection.
This will prevent the reversible fan spinning in the
wrong direction after reassembly.
►
Disconnect the plug-in connection.
NOTE:
In case of damage to the ceram-
ic thermal accumulator
it will no longer
function!
• Do not throw the ceramic thermal accu-
mulator.
• Store the thermal accumulator in the
standing position outside the wall sleeve.
Ö
You have removed the thermal accumulator insert.
1
2
1
2
1
2
3
4

