22
23
INSTALLATION AND ASSEMBLY
INSTALLATION AND ASSEMBLY
iV-Compact ventilation system
•
Installation and operating instructions
iV-Compact ventilation system
•
Installation and operating instructions
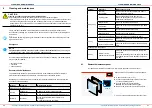
4.5
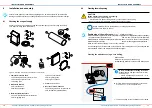
Installing the weather protection hood
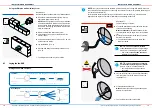
NOTE
Installation on an unfinished exterior wall
results in damage to the exterior wall!
•
Only install the weather protection hood (exterior closure) once the exterior wall is finished
and completely hardened.
NOTE
Penetration of condensate and/or algae build-up around the weather protection hood
results in damage to the masonry/exterior wall and/or discoloration of the façade!
•
Affix all sealing tapes prior to installing the weather protection hood base plate.
• Carry out a biocide/water-repellent pre-treatment on the render around the weather protection
hood in vulnerable areas (Consult your planner for further information!).
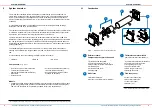
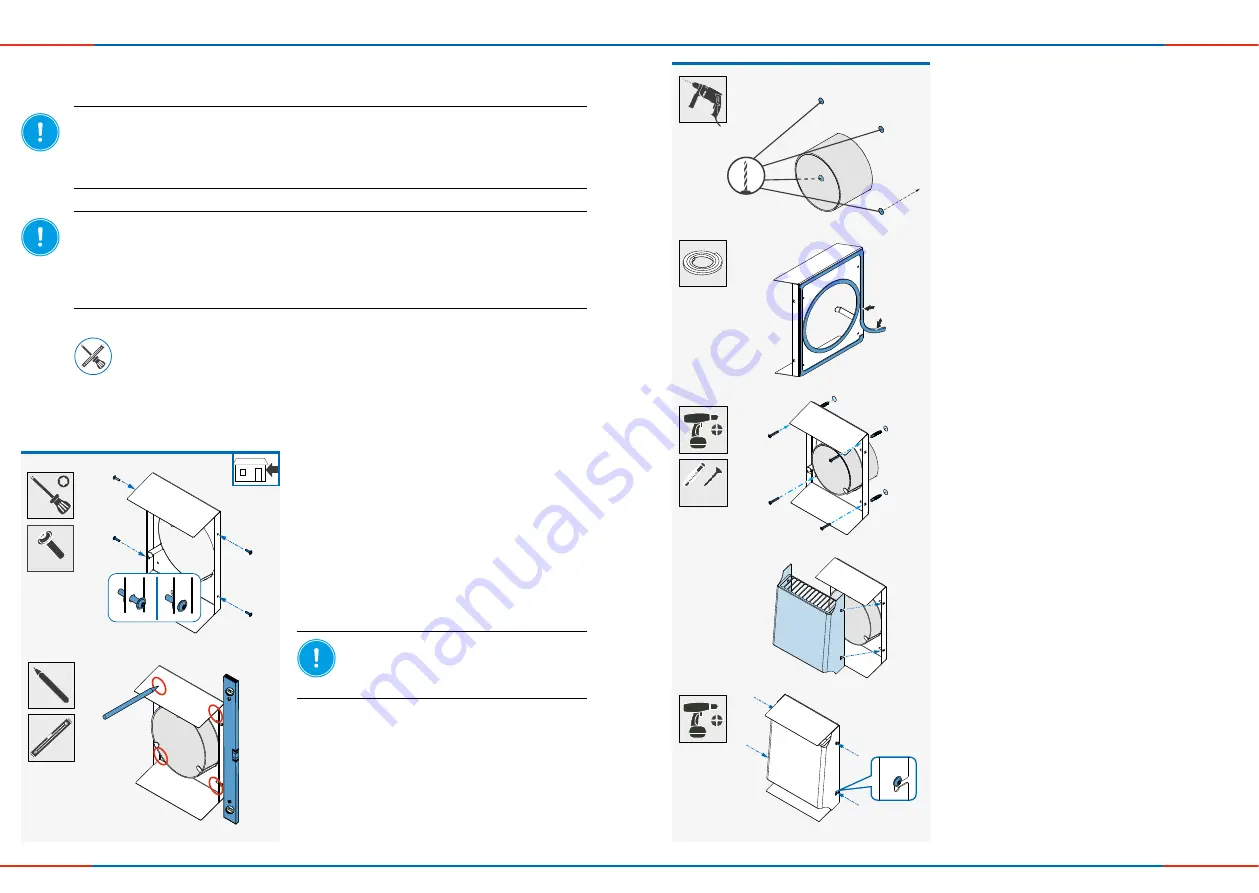
Spirit level, pen, drilling machine with drill bit Ø 8 mm, electrical screwdriver, wall plugs
(insulation plugs when using Simplex or with insulated exterior walls), permanently
elastic outdoor sealant, sealing tape, screws
Requirements:
The
exterior wall is finished and level.
The wall sleeve is fitted.
►
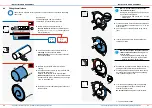
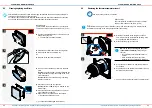
Remove the protective disc from the wall sleeve
on the exterior wall side.
►
Push the base plate onto the protruding wall sleeve.
Observe
the alignment of the drip rails: The slope
leads in direction of the ground/bottom.
►
Align the base plate using a spirit level.
►
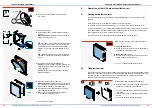
Mark out the four bore holes for fastening the base
plate.
NOTE:
Damage to the masonry/external
wall due to misaligned drip rails!
• Make sure that the slopes on both drip rails
are aligned to down-facing.
Ö
The weather protection hood is installed.
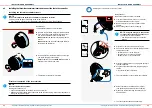
►
Drill the four holes with Ø 8 mm to a depth of min.
50 mm.
►
Insert the wall plugs into the drill holes.
►
Secure weather protection hood base plate to the
external wall using four screws.
TIP:
When screwing the base plate of Compact pro-
tective hood to external walls with insulation or when
using the WEB wall installation block/ Simlex wall
build-in system use insulation plugs to ensure safe
fastening. These are not part of the scope of supply,
but are available as an option
.
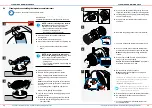
►
Hook the cover of the from the front into the lateral
screws (blue arrows) of the base plate.
Make sure
that the washers are placed between
the cover and the screw.
►
Pull down the cover until it snaps into place.
►
Secure the cover to the base plate using the lateral
screws.
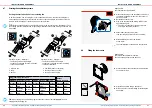
►
Turn the four lateral screws together with captive
washers loosely from the outside into the four
threaded holes (blue arrows) on both sides of the
base plate.
ø = 8 mm
50 mm
►
Affix the sealing tape, 9 mm, on the external wall
side and circumferiantally to the base plate:
• around the opening for the wall sleeve.
• at a distance of 5 mm from the outer edge.
Make sure that
the sealing tape does not protrude
over the inside edge of the wall sleeve opening.
TIP:
Apply the sealing tape only immediately before
mounting the base plate.
This prevents excessive expanding of the sealing tape
and facilitates installation.
4 x
4 x


