Server System R1304BTSSFAN/R1304BTLSFAN/R1304BTLSHBN Service Guide
45
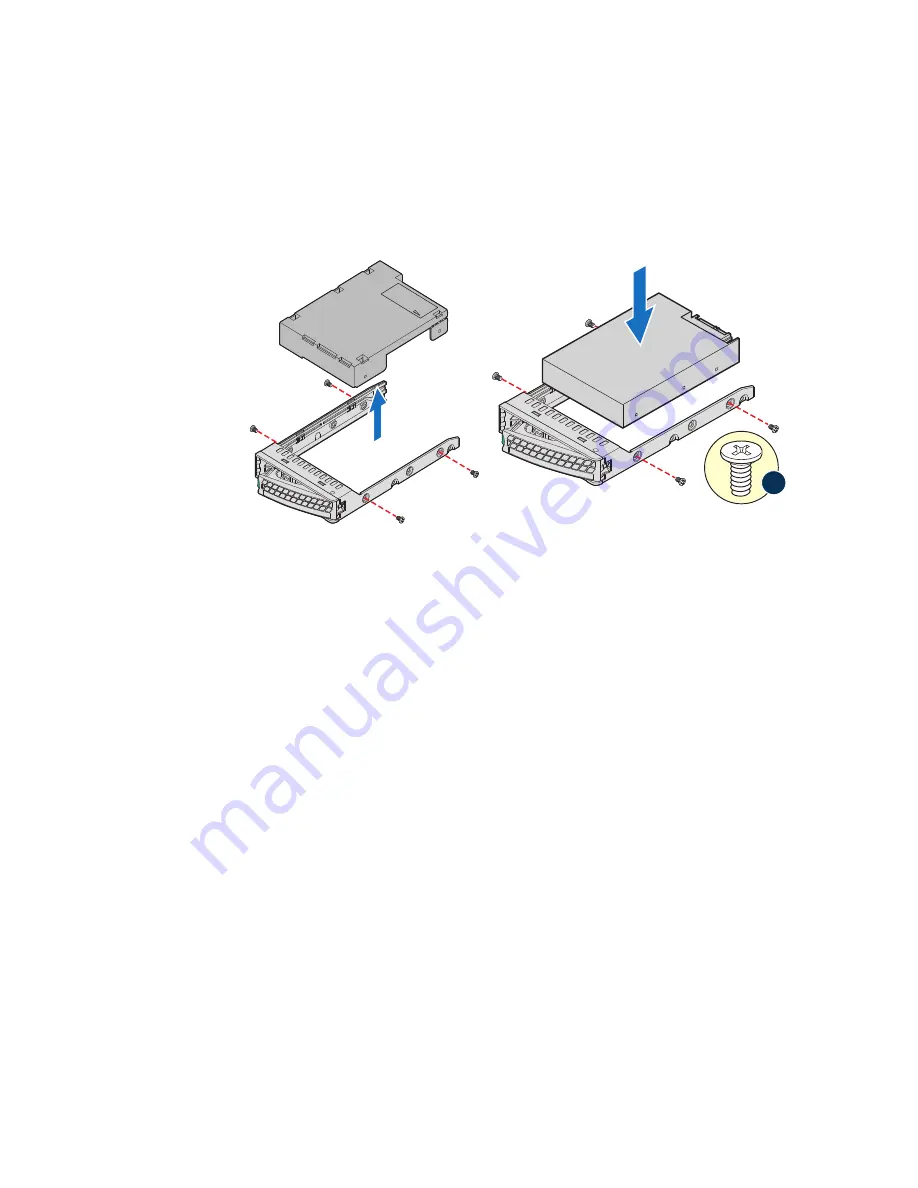
8. With the drive circuit-side down, position the connector end of the drive so it is
facing the rear of the drive carrier.
9. Align the holes in the drive to the holes in the drive carrier and attach it to the
carrier with the screws that were attached to the plastic retention device. See letter
Figure 25. Installing Drive into Drive Carrier (R1304BTLSHBN)
10. With the black lever in the fully open position, slide the drive assembly into the
server system (see letter “E” in Figure 26). The green latch at the front of the drive
carrier must be to the right. Do not push on the black drive carrier lever until the
lever begins to close by itself.
11. When the black drive carrier lever begins to close by itself, push on it to lock the
drive assembly into place (see letter “F” in
AF003721
TO
P
BREAK OFF T
AB
BEFORE MOUTING
2.5´´ HARD DRIVE
AF003722
D
3.5´´ HDD
Содержание R1304BTLSFAN
Страница 4: ...iv Intel Server System R1304BTSSFAN R1304BTLSFAN R1304BTLSHBN Service Guide...
Страница 6: ...vi Intel Server System R1304BTSSFAN R1304BTLSFAN R1304BTLSHBN Service Guide...
Страница 12: ...xii Intel Server System R1304BTSSFAN R1304BTLSFAN R1304BTLSHBN Service Guide...
Страница 20: ...xx Intel Server System R1304BTSSFAN R1304BTLSFAN R1304BTLSHBN Service Guide...
Страница 38: ...18 Intel Server System R1304BTSSFAN R1304BTLSFAN R1304BTLSHBN Service Guide...
Страница 46: ...26 Intel Server System R1304BTSSFAN R1304BTLSFAN R1304BTLSHBN Service Guide...
Страница 88: ...68 Intel Server System R1304BTSSFAN R1304BTLSFAN R1304BTLSHBN Service Guide...
Страница 108: ...88 Intel Server System R1304BTSSFAN R1304BTLSFAN R1304BTLSHBN Service Guide...
Страница 112: ...92 Intel Server System R1304BTSSFAN R1304BTLSFAN R1304BTLSHBN Service Guide...


