background image

54

Recording a source

Of course the DTR-9.1 can also be used to record an
input source media. This allows you to make copies of
the music or videos you like, copy them from one type
of media to another, or even record what is being
broadcast on television or radio. Be aware that the Rec
Out and Zone 2 buttons use the same circuit so that you
cannot make recording and output to the remote zone
(Zone 2) at the same time.

To record the input source signal you are
currently watching or listening to

This method outputs to the audio and video outputs the
currently selected input source signal. This method
allows you to a signal while you are actually listening to
or watching it.

1. Select the input source to record by pressing

the corresponding input selector button.

The input source is now selected and you may
watch or listen to it as desired.

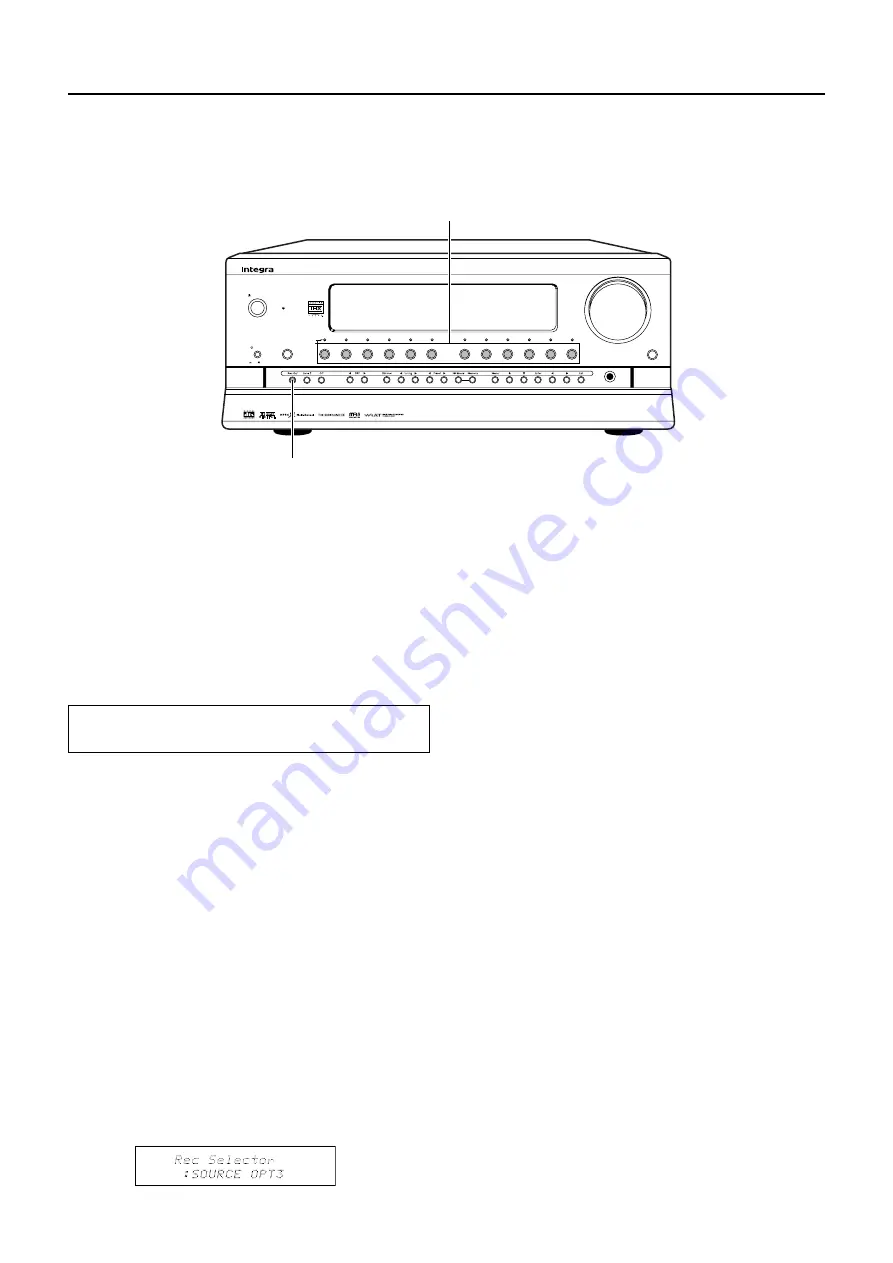
2. Press the Rec Out button twice within 8

seconds.

Pressing the Rec Out button twice outputs the cur-
rently selected input source signal to the TAPE 1
OUT, TAPE 2 OUT, VIDEO 1 OUT, and VIDEO 2 OUT
outputs for recording. The indicator above the se-
lected input source lights red.

3. Start recording at the recording component

as desired.

To confirm the settings, press the Rec Out button.
The current settings will appear for 8 seconds in the
front display.

Notes:

• If you change the input source during recording,

you will record the signals from the newly selected
input source.

• You cannot record the surround effects.
• Digital signals input to the DIGITAL INPUT (COAXIAL)

and DIGITAL INPUT (OPTICAL) inputs will be output to
the DIGITAL OUTPUT (COAXIAL) and DIGITAL OUTPUT
(OPTICAL) outputs.

• Digital input signals are only output to the digital

outputs and analog input signals are only output
from the analog outputs. There is no conversion
from digital to analog or vice versa. When connect-
ing CD players and other digital components, do
not connect only the digital terminals, but the ana-
log ones as well.

• There are some restrictions on recording digital sig-

nals. When making digital recordings, consult the in-
struction manual that came with your digital record-
ing equipment (e.g., MD recorder or DAT deck) to
know what restrictions are imposed.

• You cannot record the source connected to the

MULTI CHANNEL INPUT connector.

Off

On

Standby/On

Standby

Display

DVD

Video 

1

Video 

2

Video 

3

Video 

4

Video 

5

Tape 

1

Tape 

2

AM

FM

Phono

C D

Open/Close

Phones

CLEAR

Zone

 2

(

)

GRN

Rec

(

)

RED

Power

Master  Volume

DTR-9.1

Rec Out

Input selector buttons

Содержание DTR-9.1

Страница 1: ...rmance and listening enjoyment from your new AV Receiver Please retain this manual for future reference DTR 9 1 Appendix Remote controller Enjoying music or videos Setting OSD menu Before using AV Rec...

Страница 2: ...rized alternating current line plug a plug having one blade wider than the other This plug will fit into the power outlet only one way This is a safety feature If you are unable to insert the plug ful...

Страница 3: ...lar specifies that the cable ground shall be connected to the grounding system of the building as close to the point of cable entry as practical FCC Information for User CAUTION The user changes or mo...

Страница 4: ...nnecting power amplifiers 26 Connecting the power 27 Connecting the power 27 Setting OSD menu The On Screen Display OSD menu 28 Navigating through the OSD menu 29 Speaker Setup 30 1 Speaker Setup menu...

Страница 5: ...52 If one of the messages shown below appears 53 Enjoying the multichannel output 53 Recording a source 54 To record the input source signal you are currently watching or listening to 54 To record an...

Страница 6: ...accurate reproduction of the movie theater experience in the home 7 1 CHANNEL EXTERNAL INPUTS COMPONENT VIDEO OUTPUTS OTHER FEATURES 40 FM AM RANDOM PRESETS INTELLIVOLUME ABSOLUTE RELATIVE SWITCHABLE...

Страница 7: ...peration of the remote controller Using another remote controller of the same type in the same room or using the unit near equipment which uses infrared rays may cause operational in terference Do not...

Страница 8: ...Front panel display Off On Standby On Standby Master Volume Power Display DVD Video 1 Video 2 Video 3 Video 4 Video 5 Tape 1 Tape 2 AM FM Phono C D Open Close Zone 2 GRN Rec RED DTR 9 1 6 1 2 3 4 5 7...

Страница 9: ...am in one room while some body else is watching a different program in another Press the Zone 2 button to enable output to the ZONE 2 outputs After pressing the Zone 2 button press one of the input so...

Страница 10: ...nput source is output from the recording terminal Off When not using either Rec Out or Zone 2 press that but ton and then press the Off button to turn off the signal If the Rec Out or Zone 2 signal is...

Страница 11: ...Numeric key STEREO DIRECT THX DSP SURROUND Re EQ LATE NIGHT CH SEL LEVEL DIMMER buttons LIGHT button MODE MACRO button OSD MENU button ENTER cursor buttons VOL button TEST TV VCR button MUTING button...

Страница 12: ...r connection Inserted completely Here is an explanation of the terminals found on the rear of the DTR 9 1 and how they are used Before con necting your audio and video components be sure to read this...

Страница 13: ...en connecting two video monitors or televisions be aware that the OSD interface can only be used with MONITOR OUT 1 OSD will not be displayed on the video monitor connected to MONITOR OUT 2 DIGITAL IN...

Страница 14: ...are the analog audio inputs and outputs There are 10 audio inputs 6 of which are linked to video in puts and 4 audio outputs 2 of which are linked to video outputs The audio jacks are nominally labele...

Страница 15: ...ut source button The DTR 9 1 is equipped with two 12 volt trigger terminals and each supplies a current of 100 mA When you connect to either of these terminals make the appropriate settings in the OSD...

Страница 16: ...UT 1 PB PR Y DIGITAL OUTPUT COAXIAL AC 3 RF DIGITAL INPUT COAXIAL DIGITAL OUTPUT OPTICAL DIGITAL INPUT OPTICAL PHONO Example of how to connect your equipment VCR VIDEO 1 7 Refer to page 19 TV monitor...

Страница 17: ...should only be thought of as such It is best to fully understand the nature of each connector and terminal as well as each of your components and their features to ascertain which method of connection...

Страница 18: ...er DAT deck or CD recorder Using an RCA type audio connection cable connect the output terminals PLAY of the device to the TAPE 1 IN jacks on the DTR 9 1 and the input terminals REC to the TAPE 1 OUT...

Страница 19: ...gital Setup Digital Format see page 34 Using an RCA type audio connection cable connect the audio output terminal on the LD player to the audio VIDEO 4 IN jacks on the DTR 9 1 Make sure that you prope...

Страница 20: ...certified by Lucasfilm Ltd Ideal speaker configuration Front right and left speakers Center speaker Produces a rich sound image by serving as a sound source for the front right and left speakers and...

Страница 21: ...connect an amplifier to the PRE OUT SUBWOOFER jack and the subwoofer to the amplifier The output to PRE OUT SUBWOOFER 1 and PRE OUT SUBWOOFER 2 is the same Surround left speaker Surround back left sp...

Страница 22: ...is received Fix it with push pins or similar implements in the position that will cause the least amount of distortion If the reception is not very clear with the attached FM indoor antenna the use of...

Страница 23: ...OUTPUT PB PR Y COMPONENT VIDEO INPUT 1 PB PR Y 1 2 IR IN MAIN ZONE 2 ZONE 2 R L OUT C FRONT AMP IN R L SURR BACK SURR PRE OUT SUB WOOFER 1 2 AM FM 75 ANTENNA A B MODEL NO DTR 9 1 AV RECEIVER 12V TRIG...

Страница 24: ...deo connection cables Mini plug cable Power supply Wall outlet Signal flow Outline The IR IN ZONE 2 input allows you to control the DTR 9 1 from the remote zone Zone 2 with the remote control ler even...

Страница 25: ...V RECEIVER 12V TRIGGER 6 OHMS MIN 6 OHMS MIN HOME THEATER CONTROLLER RC 418M Connecting to the IR IN MAIN input In the cabinet Outside of the cabinet Remote sensor Multi Room System kit Remote control...

Страница 26: ...OPTICAL DIGITAL INPUT OPTICAL INPUT 2 PB PR Y INPUT 3 PB PR Y OUTPUT PB PR Y COMPONENT VIDEO INPUT 1 PB PR Y 1 2 IR IN MAIN ZONE 2 ZONE 2 R L OUT C FRONT AMP IN R L SURR BACK SURR PRE OUT SUB WOOFER 1...

Страница 27: ...nfirm that all con nections have been made properly Turning on the power may cause a momentary power surge which might interfere with other elec trical equipment on the same circuit such as com puters...

Страница 28: ...56789012345678901234 5 Zone2 OSD Setup 1 OSD Setup Quit OSD 1 2 3 4 5 6 7 8 9 0 1 2 123456789012345678901234 6 About 1 Lock Setup 2 Version Quit OSD Menu 1 Speaker Setup 2 Input Setup 3 Listening Mode...

Страница 29: ...edge of ENTER button lower edge of ENTER button left edge of ENTER button right edge of ENTER button ENTER EXIT RETURN MENU UP DOWN LEFT RIGHT ENTER EXIT Button on DTR 9 1 under door OSD Display 1 Pre...

Страница 30: ...ct if the front speakers are small sized If No is selected for the Subwoofer setting then this setting is fixed to Large c Center None Select if no center speaker is connected Large Select if the cent...

Страница 31: ...meters in 0 15 meter intervals If None was selected for the Center setting in the Speaker Config sub menu then this setting will not appear d Surr Right Set the distance from the surround right speak...

Страница 32: ...r the front right and other speakers until all speakers are adjusted to the same volume level Notes Speakers that you selected No or None for in the Speaker Config sub menu will not appear To accurate...

Страница 33: ...vious screen appears Notes The volume can be adjusted to either or be tween 81 to 18 decibels in 1 decibel increments Do not allow the distorted sound to be output from the subwoofer for a long time f...

Страница 34: ...up sub menu is set to On for the selected input source or if the selected input source button is AM FM or PHONO If this setting is incorrectly made the digital audio signals may not be properly output...

Страница 35: ...the DTS encoded signal will not be decoded and noise will be output This noise could damage the amplifier and speakers Therefore be sure to selected Auto Digital or DTS and use the digital input jack...

Страница 36: ...llaneous Setup Quit OSD 1 2 3 4 5 6 7 8 9 0 1 2 123456789012345678901234 2 3 Video Setup Input CD a Video VIDEO1 b Component Video VIDEO1 Quit OSD a Video This setting allows you to match the audio fr...

Страница 37: ...de The listening modes that can be set are different for each input source format If Dolby Pro Logic is set for the listening mode and there are no surround speakers then the listening mode becomes 3...

Страница 38: ...DVDs and other digital sources that are recorded with 2 channel au dio h D F Mono This corresponds to monaural digital format sources This signal source comes from LDs DVDs and other digital sources t...

Страница 39: ...elected if the surround back speakers are connected Action This mode is designed for movie soundtracks that stress special effect sounds and surround effects In addition to strengthening the low frequ...

Страница 40: ...eard too early In such a case use this setting to prop erly synchronize the audio and video This setting can be set between 0 to 30 ms in 0 5 ms increments Under normal circumstances this can left at...

Страница 41: ...allows you to set some of the special features offered by the DTR 9 1 a IntelliVolume When switching input sources you may find that the output level for different components or input sources connect...

Страница 42: ...L R Left Right Auto L R d Output Channel L R Center L R 3 3 Stereo Analog PCM Setup Select this to modify the Stereo listening mode when the current source is analog or PCM The parameters that can be...

Страница 43: ...hen the cur rent source is digital The parameters that can be set are shown in the table below Parameter Setting Initial value a Subwoofer Off On On b Re EQ Off On Off c Surround Speakers Surround L R...

Страница 44: ...r The monaural sound is output from the front center channel Digital Upsampling Digital upsampling processes the input digital signal and converts its digital sampling frequency to twice the current f...

Страница 45: ...signal Off Outputs the center channel signal at the regular level and frequency characteristics Listening mode Direct Mono Mono Stereo Stereo Surround Surround THX Parameter Analog PCM Digital Analog...

Страница 46: ...e 0 decibel for the relative display method Relative This displays the volume as a decibel value on a scale with a designated reference point that is displayed as 0 which equals the volume setting of...

Страница 47: ...as the background color while the OSD menu is displayed b Superimpose Off Select to have the OSD menu displayed on the selected background color Normal Select to have the OSD menu superimposed over t...

Страница 48: ...4 5 Zone2 OSD Setup 1 OSD Setup Quit OSD Menu 1 Speaker Setup 2 Input Setup 3 Listening Mode Setup 4 Preference 5 Zone2 OSD Setup 6 About Select Exit EXIT Enter ENTER Quit OSD 1 2 3 4 5 6 7 8 9 0 1 2...

Страница 49: ...es then changing the input source in the main zone also changes the input source for the re mote zone In the remote zone you can only play the source in the 2 channel mode You cannot play the source i...

Страница 50: ...se press the FM Mode button under the cover on the front panel Mono appears for a few seconds under the frequency in the front display To return to ste reo press the FM Mode button again Auto ap pears...

Страница 51: ...can be stored in memory as preset radio stations Using the OSD Menu you can enter names to each preset radio station see page 41 Selecting a preset radio station 1 Press either the AM or FM input sou...

Страница 52: ...see page 57 Listening with headphones To listen with headphones plug a pair headphones with a standard stereo plug into the PHONES jack on the DTR 9 1 front panel When you connect headphones the unit...

Страница 53: ...ages shown below appears If one of the messages shown below appears in the front display it is telling you that the operation you are trying to perform is not possible for the reason given in the mess...

Страница 54: ...ecording at the recording component as desired To confirm the settings press the Rec Out button The current settings will appear for 8 seconds in the front display Notes If you change the input source...

Страница 55: ...tal recordings consult the in struction manual that came with your digital record ing equipment e g MD recorder or DAT deck to know what restrictions are imposed You cannot record the source connected...

Страница 56: ...R 9 1 and press the POWER STNBY button to put it back in the standby mode When you press the POWER STNBY button on the re mote controller it puts the DTR 9 1 in the standby state but does not turn it...

Страница 57: ...nutes Each time it is pressed there after the remaining time until the DTR 9 1 turns off decreases by 10 minutes While the sleep function is enabled you can press the SLEEP but ton to see how much tim...

Страница 58: ...utton MD appears in the remote controller display 2 Press the desired operation button The buttons shaded in the figure to the left are the operation buttons that can used to control an Integra mini d...

Страница 59: ...DTR 9 1 Calling up a preset radio station 1 Press the AUDIO TAPE MODE button AUDIO appears in the remote controller display 2 Press the TUN input selector button TUN appears in the remote controller d...

Страница 60: ...ctivates the muting function at the DTR 9 1 Note The ENT button on the bottom right of the numeric keys has the same function as ENTER of the ENTER cursor button SAT CABLE VCR and TV MODE buttons No p...

Страница 61: ...nd holding down the desired MODE button on the remote controller press the ENT button and then release both buttons When you press and hold down the MODE button the SEND LEARN indicator lights When yo...

Страница 62: ...the display and the remote controller exits the programming mode Resume from Step 2 If a failure occurs during programming the SEND LEARN indicator flashes three times quickly NG appears in the displ...

Страница 63: ...h buttons When you press the MODE button the SEND LEARN indicator lights and that mode appears in the dis play When you press the ENT button the lamp turns off When you release the buttons the lamp fl...

Страница 64: ...and the re mote controller exits the programming mode Re sume from Step 1 Running a Macro function Perform the procedure below to run a macro function that you have programmed into the remote control...

Страница 65: ...dicator flashes three times quickly ERROR appears in the display and the remote controller exits the pro gramming mode Resume from Step 1 If you perform an invalid operation during program ming the SE...

Страница 66: ...MACRO button in Step 2 then you will in ef fect be overwriting the previous macro with a new macro Erasing a direct macro from the DIRECT MACRO button 1 Press and hold down any one of the eight MODE b...

Страница 67: ...the display All programmed commands and macros are erased and the remote controller returns to its factory presets Notes Proceed to Step 3 immediately after Step 2 other wise the batteries will be con...

Страница 68: ...head phones SPEAKERS No sound from the center speaker or at very low volume Speaker cable is not connected Check the connection between the amplifier and the speaker Listening mode is set to Stereo or...

Страница 69: ...t be received AM loop antenna is not connected Connect the included AM loop antenna to the AM antenna terminals Buzzing noise on AM stations particularly noticeable at night or with weak stations Nois...

Страница 70: ...ed functions it may malfunction due to exter nal noise or static electricity If this happens press the POWER switch on the unit and then press it in again af ter about five seconds Remote controller i...

Страница 71: ...2 Multichannel Setup a Multichannel CD No TAPE1 No TAPE2 No DVD No VIDEO1 No VIDEO2 No VIDEO3 No VIDEO4 No VIDEO5 No 2 3 Video Setup a Video CD Last valid PHONO Last valid FM Last valid AM Last valid...

Страница 72: ...o Output VIDEO1 VIDEO2 COMPONENT not connected Video Setup DVD VIDEO1 VIDEO2 VIDEO3 VIDEO4 VIDEO5 Intelli Volume __________dB Character Input Yes name ___________ No Listening Mode Preset 1 Input sour...

Страница 73: ...deo DVD VIDEO1 VIDEO2 VIDEO3 VIDEO4 VIDEO5 not connected Component Video INPUT1 INPUT2 INPUT3 not connected Video Output VIDEO1 VIDEO2 COMPONENT not connected Video Setup DVD VIDEO1 VIDEO2 VIDEO3 VIDE...

Страница 74: ...imeout _________sec TV Format Auto NTSC PAL About Lock Setup Parameter Lock Unlocked Locked Version Master ID ___________________________ Speakers Speaker configuration Subwoofer Yes No Name Distance...

Страница 75: ...e location of the key in the figure If you have created more than three modes by programming more than three different remote controllers etc then you can copy this page as necessary MODE MODE MODE OP...

Страница 76: ...IFIER SECTION Continuous Average Power output FTC All channels 130 watts per channel min RMS at 8 ohms 2 channels driven from 20 Hz to 20 kHz with no more than 0 05 total harmonic distortion 170 watts...

Страница 77: ...ginal instruction manual Substitute the information given under a heading in this manual for that given under the same heading in the original instruction manual Contents Features 2 Speaker configurat...

Страница 78: ...mation for the added rear channel is encoded into the left and right surround channels of normal 5 1 Dolby Digital surround tracks Movie theaters equipped with the Dolby Digital Surround EX decoder ca...

Страница 79: ...the listener s ears when at the listening position Place the front left and right speakers the same distance from the listening position Surround left and right speakers Place these speakers so that...

Страница 80: ...Large cannot be selected for this setting d Surround L R None Select if no surround left and right speakers are connected Large Select if the surround left and right speakers are large sized Small Sel...

Страница 81: ...undary Gain Compensation and Advanced Speaker Array Menu 1 Speaker Setup 2 Input Setup 3 Listening Mode Setup 4 Preference 5 Zone2 OSD Setup 6 About Select Exit EXIT Enter ENTER Quit OSD 1 Speaker Set...

Страница 82: ...coded signal and starts operating This is not a malfunction If you press the pause or skip button on the player while playing a DTS source a short noise may be heard This is not a malfunction In such...

Страница 83: ...Matrix 6 1 DTS ES Discrete 6 1 DTS 96 24 MPEG MPEG Multichannel Dolby Pro Logic PL Movie DTS Neo 6 PL Music PL Movie DTS Neo 6 Cinema PL Music DTS Neo 6 Music THX THX Cinema THX THX Cinema THX THX Cin...

Страница 84: ...ght surround channels so that at playback the output for the left right and back surround channels are decoded using a high precision matrix decoder MPEG Multi MPEG Multichannel Used for playing MPEG...

Страница 85: ...channels for 5 1 ch playback In Pro Logic you can choose the Movie mode for playing movies and the Music mode for playing music Pro Logic Movie In this mode conventional narrow band monaural surround...

Страница 86: ...Left Right Auto L R d Output Channel L R Center L R 3 3 Stereo Analog PCM Setup Select this to modify the Stereo listening mode when the current source is analog or PCM The parameters that can be set...

Страница 87: ...n On e Virtual Surr Level 3dB to 3dB 0dB f Dialog Enhance Off On Off 3 7 Enhanced 7 Setup Select this to modify the Enhanced 7 listening mode The parameters that can be set are shown in the table belo...

Страница 88: ...und to the surround back left and right speakers and outputs nothing to the surround left and right speakers Sur L R Back This outputs the sound to both the surround left and right speakers and the su...

Страница 89: ...n For playback of MPEG multi channel sources with Dolby EX effects added Off For normal playback of MPEG multi channel sources You can change the Dolby EX mode settings easily using the remote control...

Страница 90: ...Enhance This parameter allows you to adjust the dialog sound level from the center speaker if it is difficult to hear On Enhances the vocal ranges for the center channel signal Off Outputs the center...

Страница 91: ...der Analog PCM Listening mode Mono Direct Stereo Theater Surround Analog Digital Analog Digital Dimensional Digital Analog PCM PCM format PCM Dolby D T D Dolby D Pro Logic monaural DTS DTS DTS Neo 6 o...

Страница 92: ...for unwanted asynchronous video and audio tracks This sub menu does not appear if Direct is selected as the listening mode a A V Sync If the video signal is progressive processed using projector or ot...

Отзывы: