15
VIDEO IN/OUT
These are the video inputs and outputs. There are 6
video inputs and 2 video outputs and each one in-
cludes both composite video and S-video configura-
tions. Connect VCRs, LD players, DVD players, and
other video components to the video inputs. S-video
sources can be viewed via the S-video or composite
outputs, while composite sources can only be viewed
through the composite output.
The 2 video output channels can be used to be con-
nected to video tape recorders for making recordings.
Composite video jack
S video jack
Rear panel facilities
• When connecting a VCR or other video compo-
nent, make sure you connect the audio and video
leads together (i.e., both to VIDEO 3).
• With LD players that have an AC-3RF terminal, con-
nect the video source to the video inputs of VIDEO 4
because only it supports the AC-3RF settings during
digital setup.
ZONE 2
These are the audio and video output jacks for the re-
mote zone (Zone 2). Use these outputs to connect the
remote zone. For the connection procedure, refer to
“Setting up the remote zone” on page 24. These out-
puts are activated by the Zone 2 button on the front
panel.
SPEAKERS
Seven terminals are provided for the front left, front
right, front center, surround left, surround right, surround
back left, and surround back right speakers. In addition
to being able to reproduce the conventional 5.1-chan-
nel source input, outputs for surround back left and sur-
round back right speakers have been added for sup-
port of the state-of-the-art THX Surround EX.
Speaker outputs are compatible with banana plug
connectors .
12V TRIGGER
This is a 12-volt output terminal so that the DTR-9.1 can
control other external devices. For other devices that
have an input terminal of the same kind, you can con-
nect it to this terminal with 1/8-inch mini-jack cable so
that its power is turned on when you press an input
source button. The DTR-9.1 is equipped with two 12-volt
trigger terminals and each supplies a current of 100
mA. When you connect to either of these terminals,
make the appropriate settings in the OSD menu.
z
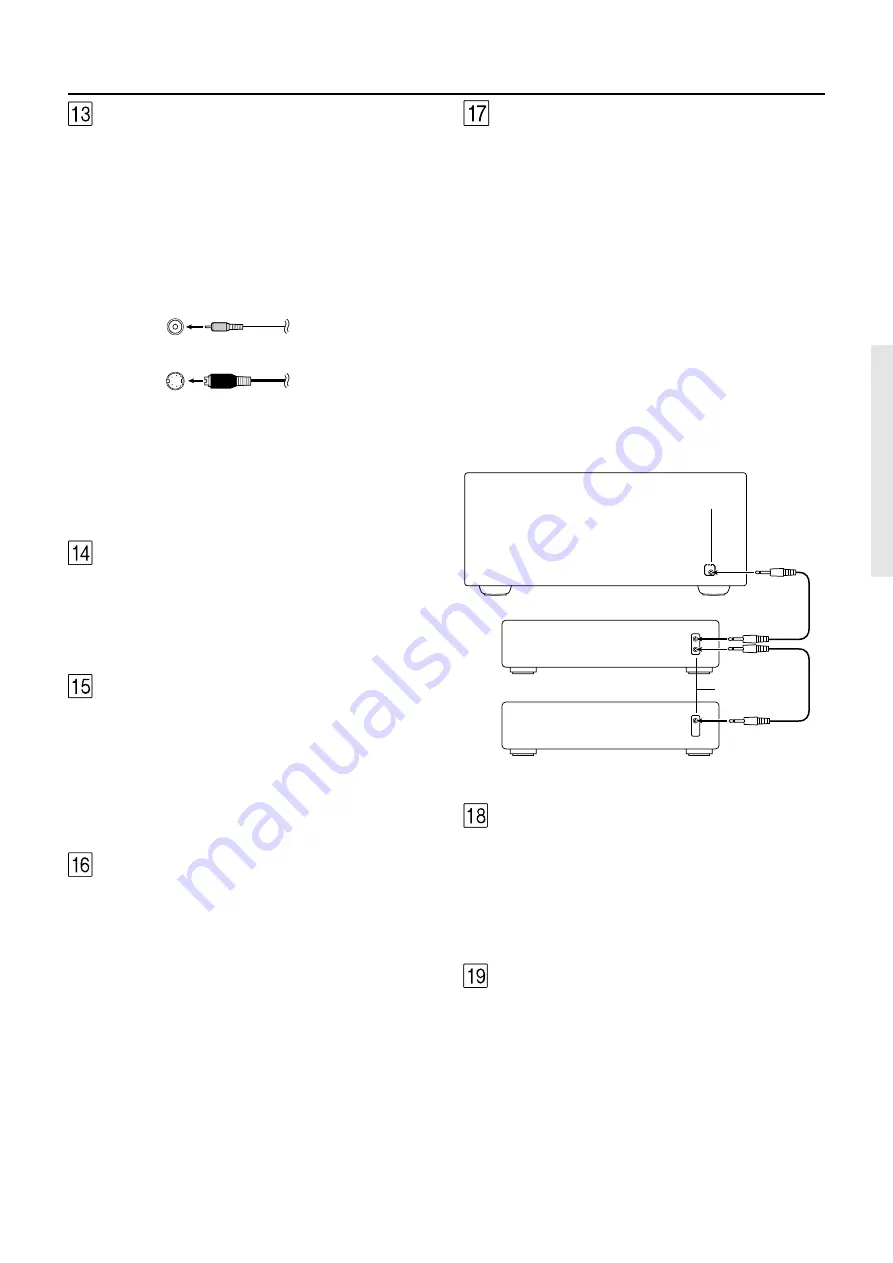
(RI)
By connecting the
z
connector as shown in the dia-
gram below, you can use the RC-418M remote control-
ler to operate Integra/Onkyo cassette tape decks and
compact disc players that also have Integra/Onkyo’s
z
connectors. Simply connect a remote control cable
from this connector to the
z
connector of the cas-
sette tape deck or compact disc player. An
z
remote
control cable with a 3.5-mm (1/8-inch) miniature two-
conductor plug comes with every cassette tape deck
and compact disc player that has an
z
connector.
• For remote control operation, the audio connection
cables must also be connected.
• The RC-418M remote controller does not support
turntables.
• If the connected component has two RI connec-
tors, you can use either one to connect to the DTR-
9.1. The other one can be used to daisy chain with
another component.
• For Integra DVD or MD players, you can control
them by simply pointing the RC-418M controller di-
rectly at the component.
IR IN MAIN
If the DTR-9.1 is located inside a rack or cabinet that will
not allow infrared beams to reach the IR sensor, you will
need to connect a remote sensor* to this input to be
able to use the remote controller. Then install the re-
mote sensor in an unblocked location where you can
easily point the remote controller.
* An optional remote sensor kit is required.
IR IN ZONE 2
This jack allows you to connect a multiroom system kit
so that you can use the remote controller while you are
in the remote zone (Zone 2), which may be far sepa-
rated from the DTR-9.1.
*
To be able to use the remote controller in the remote
zone (Zone 2), you must connect one of the follow-
ing (sold separately):
• Integra’s Multi-Room System Kit (IR Remote Control-
ler Extension System).
• A multiroom A/V distribution and control system
from Niles
®
, Xantech
®
, or the like.
Ex: CD player
Ex: Cassette tape deck
DTR-9.1
z
connector
z
connector


