


Live Data Mode
CUSTOMIZING LIVE DATA (PIDs)
3160g 129
CUSTOMIZING LIVE DATA (PIDs)
This feature lets you customize the Scan Tool display to show only
those PIDs that are of interest at the current time. You can customize
the Live Data display by placing the Scan Tool in "Custom Live Data"
mode and selecting only the PIDs that you wish to display. To customize
the Live Data display, proceed as follows:
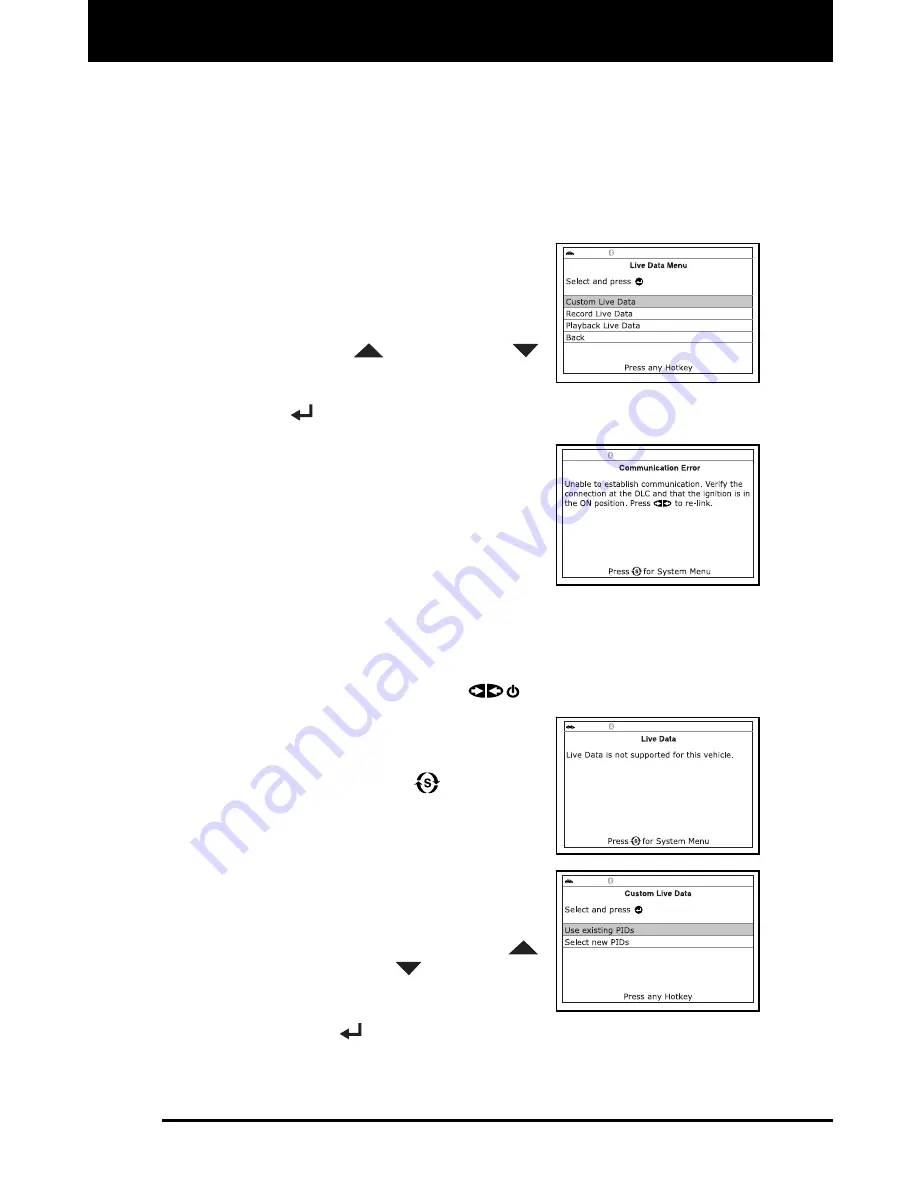
1.
With the Scan Tool in Live Data mode
(see VIEWING LIVE DATA on page
127), press and hold the
LD
button until
the Live Data Menu displays, then
release the
LD
button.
2.
Use the
UP
and
DOWN
buttons, as necessary, to highlight
Custom Live Data
, then press the
ENTER
button.
If the Scan Tool fails to establish
communication with the vehicle, a
“Communication Error” message is
shown on the Scan Tool’s display.
- Ensure your vehicle is OBD2
compliant. See VEHICLES
COVERED on page 5 for vehicle
compliance verification information.
- Verify the connection at the DLC, and verify the ignition is ON.
- Turn the ignition OFF, wait 5 seconds, then back ON to reset
the computer.
- Press
the
POWER/LINK
button to continue.
If Live Data is not supported by the
vehicle under test, an advisory
message displays. Press the
SYSTEM MENU
button to
return to the System Menu. Live
Data is not available for your vehicle.
If custom Live Data was previously
selected, the Select PIDs to Use
screen displays.
- To use the
existing
custom Live
data selections, use the
UP
and
DOWN
buttons, as
necessary, to highlight
Use
existing PIDs
, then press the
ENTER
button. Proceed to step
5
.


