


18
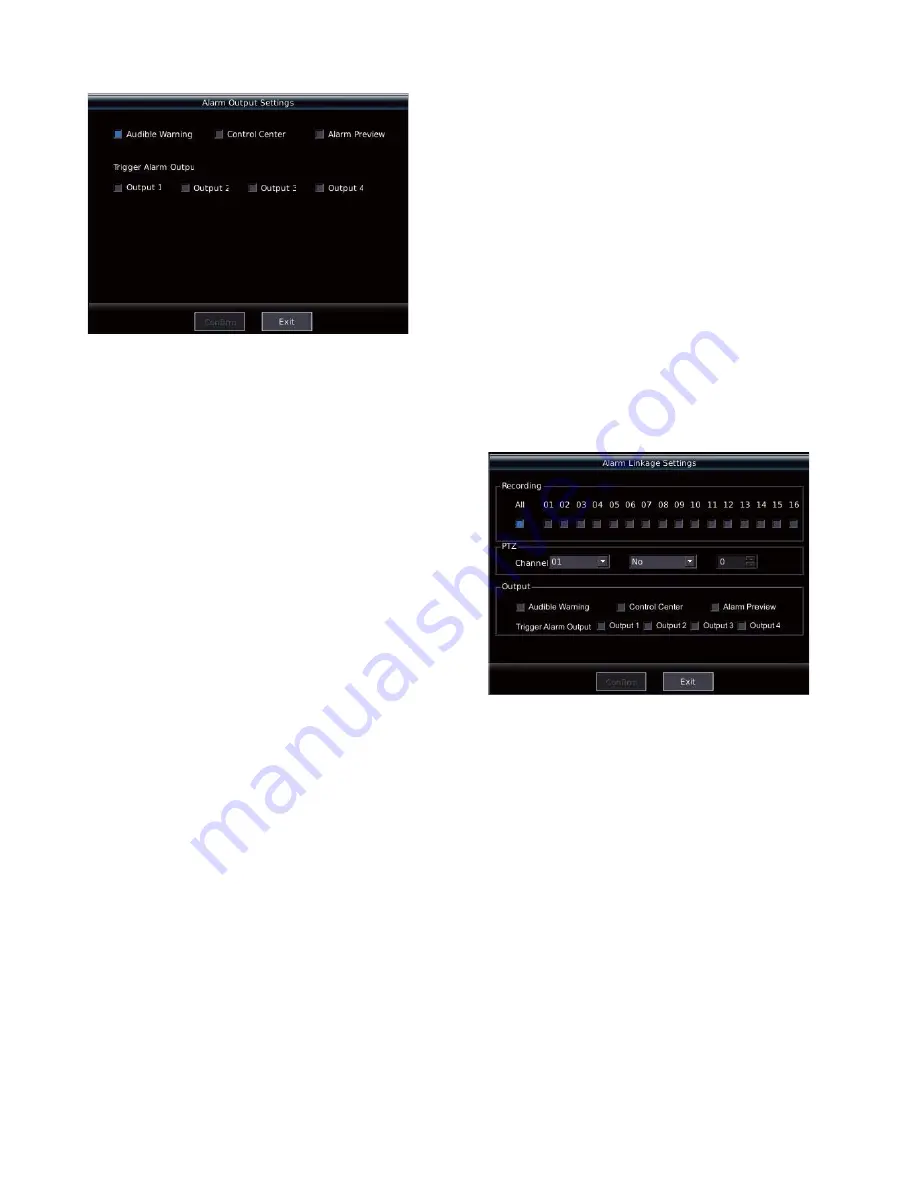
Figure 4-8
The DVR support 4 linkage output modes.
y
Audible warning
: The inbuilt beeper generates sound when
there's mask alarm.
y
Control center
: The system transmits the alarm message to
client end when there's mask alarm to remotely handle the
alarm by client end.
Note
: For this output, it's necessary to set the address of alarm
center as the IP address of the PC that runs the client end via the
"Network Settings" in the submenu.
y
Alarm preview:
Generate alarm preview when there's mask
alarm.
Note:
The alarm preview could realize self-adaptive
multiple-screen display and tour alarm. Press
Ǐ⬄ǐ
key or any
number key or
Ǐ
ESC
ǐ
key to cancel the alarm display.
y
Trigger alarm output:
Select the corresponding output, press
Ǐ
ENT
ǐ
key, the status becomes "
9
". The selected output port
generates alarm trigger message once having alarm.
Note
: The trigger alarm output needs to connect with switching
value. Refer to section 2.4 for the alarm input/output connection.
Press "Confirm" to save the setting, and "Exit" to return to
"Channel" interface.
(5) Save
After return to "Channel" interface, press "Save" button to save all
parameters setting of the channel. If need to copy the parameters of
the channel to other or all channel, press "Copy", and then "Save"
button.
Note
: the basic information and area can't be copied.
2. Video loss alarm
(1) Select
channel
press
Ǐ
ENT
ǐ
key to call out the drop-down list to select the desired
channel, and press
Ǐ
ENT
ǐ
key to confirm the selection.
(2) Select the video loss alarm check box
Move the cursor to the video loss detection check box, and press
Ǐ
ENT
ǐ
key.
(3) Set schedule
Refer to "(3) Set schedule" of "Video mask alarm" in section 4.5.1.
(4) Set alarm output
Refer to "(4) Set alarm output" of "Video mask alarm" in section
4.5.1.
(5) Copy and save
Refer to "(5) Save" of "Video mask alarm" in section 4.5.1.
3. Motion detection alarm
(1)
Select
channel
Refer to "(1) Select channel" of "Video loss alarm" in section 4.5.1.
(2)
Select the video motion detection check box
Move the cursor to the check box of "Video motion detection", and
press
Ǐ
ENT
ǐ
key.
(3) Set sensitivity
Refer to "(1) Set sensitivity" of "Video mask alarm" in section
4.5.1.
(4) Set area
Refer to "(1) Set area" of "Video mask alarm" in section 4.5.1.
(5) Set schedule
Refer to "(3) Set schedule" of "Video mask alarm" in section 4.5.1.
(6) Set alarm linkage
Move the cursor to the "Linkage" option of video motion detection,
and press
Ǐ
ENT
ǐ
key to enter the linkage setting interface, as
shown in Figure 4-9.
Figure 4-9
The DVR supports six linkage modes as follows:
y
Recording
: Select the recording channel, the DVR will record
the video of that channel when there's alarm (It's necessary to
set the recording schedule in recording management.).
y
PTZ:
Firstly select the channel, then select "Preset/Pattern/No",
and input the corresponding number in the editing box. Refer to
section 4.4.3 and 4.4.4 for detailed settings.
y
Audible warning:
The inbuilt beeper generates sound when
there's motion detection alarm.
y
Control center:
The system transmits the alarm message to
client end when there's motion detection alarm to remotely
handle the alarm by client end.
Note
: For this output, it's necessary to set the address of alarm
center as the IP address of the PC that runs the client end via the
"Network Settings" in the submenu.
y
Alarm preview
: Generate alarm preview when there's motion
detection alarm.
y
Trigger
: Select the corresponding output, press
Ǐ
ENT
ǐ
key, the
status becomes "
9
". The selected output port generates alarm
trigger message when there's motion detection alarm.


