


28
Chapter V Menu Programming
All of the programming functions of V2040 can be accessed
through the Main Selection menu.
5.1 Main Selection Menu
To access the Main Selection Menu:
1.
Make sure that the programming monitor has been connected to
the BNC connector labeled as "PROG MON" on the back panel
of V2040.
2.
Place the key-switch in the MENU position.
The programming monitor will display the Main Selection Menu
shown below.
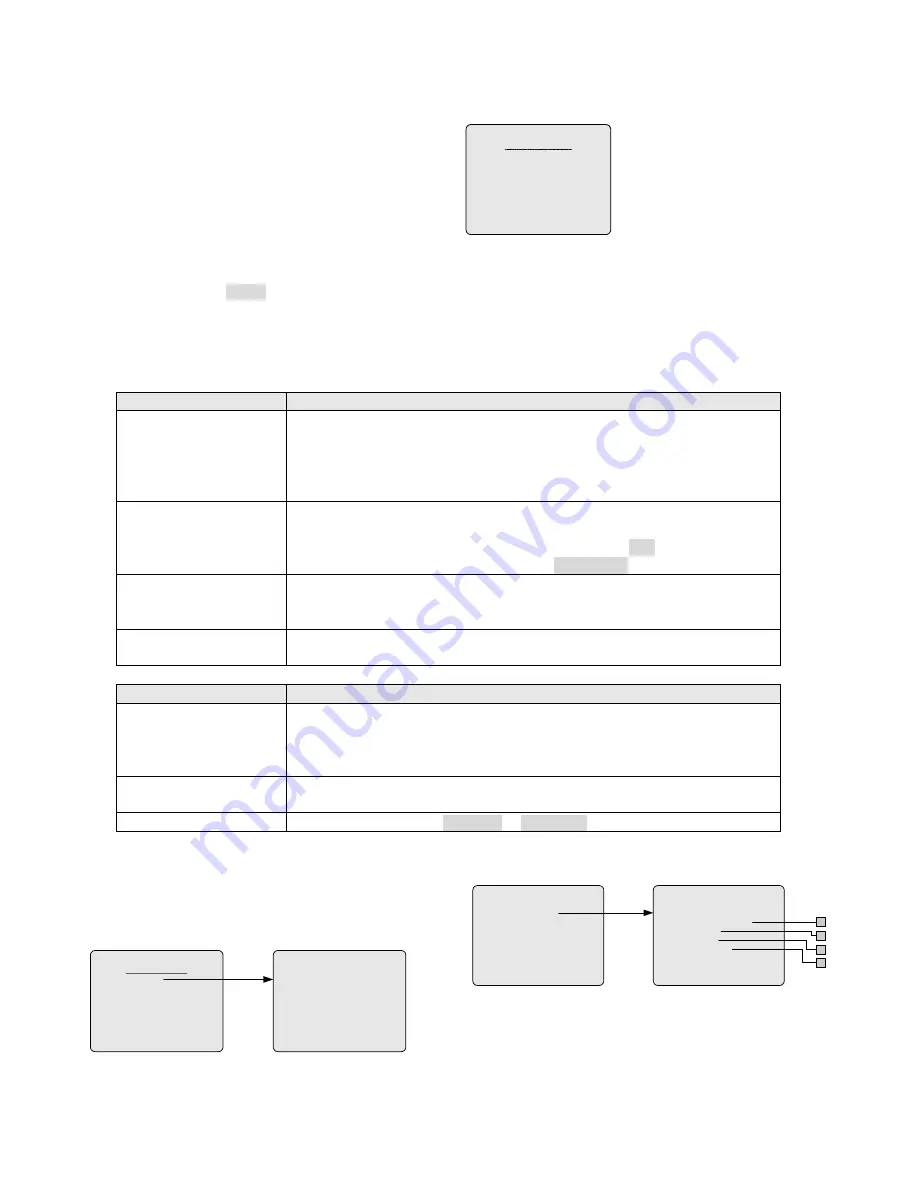
MAIN SELECTION
1 SYSTEM
2 MONITOR
3 CAMERA
4 PORTS
5 ACCESS
6 PRIORITY
7 SATELLITE
V2040 Main Selection Menu
The Main Selection menu is displayed as above, indicating the
menu programming functions are available.
5.2 Menu Navigation and Operation
Please refer to the following guidelines for menu navigation and operation:
Function
Instruction
Position the cursor
The blinking line on the menu screen indicates the current cursor location.
There are usually two ways to move the cursor:
z
Press one of the following keys for the designated direction:
NEAR
(left),
FAR
(right),
WIDE
(up) and
TELE
(down);
or
z
Push the joystick in the direction in which you want to move the cursor.
Scroll multiple pages
Some menus may include multiple pages.
To turn to another page, use the following keys:
CLOSE
(page up) and
OPEN
(page down) in the IRIS section;
OFF
(page
backward) and
ON
(page forward) in the AUXILIARY section.
Access a sub-menu
There are two ways to access a sub-menu:
z
Move the cursor to the desired sub-menu, and press the
ACK
key;
or
z
Enter the number for the desired sub-menu, and press the
ACK
key.
Return to the previous menu Move the cursor to the bottom line, i.e., RETURN MAIN or PREVIOUS MENU, and
press the
ACK
key.
Function
Instruction
Select an entry value
1)
Press the
ACK
key to toggle through the available values. If the cursor moves to
the next entry, it indicates the value has been selected. Otherwise, continue with
Step 2.
2)
Press the
NEXT
key to accept the selected value and move to the next field.
Enter an entry value
1)
Enter the desired number (or code number) on the numeric keypad.
2)
Press the
ACK
key to confirm.
Exit menu programming
Place the key-switch in the OPERATE or PROGRAM position.
5.3 System Menu
Access the SYSTEM menu from the MAIN SELECTION menu.
System Time and Date, Tours, Salvos, Alarm Contacts, Event
timers and Monitor Status are programmed in this menu.
SYSTEM
1 SET TIME AND DATE
2 SET SYSTEM TOURS
3 SET SYSTEM SALVOS
4 SET EVENT TIMERS
5 SET ALARM CONTACTS
6 MONITOR STATUS
RETURN MAIN
MAIN SELECTION
1 SYSTEM
2 MONITOR
3 CAMERA
4 PORTS
5 ACCESS
6 PRIORITY
7 SATELLITE
5.3.1 Setting Time and Date
SET TIME AND DATE
DATE FORMAT - MM-DD-YY
DATE - 08-25-02
TIME - 15:20:30
DAY OF WEEK - FRI
PREVIOUS MENU
SYSTEM
1 SET TIME AND DATE
2 SET SYSTEM TOURS
3 SET SYSTEM SALVOS
4 SET EVENT TIMERS
5 SET ALARM CONTACTS
6 MONITOR STATUS
RETURN MAIN
A
B
C
D
Use the SET TIME AND DATE menu to set the date format, date,
time and day of the week for on-screen displays.


