11
12
PO
SIT
IO
N
AD
JUS
TM
EN
T
PO
SIT
IO
N
AD
JUS
TM
EN
T
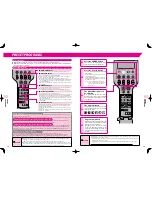
RECLINE
LEG REST
POSITION ADJUSTMENT
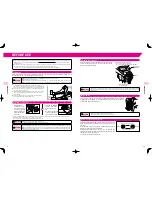
How to Sit
When the chair is off, the rollers are normally drawn back into the left and right sides of the upper part of the
seat back (Storage Position). For safety reasons, first check the positions of the rollers. If they are in any position
other than storage positions, set the main POWER switch to ON before sitting down to allow the rollers to
return to their storage position. When you finish checking, sit down slowly in the center of the seat.
Caution
●
Do not sit down on the chair with the leg rest raised.
→
Any sudden heavyweight on the leg rest could cause damage to the mechanism. Or, accident or injury
may result if the chair tips over.
●
Before using, raise the reclining seat back to its fully upright position. Then recline the seat back slowly to
the most comfortable position, remembering to start off with a lighter massage.
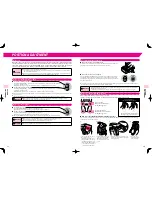
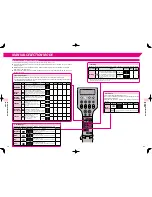
How to Use the Reclining Seat Back
■
To raise the reclining seat back:
Press and hold the RECLINE [ ] button on the remote control. Release the button when the seat back
reaches your desired position.
If the button is kept pressed, the seat back will be raised to its fully upright position and stop.
■
To lower the reclining seat back:
Press and hold the RECLINE [
] button on the remote control. Release the button when the seat back
reaches your desired position.
If the button is kept pressed, the seat back will be reclined to its lowest position and stop.
●
The leg rest is raised in conjunction with the movement of the reclining seat back. As soon as reclining of the seat back stops, the
leg rest also stops.
●
If the main POWER switch at the back of the chair is set to ON, the reclining angle of the seat back can be adjusted.
Warning
●
Make sure no one, especially children or pets, is in the way when lowering the reclining seat back.
Be careful not to stand or place any object behind the seat.
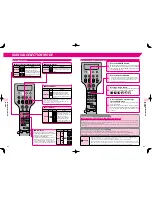
How to Use the Leg Rest
■
To raise the leg rest:
Press and hold the LEG REST [ ] button on the remote control.
Release when you reach the desired leg rest position. The leg rest is stopped.
■
To lower the leg rest:
Press and hold the LEG REST [ ] button on the remote control.
Release when you reach the desired leg rest position. The leg rest is stopped.
●
If the main POWER switch at the back of the chair is set to ON, the angle of the leg rest can be adjusted.
Warning
●
Make sure no one, especially children or pets, is in the way when lowering the leg rest.
Be careful that people and/or objects are not caught under the leg rest.
●
Do not release hands suddenly while lifting the leg rest by hand.
Caution
●
Do not place anything other than legs and feet on the leg rest.
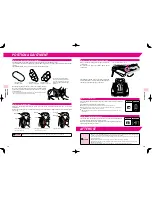
Foot Slide Adjustment Function
■
How to Move the Foot Unit Downward
To slide the Foot Unit of the leg rest to move it downward, push it down with your
feet. The Foot Unit will slide and be locked in that lower position.
■
How to Move the Foot Unit Upward
Press the RECLINE or LEG REST button to unlock the Foot Unit. While the button is
held pressed, the Foot Unit moves upward. Choose a comfortable position of the
Foot Unit by moving it upward or downward. As soon as the button is released, the
Foot Unit is locked again.
RECLINE
LEG REST
●
If a certain force is applied to the Foot Unit (for example, moving it upward forcibly), the lock of the Foot Unit will be released
with a rasping sound, to protect the Foot Unit from being damaged.
Warning
●
Be careful not to get hands, feet, or objects caught between the leg rest units or between the leg rest and the
chair during a foot slide operation.
→
Accident, personal injury, or damage to the chair may result if hands, feet, or objects are caught.
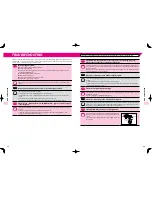
How to Use the Shoulder Massage Unit
Place the Shoulder Massage Unit in a proper position.
If it is not placed properly, the Automatic Shiatsu Point Locator may not function properly.
Position both ends of the Shoulder
Massage Unit on your shoulders.
Proper Position of
the Shoulder Massage Unit
To raise the unit:
Push up the headrest of the
Shoulder Massage Unit.
To pull down the unit:
Pull down the lower parts of the
Shoulder Massage Unit.
■
How to Use the Chair Without the Shoulder Massage Unit
You can have your shoulders massaged by the rollers and not by the Shoulder Massage Unit, by securing the Shoulder Massage
Unit at the upper part of the seat back.
①
Flip the side of the Shoulder
Massage Unit over, as
illustrated. The lock belts for
the Shoulder Massage Unit are
initially positioned at the rear
of the Shoulder Massage Unit.
* The lock belts are located at
the both sides of the unit.
②
Pull out the belts on both
sides. Move the Shoulder
Massage Unit upward to
the upper part of the seat
back.
③
Fasten the buttons located at the rear
of the both sides of the back pad to the
holes of the belts.
④
Sit on the chair,
as illustrated, and
start a massage.


