119
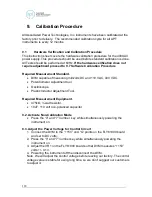
9.4. Adjust the Amplifier Inverter DC Bus Voltage
1. Connect the DVM to the TP6(+) and TP7(-) points on the DDC61000
board and set to DC volts.
2. Power up the instrument.
3. The instrument without load and idling condition.
4.
Adjust the VR1 on the DDC61000 board so that DVM measures “+320V”
volts +/- 0.3V
5. Powering the instrument off then disconnect the DVM.
Note. We will adjust the DC Bus voltage before leaving our factory. The DC
Bus voltage value is stable for using long time, so we don’t suggest our
customers to adjust it.
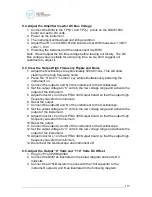
9.5. Clear the Output High Frequency Ripple and Noise
1. Adjust the Oscilloscope to approximately 500mV/10us. This will allow
viewing of the high frequency noise.
2. Press the
“0” and “7” number key while simultaneously powering the
instrument on.
3. Connect the output A and N of the instrument to the Oscilloscope.
4.
Set the output voltage to “0” volts in the low voltage range and activate the
output of the instrument.
5. Adjust Inductor L3 on the OPTAC300 Output board so that the output high
frequency waveform to minimum.
6. Reset the output.
7. Connect the output B and N of the instrument to the Oscilloscope.
8.
Set the output voltage to “0” volts in the low voltage range and activate the
output of the instrument.
9. Adjust Inductor L5 on the OPTAC300 Output board so that the output high
frequency waveform to minimum.
10. Reset the output.
11. Connect the output C and N of the instrument to the Oscilloscope.
12.
Set the output voltage to “0” volts in the low voltage range and activate the
output of the instrument.
13. Adjust Inductor L1 on the OPTAC300 Output board so that the output high
frequency waveform to minimum.
14. Disconnect the Oscilloscope and instrument off.
9.6. Adjust the Output
“0” Volts and “110” Volts DC Offset
1. Plug in JP1 on PWMAC300.
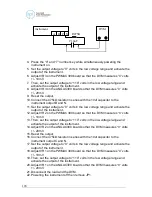
2. Connect the DVM as illustrated in the below diagram and set to DC
millivolts.
3.
Connect the 475kΩ resistor in series with the 10uf capacitor to the
instrument output A and N as illustrated in the following diagram:
Содержание apt 400XAC Series
Страница 17: ...11 Figure 2 3 4W Configuration Wye Load Figure 3 3 3W Configuration Delta Load...
Страница 18: ...12 Figure 4 1 2W Configuration Figure 5 1 3W Configuration...
Страница 112: ...106 or current EXTP External trigger pulse Trigger one pulse with relation to how the SYNC event is set...
Страница 143: ...137 setting...


