118
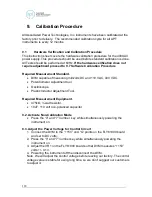
9. Calibration Procedure
All Associated Power Technologies, Inc. instruments have been calibrated at the
factory prior to delivery. The recommended calibration cycle for all APT
instruments is every 12 months.
9.1
Hardware Verification and Calibration Procedure
This instruction sheet covers the hardware calibration procedure for the 400XAC
power supply. This procedure should be used before standard calibration is done.
All Tests should be performed at 60Hz.
If the hardware verification does not
require adjustment proceed to 9.7 Software Calibration Procedure
.
Required Measurement Standard.
•
DVM capable of measuring millivolts DC and 110 VAC, 400 VDC.
•
Potentiometer Adjustment tool
•
Oscilloscope
•
Plastic Inductor Adjustment Tool.
Required Measurement Equipment.
•
475kΩ, ¼ watt resistor.
•
10uF, 110 volt non-polarized capacitor
9.2. Activate Non-Calibration Mode
•
Press the
“0” and “7” number key while simultaneously powering the
instrument on.
9.3. Adjust the Power Voltage for Control Circuit
1.
Connect the DVM to the “+15V” and “G” points on the FLY61000 board
and set to DC volts.
2. Press the
“0” and “7” number key while simultaneously powering the
instrument on.
3.
Adjust the VR1 on the FLY61000 board so that DVM measures “+15V”
volts +/- 0.1V.
4. Powering the instrument off then disconnect the DVM.
Note. We will adjust the control voltage before leaving our factory. The control
voltage value is stable for using long time, so we don’t suggest our customers
to adjust it.
Содержание apt 400XAC Series
Страница 17: ...11 Figure 2 3 4W Configuration Wye Load Figure 3 3 3W Configuration Delta Load...
Страница 18: ...12 Figure 4 1 2W Configuration Figure 5 1 3W Configuration...
Страница 112: ...106 or current EXTP External trigger pulse Trigger one pulse with relation to how the SYNC event is set...
Страница 143: ...137 setting...


