background image

Optia HE


Installation & Servicing

9

GENERAL

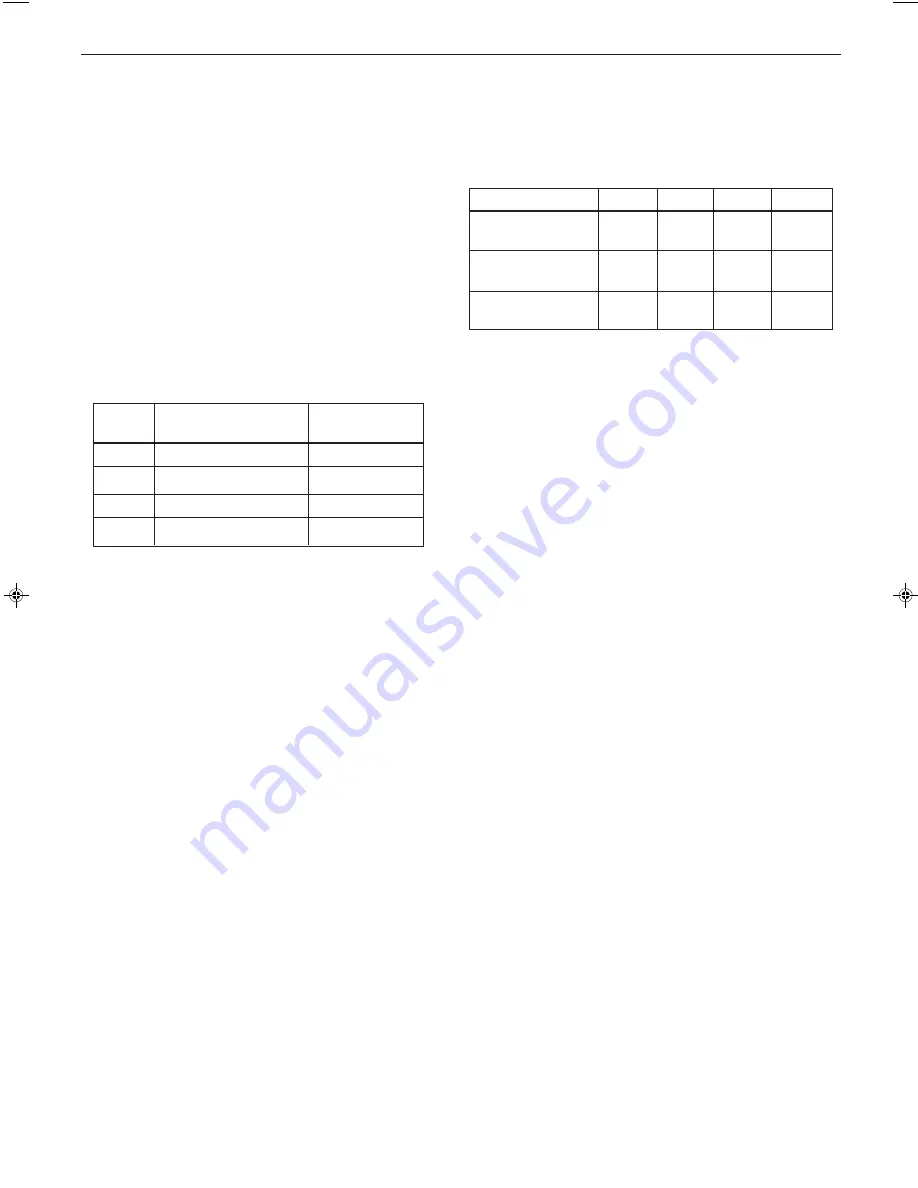
Boiler Size

HE

9

12

15

18

Boiler

kW

 9.0

12

15

18

Output Btu/h x 1000

30.7

40.9

50.2

60.4

Water Flow

l/min

11.7

15.6

19.5

23.4

Rate

gal/h

155

206

258

309

Pressure

mbar

54.0

93.5

98.4

142.5

Loss

in wg

21.6

37.4

39.3

57

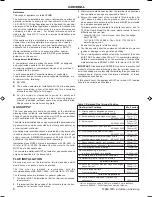
Table 5 - Water flow rate and pressure loss

TERMINAL

The terminal assembly can be adapted to accommodate various
wall thicknesses. Refer to Frame 10.

AIR SUPPLY

Detailed recommendations for air supply are given in BS.5440:2.
In IE refer to I.S. 813:2002.

The following notes are for general guidance:

1.

It is NOT necessary to have a purpose provided air vent in the
room or internal space in which the boiler is installed.

2.

If the boiler is to be installed in a cupboard or compartment,
permanent air vents are required (for cooling purposes) in
the cupboard/compartment, at both high and low levels. The
air vents must either communicate with room/internal space,
or be direct to outside air. The minimum effective areas of the
permanent air vents, required in the cupboard/compartment,
are specified in Table 4 and are related to maximum rated
heat input.

The boiler is fitted with a special drain plug, which is provided, to
drain the BOILER ONLY, in the event of the system drain plug
being unable to do so. The hydraulic resistance of the boilers, at
MAXIMUM OUTPUT with an 11

O

C (20

O

F) temperature differential,

are shown in Table 5.
Maximum boiler operating temperature should be 82

o

C (180

o

F).

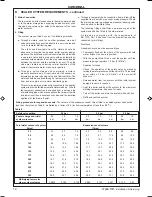
Table 4 - High and low vent areas

Boiler

Air from room/internal

Air direct from

space, cm (in

2

 )

outside, cm (in

2

)

HE9

 102

(16)

 51

(8)

HE12

135

(21)

 68

(11)

HE15

170

(26)

 83

(13)

HE18

198

(31)

 102

(16)

3.

Both air vents MUST communicate with the same room or
internal space or MUST be on the same wall to outside air.

4.

In siting the air vents care must be taken to avoid the freezing
of pipework.Water circulation system.

WATER CIRCULATION SYSTEM

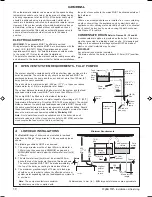
The boiler must NOT be used for direct hot water supply. For the
types of system and correct piping procedure refer to 'Introduction'
and Frame 1.
The central heating system should be in accordance with BS.6798
and, in addition, for Smallbore and Microbore systems, BS. 5449.
The domestic hot water system, if applicable, should be in
accordance with the relevant recommendations of BS. 5546. Copper
tubing to BS. 2871:1 is recommended for water carrying pipework.
The hot water storage cylinder MUST  be of the indirect type and
should preferably be manufactured of copper.
Single feed, indirect cylinders are not recommended and MUST
NOT be used on sealed systems.
The appliances are NOT suitable for gravity central heating, nor
are they suitable for the provision of gravity domestic hot water.
The hot water cylinder and ancillary pipework, not forming part of
the useful heating surface, should be lagged to prevent heat loss
and any possible freezing - particularly where pipes run through
roof spaces and ventilated under floor spaces.
Boilers not fitted to a sealed  system must be vented.

IMPORTANT

A minimum length of 1m of copper pipe MUST be fitted to both
flow and return connections from the boiler before connection to
any plastic piping.  

This applies to ALL types of installation.

Draining taps MUST be located in accessible positions, which
permit the draining of the whole system - including the boiler
and hot water storage vessel. They should be at least 

1/2" BSP

nominal size and be in accordance with BS. 2879.

WATER TREATMENT

These boilers incorporate a cast iron heat exchanger and an
aluminium heat exchanger

.

IMPORTANT. 

The application of any other treatment to this

product may render the guarantee of 

Wolseley UK

 INVALID.

Wolseley UK

 recommend Water Treatment in accordance with

the 

Benchmark

 Guidance Notes on Water Treatment in Central

Heating Systems.

Wolseley UK

 recommend the use of Fernox, GE Betz Sentinel or

Salamander water treatment products, which must be used on
accordance with the manufacturers instructions.
For further information contact:
Fernox Manufacturing Co. Ltd, Cookson Electronics, Forsyth Road,
Sheerwater, Woking, Surrey.   GU21 5RZ.  Tel. +44 (0) 1799 521133
or

Sentinel Performance Solutions
The Heath Business & Technical Park, Runcorn, Cheshire
WA7 4QX.  Tel: 0800 389 4670.  www.sentinel-solutions.net

or
Salamander Engineering Ltd, Unit 24, Reddicap Trading Estate,
Sutton Coldfield, West Midlands B75 7BU.  Tel. +44 (0) 121 378 0952

Notes.

1.

It is most important that the correct concentration of the water
treatment products is maintained in accordance with the
manufacturers' instructions.

2.

If the boiler is installed in an existing system any unsuitable
additives MUST be removed by thorough cleansing.
BS7593:1992 details the steps necessary to clean a
domestic heating system.

3.

In hard water areas, treatment to prevent limescale may be
necessary - however the use of artificially softened water is
NOT permitted.

4.

Under no circumstances should the boiler be fired before the
system has been thoroughly flushed.

BOILER CONTROL INTERLOCKS

Wolseley UK

 recommend that heating systems utilising full

thermostatic radiator valve control of temperature in individual
rooms should also be fitted with a room thermostat controlling
the temperature in a space served by radiators not fitted with
such a valve as stated in BS. 5449.
Central heating systems controls should be installed to ensure
the boiler is switched off when there is no demand for heating or
hot water.

continued . . . .

201962-6.pmd

19/02/2008, 15:10

9

Содержание Optia HE 9

Страница 1: ...oiler Optia HE High Efficiency Boilers Installation Servicing Instructions See reverse for Optia HE Users Guide Manufactured exclusively for Wolseley UK by Ideal Boilers For details of document amendm...

Страница 2: ...2 Optia HE Installation Servicing...

Страница 3: ...s 39 40 Condensate Pipe Termination Configurations BS6798 recommends that a second trap and an air break are required where the siphon trap within the boiler is less than 75mm for configuration 2 and...

Страница 4: ...he gross C V of the gas Btu ft3 Table 1 General Data The value is used in the UK Government s Standard Assessment Procedure SAP for energy rating of dwellings The test data from which it has been calc...

Страница 5: ...Helpline on the back page Page Burner operating pressure measure and record Central heating flow temp measure and record Central heating return temp measure and record For combination boilers only Sc...

Страница 6: ...stered Installer It must be carried out in accordance with the relevant requirements of the Gas Safety Installation and Use Regulations The appropriate Building Regulations either The Building Regulat...

Страница 7: ...core boring tool is to be used inside the building the space in which the boiler is to be installed must be at least wide enough to accommodate the tool Front clearance 450mm 17 3 4 from the front of...

Страница 8: ...ccordance with the recommendations of BS 5440 1 2000 In IE refer to I S 813 2002 The following notes are intended for general guidance 1 The boiler MUST be installed so that the terminal is exposed to...

Страница 9: ...al heating nor are they suitable for the provision of gravity domestic hot water The hot water cylinder and ancillary pipework not forming part of the useful heating surface should be lagged to preven...

Страница 10: ...ir gap and a MINIMUM depth of water below the static water level cold of 75mm 2 The static water level cold must be at least 200mm above the top of the horizontal flow pipe fitted as shown The vent co...

Страница 11: ...overing at least the range 0 4 bar 0 60 lb in2 must be fitted to the system The gauge should be easily seen from the filling point and should preferably be connected at the same point as the expansion...

Страница 12: ...automatic air vent connected between them the stop valve being located between the system and the automatic air vent The stop valve may remain open during normal operation of the system if automatic...

Страница 13: ...view LEGEND 24 30 27 35 9 12 19 37 26 23 17 Data Plate Condensate siphon trap cla7880 9 Sightglass 12 Main Burner 17 Gas Valve 19 Control Box 23 PCB25E 24 Air pressure switch 26 Controls Casing 27 Flu...

Страница 14: ...off 8 UNPACKING Pack A Contents A The complete boiler B Installation Servicing User s Instructions C Hardware Pack listed below Hardware Pack 1 Contents A Pipe Flue extension 1 off B Nut Siphon 1 off...

Страница 15: ...ion ducts plus the standard flue duct may be used together 2 Flue extensions of greater than 1m 39 should be supported with the bracket provided 90o Elbow kit equivalent flue length resistance 1 5m 45...

Страница 16: ...wall mounting plate screw positions choose one from each group Note Mark the centre of the flue hole as well as the circumference b The position of the flue duct hole c The jacking screw fixing hole...

Страница 17: ...e outer flue duct Refer to Frame 16 prior to fitting the flue ring Fit the boiler sealing ring inside the terminal B pack outer flue duct Ensure the boiler sealing ring is fully engaged Ensure the not...

Страница 18: ...the bottom packaging protection 3 Check the boiler alignment using a spirit level and adjust as necessary with the jacking screw 4 Line up the hole in the jacking screw with the hole in the wall prev...

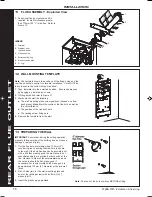
Страница 19: ...ew with an 8mm 5 16 masonry drill 21 WALL MOUNTING TEMPLATE Note The template shows the positions for the fixing holes and the flue hole centres for standard installation If the flow and return pipes...

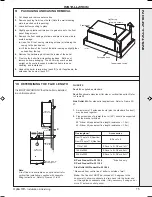
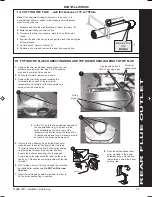
Страница 20: ...e the tube is cut square mark the flue all the way round 4 Cut to length and remove any burrs 24 FITTING THE FLUE ASSEMBLY 1 Insert the flue assembly through the hole 2 Ensure the flue terminal is in...

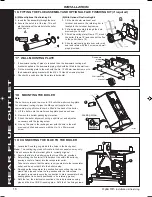
Страница 21: ...switch sensing pipe and CO CO2 sensing pipe 8 Lift the boiler onto the wall mounting bracket 9 Remove the bottom packaging protection 10 Check the boiler alignment to the wall using a spirit level and...

Страница 22: ...the flue all the way around 6 De burr the cut edges 29 FLUE EXTENSION DUCTS continued 28 FLUE EXTENSION DUCTS For flue lengths greater than 705mm rear flue or 775mm side flue Flue duct support Wall p...

Страница 23: ...is is achieved by using either Flat roof weather collar or Universal weather collar ACCESSORIES Flue Duct Extension Kits are available for flue lengths extending beyond 1m These packs contain 1m exten...

Страница 24: ...N 610 mm min ex7531 610 mm min ex7532 The terminal should be positioned so that products of combustion can safely disperse at all times Pluming may occur at the termination so where possible terminal...

Страница 25: ...to 7 5 Push fit the vertical connector E supplied separately into the boiler flue connection and retain with the four securing screws provided 6 Push fit extension duct F if required supplied separat...

Страница 26: ...27 The routing of the drain must be made to allow a minimum fall of 1 in 20 away from the boiler throughout its length The drainage pipework must be arranged so that obstruction e g through freezing o...

Страница 27: ...oviding it can be confirmed that the down pipe is part of a combined waste and rain water system Make connection to SVP using a solvent welded saddle BOILER External wall Ground Level Termination to S...

Страница 28: ...O heat thermostat Thermostat sensor L br br L On Off switch ALL EARTHS must be connected Not all earths are shown for clarity Air pressure switch Flue protection thermostat cla7856 Combined spark sens...

Страница 29: ...facturer 3 This is a fully controlled system set the boiler thermostat to maximum 4 Switchmaster Midi is similar in operation but the wiring differs slightly see the manufacturer s literature 43 PICTO...

Страница 30: ...left off for more than a day or so then a frost thermostat should be wired into the system This is usually done at the programmer in which case the programme selector switches are set to OFF and all...

Страница 31: ...button J 7 Switch the electricity supply ON and check that all external controls are calling for heat 48 INITIAL LIGHTING 8 Set the boiler thermostat knob D to position 6 and the boiler Mains On Off...

Страница 32: ...2 10 Stress the importance of regular servicing by a CORGI registered installer and that a comprehensive service should be carried out AT LEAST ONCE A YEAR In IE servicing work must be carried out by...

Страница 33: ...elow and be repeated to ensure even clamping 1 Remove the screw retaining the front burner support strap to the combustion chamber Remove the M5 pozi situated at the LH bottom rear of the burner and p...

Страница 34: ...is correct refer to Frame 67 Clean or renew as necessary Note The pilot shield is located around the pilot assembly bracket and is located by the electrode retaining nut 57 CLEANING THE RECUPERATOR 1...

Страница 35: ...seal Do NOT overtighten 5 Replace the boiler front panel Refer to Frame 49 59 REASSEMBLY 62 SIGHTGLASS REPLACEMENT Reassemble the boiler in the following order 1 Refit the flue baffles 2 Inspect the...

Страница 36: ...hanger pocket and unclip from the casing 7 Remove the strain relief bush from the back panel base 8 Remove the sensor lead through the grommet in the control box 9 Replace and reassemble in reverse or...

Страница 37: ...Check the spark gap 7 Reassemble in reverse order 8 Check the operation of the boiler 9 The pilot is factory set to maximum and no further adjustment is possible Ensure there is an inlet pressure of 2...

Страница 38: ...justment sealing 1 Refer to Frame 61 2 Remove the burner and air box assembly Refer to Frame 54 3 Remove the electrode retaining nut 4 Remove the pilot shield 5 Remove the ignition electrode and integ...

Страница 39: ...electrical connections from the APS 5 Fit the new APS and reassemble in reverse order 6 Check the operation of the boiler 73 PRINTED CIRCUIT BOARD PCB REPLACEMENT 1 Refer to Frame 61 2 Remove the cont...

Страница 40: ...emove the fan collector hood assembly refer to Frame 55 Pull off the electrical connections from the overheat thermostat and pull off the white rubber tube from the siphon blockage sensing pipe 6 a Re...

Страница 41: ...sump connecting pipe and the blockage sensing pipe 5 Unscrew the siphon union connection 6 Remove the two siphon retaining screws and remove siphon 7 Re fit the new siphon and gasket and reassemble i...

Страница 42: ...on the fan connector at PCB Molex marked FAN YES YES NO NO Check the polarity of the mains supply Check the continuity of the ignition lead from connector to electrode Does the spark now cease when g...

Страница 43: ...6 HE15 1 174 067 HE18 1 174 068 35 Front Panel Assembly Kit 1 174 069 37 Control Door Kit 1 173 572 39 Casing Seal and Screws Kit 1 174 070 45 E83 682 Overheat Thermostat LM7 Kit 1 171 950 59 E97 310...

Страница 44: ...44 Optia HE Installation Servicing SHORT LIST OF PARTS 78 SHORT PARTS LIST 12 30 35 19 9 24 17 18 23 FUSE 37 39 26 27 15 14 13 13 A 45 59 cla7873...

Страница 45: ...ocal Authority Building Control LABC who will arrange an inspection or contact a government approved inspector LABC will record the data and will issue a certificate of compliance If you notify via CO...

Страница 46: ...HAT TYPE OF SCALE REDUCER HAS BEEN FITTED FOR THE DOMESTIC HOT WATER MODE MEASURE RECORD GAS RATE ft3 hr MAXIMUM BURNER OPERATING PRESSURE IF APPLICABLE mbar COLD WATER INLET TEMPERATURE o C HOT WATER...

Страница 47: ...ARD SERIAL No COMMENTS SIGNATURE SERVICE 3 DATE ENGINEER NAME COMPANY NAME TEL No CORGI ID CARD SERIAL No COMMENTS SIGNATURE SERVICE 4 DATE ENGINEER NAME COMPANY NAME TEL No CORGI ID CARD SERIAL No CO...

Страница 48: ...Optia HE Installer Technical Helpline 0870 8498057 The code of practice for the installation commissioning servicing of central heating systems...

Отзывы: