Secure
Shell
users
are
authenticated
by
exchanging
user
ID
and
password.
The
password
and
user
ID
are
sent
after
the
encryption
channel
is
established.
The
user
ID
and
password
pair
can
be
one
of
the
12
locally
stored
user
IDs
and
passwords,
or
they
can
be
stored
on
an
LDAP
server.
Public
key
authentication
is
not
supported.
Generating
a
Secure
Shell
server
key
A
Secure
Shell
server
key
is
used
to
authenticate
the
identity
of
the
Secure
Shell
server
to
the
client.
Secure
shell
must
be
disabled
before
you
create
a
new
Secure
Shell
server
private
key.
You
must
create
a
server
key
before
enabling
the
Secure
Shell
server.
When
you
request
a
new
server
key,
both
a
Rivest,
Shamir,
and
Adelman
key
and
a
DSA
key
are
created
to
allow
access
to
the
Remote
Supervisor
Adapter
II
from
either
an
SSH
version
1.5
or
an
SSH
version
2
client.
For
security,
the
Secure
Shell
server
private
key
is
not
backed
up
during
a
configuration
save
and
restore
operation.
To
create
a
new
Secure
Shell
server
key,
complete
the
following
steps:
1.
In
the
navigation
pane,
click
Security
.
2.
Scroll
to
the
Secure
Shell
(SSH)
Server
area
and
make
sure
that
the
Secure
Shell
server
is
disabled.
If
it
is
not
disabled,
select
Disabled
in
the
SSH
Server
field
and
then
click
Save
.
3.
Scroll
to
the
SSH
Server
Key
Management
area.
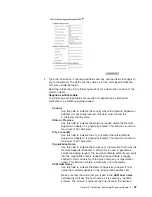
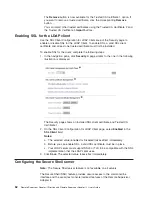
A
page
similar
to
the
one
in
the
following
illustration
is
displayed.
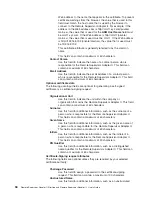
4.
Click
Generate
SSH
Server
Private
Key
.
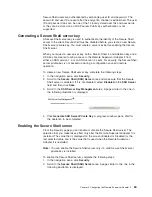
A
progress
window
opens.
Wait
for
the
operation
to
be
completed.
Enabling
the
Secure
Shell
server
From
the
Security
page
you
can
enable
or
disable
the
Secure
Shell
server.
The
selection
that
you
make
takes
effect
only
after
the
Remote
Supervisor
Adapter
II
is
restarted.
The
value
that
is
displayed
on
the
screen
(Enabled
or
Disabled)
is
the
last
selected
value
and
is
the
value
that
is
used
when
the
Remote
Supervisor
Adapter
II
is
restarted.
Note:
You
can
enable
the
Secure
Shell
server
only
if
a
valid
Secure
Shell
server
private
key
is
installed.
To
enable
the
Secure
Shell
server,
complete
the
following
steps:
1.
In
the
navigation
pane,
click
Security
.
2.
Scroll
to
the
Secure
Shell
(SSH)
Server
area.
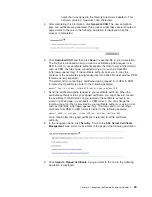
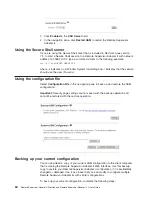
A
page
similar
to
the
one
in
the
following
illustration
is
displayed.
Chapter
3.
Configuring
the
Remote
Supervisor
Adapter
II
63
Содержание Remote Supervisor Adapter II
Страница 1: ...Remote Supervisor Adapter II SlimLine and Remote Supervisor Adapter II User s Guide...
Страница 2: ......
Страница 3: ...Remote Supervisor Adapter II SlimLine and Remote Supervisor Adapter II User s Guide...
Страница 8: ...vi Remote Supervisor Adapter II SlimLine and Remote Supervisor Adapter II User s Guide...
Страница 12: ...4 Remote Supervisor Adapter II SlimLine and Remote Supervisor Adapter II User s Guide...
Страница 76: ...68 Remote Supervisor Adapter II SlimLine and Remote Supervisor Adapter II User s Guide...
Страница 86: ...78 Remote Supervisor Adapter II SlimLine and Remote Supervisor Adapter II User s Guide...
Страница 120: ...112 Remote Supervisor Adapter II SlimLine and Remote Supervisor Adapter II User s Guide...
Страница 126: ...118 Remote Supervisor Adapter II SlimLine and Remote Supervisor Adapter II User s Guide...
Страница 131: ......
Страница 132: ...Part Number 43W7827 Printed in USA 1P P N 43W7827...


