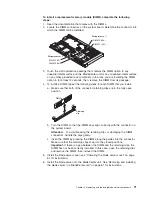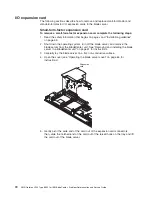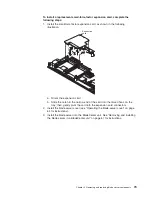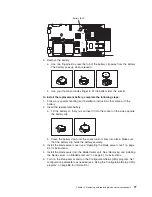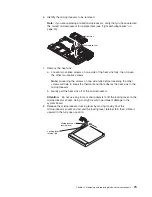
6. Identify the microprocessor to be removed.
Note:
If you are replacing a failed microprocessor, verify that you have selected
the correct microprocessor for replacement (see “Light path diagnostics” on
page 40).
Heat sink
Microprocessor
7. Remove the heat sink:
a. Loosen two captive screws on one side of the heat sink fully; then, loosen
the other two captive screws.
Note:
Loosening the screws on one side fully before loosening the other
screws will help to break the thermal bond that adheres the heat sink to the
microprocessor.
b. Gently pull the heat sink off of the microprocessor.
Attention:
Do not use any tools or sharp objects to lift the locking lever on the
microprocessor socket. Doing so might result in permanent damage to the
system board.
8. Release the microprocessor locking lever by moving it away from the
microprocessor socket and around the locking lever retainer tab; then, rotate it
upward to the fully open position.
Microprocessor-
locking lever
Locking lever
retainer tab
Chapter 4. Removing and replacing blade server components
79
Содержание LS20 - BladeCenter - 8850
Страница 1: ...AMD Opteron LS20 Type 8850 for IBM BladeCenter Problem Determination and Service Guide...
Страница 2: ......
Страница 3: ...AMD Opteron LS20 Type 8850 for IBM BladeCenter Problem Determination and Service Guide...
Страница 14: ...xii AMD Opteron LS20 Type 8850 for IBM BladeCenter Problem Determination and Service Guide...
Страница 72: ...58 AMD Opteron LS20 Type 8850 for IBM BladeCenter Problem Determination and Service Guide...
Страница 104: ...90 AMD Opteron LS20 Type 8850 for IBM BladeCenter Problem Determination and Service Guide...
Страница 114: ...100 AMD Opteron LS20 Type 8850 for IBM BladeCenter Problem Determination and Service Guide...
Страница 115: ......
Страница 116: ...Part Number 49Y0167 Printed in USA 1P P N 49Y0167...


