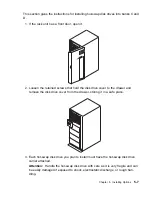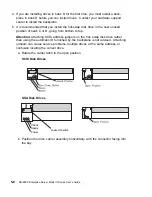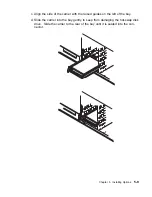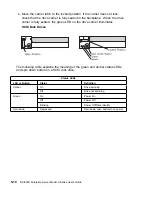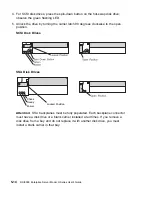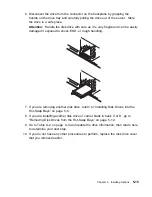
6. Disconnect the drive from the connector on the backplane by grasping the
handle on the drive tray and carefully pulling the drive out of the server. Store
the drive in a safe place.
Attention: Handle the disk drive with care as it is very fragile and can be easily
damaged if exposed to shock, ESD, or rough handling.
7. If you are removing another disk drive, return to “Installing Disk Drives into the
Hot-Swap Bays” on page 5-6.
8. If you are installing another disk drive or carrier blank in bank C or D, go to
“Removing Disk Drives from the Hot-Swap Bays” on page 5-12.
9. Go to Table A-2 on page A-4 and update the drive information; then return here
to determine your next step.
10. If you do not have any other procedures to perform, replace the disk drive cover
that you removed earlier.
Chapter 5. Installing Options
5-15
Содержание H SERIES RS/6000
Страница 1: ...RS 6000 Enterprise Server Model H Series IBM User s Guide SA38 0546 01...
Страница 14: ...xiv RS 6000 Enterprise Server Model H Series User s Guide...
Страница 16: ...xvi RS 6000 Enterprise Server Model H Series User s Guide...
Страница 128: ...5 16 RS 6000 Enterprise Server Model H Series User s Guide...
Страница 146: ...AIX and Physical Location Code Reference Table Model 50 6 18 RS 6000 Enterprise Server Model H Series User s Guide...
Страница 147: ...Chapter 6 Using the Online and Standalone Diagnostics 6 19...
Страница 160: ...6 32 RS 6000 Enterprise Server Model H Series User s Guide...
Страница 265: ...expect 8 r or 7 r or 6 r or 4 r or 3 r delay 2 done Appendix C Modem Configurations C 21...
Страница 272: ...C 28 RS 6000 Enterprise Server Model H Series User s Guide...
Страница 276: ...D 4 RS 6000 Enterprise Server Model H Series User s Guide...
Страница 285: ...Index X 9...
Страница 286: ...X 10 RS 6000 Enterprise Server Model H Series User s Guide...
Страница 289: ......

