www.i2systems.com
Integrated Illumination Systems, Inc.
355 Bantam Lake Road
Morris, CT 06763 USA
tel +1.860.567.0708
fax +1.860.567.2501
[email protected]
Product information is subject to change without notice.
All brand names and product names are trademarks of i2Systems.
© 2012 i2Systems. All Rights Reserved.
Gen3
Installation Guide
15
Gen3
Gen3
Gen3
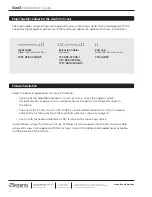
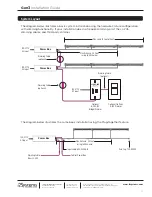
120-277V AC FEED
24V DC
Hardwire Fixture includes
6-foot Cable installed
HOT (BLK)
NEUTRAL (WHT)
GRN/YEL
RED
BLK
WHT
GRN
16 AWG
recommended
PS24V75W-E05P/PW
120V - 277V
AC FEED
Non-Switched
Circuit
HOT (BLK)
NEUTRAL (WHT)
GRN/YEL
VIO / BLK*
ORN / RED*
100W, UL-Listed Class 2
Power Supply
Dim Up and Down buttons
for Manual Dimming
LED bar graph indicator
shows selected dim levels
Connect Dimming
Cable Drain Wire to
the LL-205-10V and
Power Box Earth Ground
LL-205-10V
VIO
BRN
*Indoor Dimming Cable uses Red and Black Conductors. Outdoor Dimming Cable uses Orange and Violet.
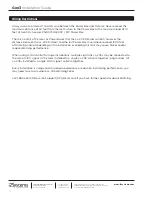
Operation
The LED bar graph will indicate the current dim level. Press and hold the top Dim button to increase the light
intensity, and tap twice for 100% intensity. To decrease the light intensity, press and hold the bottom Dim button.
Tap once to turn off the lights.
Use the Dimming Cables as specified on page 8 to combine or “daisy-chain” Power Boxes to a single LL-205, making
sure you connect the Dimming Cable Drain Wire as shown above.
Note:
You can use the LL-205-S or the LL-205-10V Dimmer for push-button dimming. Refer to the LL-205 Installation
Guide for technical specifications on these products.
Installation: Wall Mount, Push-Button Dimming, Hardwire
Содержание Gen3 V3285
Страница 1: ...Gen3 V3285 Installation Guide ...
Страница 20: ......


