background image

HMC 

Product Manual 

133

Release 3.4:   May 2010

Scheduler

5.

Click 

Next

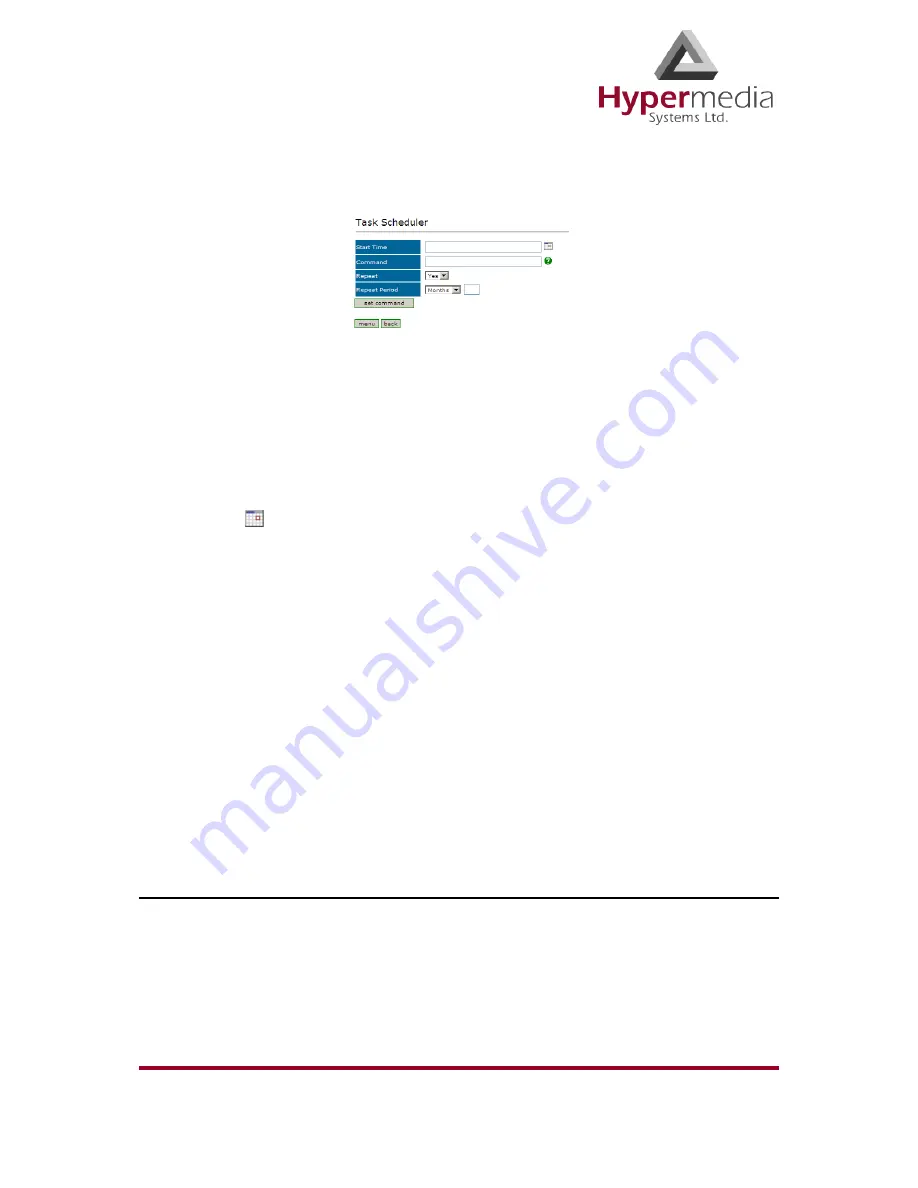
.  The Set Command screen, with the command syntax, is displayed.


Figure 130: Task Scheduler Set Command Screen

WARNING!  

Clicking 

menu

 deletes the new task.  The table of schedules tasks is 

redisplayed.

6.

Configure the task’s schedule:

a.

Click 

 (calendar icon).  A calendar opens in a new browser tab.

Note:  

First, set the time.  As soon as you click the date, the browser tab closes and the date 

and time are entered into the Start Time field.

b.

Enter the time that the command will start.

c.

Enter the date that the command will start.  When you click the date, the browser tab 
closes and the date and time are entered into the Start Time field.

d.

From the Repeat drop-down menu, select either Yes or No.

e.

If the task is configured to repeat, select a 

Repeat Period

.  The Repeat Period can be 

either months, days, hours, or minutes.

7.

Click 

Set Command

.  The new Task is displayed in the Task Scheduler screen.

8.

Click 

Upload Schedule

.  The Server activates the schedule according to the defined dates 

and times.

VoIP Channels

Use the VoIP Channels task to block, open, or clear VoIP channels at a specific time. 
1.

From the HMC navigation pane, expand the 

Manage

 branch.

2.

Click the 

Scheduler

 sub-branch.  The Task Scheduler screen is displayed.

3.

From the 

Add New Command

 dropdown menu, select 

VoIP Channels

.  The Task 

Scheduler automatically advances to the next screen.

Содержание HG-4000 3U

Страница 1: ...Hypermedia Gateways HG 4000 3U and 6U Product Manual 6U 3U...

Страница 2: ...r format Every effort has been made to ensure that the information in this manual is accurate Hypermedia Inc is not responsible for printing or clerical errors Information in this document is subject...

Страница 3: ...herein and must be retained by you You may not rent lease reverse engineer decompile modify or disassemble the PRODUCT or create derivative works based on the PRODUCT LIMITED HARDWARE WARRANTY The HAR...

Страница 4: ...tation of liability for consequential or inci dental damages the above limitation may not apply to you U S GOVERNMENT RESTRICTED RIGHTS For purchases made in the United States The SOFTWARE and any acc...

Страница 5: ...re Installation Preparation 7 Installing the D Link DIR100 Router 8 Installing the RO 1 1 Embedded Router Card 10 Installing the Media Gateway MG Card 11 Installing the Cellular Card 12 Powering Up an...

Страница 6: ...llular Allocations 33 Callbacks 34 Resources 34 Call Triggers 35 SMS Triggers 35 Callthroughs 37 Dial Filters 39 PIN Codes 40 MSN Values 41 Reset 42 Information Screens 43 Module Info 43 Serial Number...

Страница 7: ...Group 66 Using the Default Group Settings 67 Resource Map 68 Sample Assignment 68 Assigning LCR Resources 69 Rules 72 Creating a Rule 72 Creating a Default Set of Rules 74 Deleting a Rule 74 Filters 7...

Страница 8: ...iguring the VoIP Card 99 VoIP Media Connections 100 Associating Linking VoIP Channels 100 Unlinking VoIP Allocations 102 Callthrough 103 VoIP Settings 105 VoIP Management Features 107 IP Filters 107 D...

Страница 9: ...nd 135 Callback 137 Remote Delegation 137 Ext Authentication 138 Callback and Callthrough 139 Callback Overview 140 Callback Best Practice 141 Determine a Trigger Strategy 141 Allocate the Trigger Res...

Страница 10: ...other Tools 155 Console Suite 156 CDR Console 156 Log Console 157 Decoding Logs 158 Service Console 167 HGS Setup Parameters Tool 168 PRI Cause Conversion 170 Hypermedia Gateway Server List 172 Adding...

Страница 11: ...a Gateway system Skip the sections that do not apply to your system This section includes Contents of Package on page 2 Safety Information on page 3 System Components on page 4 Pre Installation Prepar...

Страница 12: ...yperGateway family of platforms HyperSaving Package is a corporate com munications software add on that minimizes expenses of local national and international calls The scalable system provides secure...

Страница 13: ...nly a qualified technician should open the housing Before opening disconnect the power cable from the equipment The Hypermedia Gateway complies with all necessary safety standards Equipment con nected...

Страница 14: ...he system enables any combination of connectivity between its PRI BRI VoIP and cellular interfaces The unit contains a back plan and slots for the boards described in Table 1 Hypermedia Gateway Boards...

Страница 15: ...oards Board Name Description CB1 2 Control Board The CB1 2 module is designed for remote TCP IP access advanced application and enhanced new features It comes in two configura tions Stand alone embedd...

Страница 16: ...public or private Integrated Services Digital Networks ISDN at E1 and T1 reference points The PRI 1 1 module supports a single PRI channel The PRI 2 x comes in two configurations 2 1 single PRI with t...

Страница 17: ...Perform a cellular signal check before mounting the system This can be done by checking the Signal Strength and the Bit Error Rate ratio on another mobile phone s display from the same operator and s...

Страница 18: ...e the method that matches the configuration of the Hypermedia Gateway Figure 2 D Link DIR 100 Router System with a CB Card If the system has a CB card both D Link Router cables attach to it a Attach P...

Страница 19: ...ndicates a problem 3 Configure the router a Get the following information from your Internet Service Provider WAN IP Address WAN Subnet Mask WAN Gateway b Using a computer connected to the same LAN as...

Страница 20: ...stalling the RO 1 1 Embedded Router Card The RO 1 1 module is a single slot card that provides Ethernet Broadband Router function ality It is equipped with NAT network address translation technology a...

Страница 21: ...dynamic allocation of GSM channels E1 PRI B channels and VoIP channels It comes in two configurations the basic Matrix slot board pictured VoIP Gateway add on supporting the VoIP interface Every Hype...

Страница 22: ...s pushes SIM drawer out of the slot b Remove the SIM drawer c Place the SIM card in the SIM drawer d Replace the SIM drawer e Optionally to use the CG board s multi SIM extender i Pull out the CG boar...

Страница 23: ...awers b Fasten the antenna using the SMA connector Do not use excess force c Tether all cables securely Tethering helps prevents breakage of connectors and damage to cellular cards WARNING The antenna...

Страница 24: ...undant power supplies are optional When installed if one fails or if you power up the system with just one power supply an alarm will sound To stop the alarm press the Alarm Reset button at the top le...

Страница 25: ...ermedia Gateway s cards Table 3 MG Card s Ethernet LEDs Off On Blinking ACT Active traffic LINK LAN Connection established Table 4 VoIP LEDs Off On Blinking Ready Yellow Power is off Connected on 95 M...

Страница 26: ...d The channel does not contain an installed SIM card LED is off No reception The channel is not connected to a cellular network Short blink Stand by The channel is connected but there is no call in pr...

Страница 27: ...using a standard ver sion of Internet Explorer Note The Hypermedia Management Console is customized to match the specific order Some branches of the HMC may or may not appear based upon the customiza...

Страница 28: ...er 6 or 7 2 Ensure that you have access to the installation file It is included with the Hypermedia Gateway CD ROM Figure 9 Hypermedia Gateway CD ROM The installation file name begins with the letter...

Страница 29: ...ame of the program group that will be added to the Start Menu The default name is Hypermedia Click Next The Additional Tasks window is displayed 8 Optionally select the checkbox to create a Desktop sh...

Страница 30: ...ia Management Console The program opens in the default browser Figure 13 HMC Connection Screen 3 Click the warning bar at the top of the screen and from the dropdown menu click Allow Blocked Content C...

Страница 31: ...r Address Screen Note For a local connection use the default IP address The default address is 127 0 0 1 For a remote connection enter the remote IP address and use port 80 d Enter the IP address and...

Страница 32: ...16 HMC Login Authorization Request Note The default password is admin 6 Enter the password and click Submit A confirmation message is displayed The confir mation message indicates that you have succes...

Страница 33: ...guration and Monitor Pane In addition the interface includes identifying information Figure 18 The Hypermedia Management Console Interface Popup and dropdown menus are available from the Configuration...

Страница 34: ...igure PRI Cards Open the PRI Cards branch to configure parameters con trolling the connections between the digital PBX and the Hypermedia Gateway and to configure the associations between PRI channels...

Страница 35: ...Rs Open the Monitor LCR CDRs branch to download a file containing VoIP CDRs Manage Number Filters Open the Number Filters branch to perform advanced manipulations on numbers that are sent to or receiv...

Страница 36: ...lot s module that is to permanently save all the configuration settings in the Hypermedia Gateway This process might take up to 60 seconds Save existing configuration Use this option to make a backup...

Страница 37: ...caller ID Remote Hang up Closes Session Is Yes is selected a hang up initiated by the remote side will disconnect the caller and close the session If No is selected a remote hang up will generate a di...

Страница 38: ...iod of time measured in milliseconds which determines the length of a DTMF digit sent for automatic Callback DTMF digits Callback Automatic Inter Digit Duration Enter a period of time measured in mill...

Страница 39: ...page 40 MSN Values on page 41 Reset on page 42 Information Screens on page 43 Locks on page 44 SIM Select on page 45 SIM Counters on page 46 SIM Auto Manage on page 47 Call Counter Steps on page 48 C...

Страница 40: ...to 16 SIM cards In addition a Hypermedia Gateway can include several SIM cards Some parameters can be applied either to specific SIM cards or to specific modules or to the entire cellular card or to a...

Страница 41: ...he Volume Settings screen of that cellular card is displayed 3 To increase the volume move the slider to the right Each module includes two sliders In In adjusts the volume heard by the party on the P...

Страница 42: ...the cellular card and vice versa Note The matrix can be configured in any combination Routing can be assigned between any cellular channel and any other channel in the system including other cellular...

Страница 43: ...nk 7 Click Save The configuration dropdown boxes are hidden 8 Optionally repeat the process for additional channels and other media types 9 Click Apply Settings and wait for Configuration Saved to be...

Страница 44: ...ard Media Connection channel is linked to a Cellular Gateway CG and is unallocated see Media Connections on page 32 2 From the HMC navigation pane s Cellular branch expand the Callbacks sub branch 3 C...

Страница 45: ...Click Call Triggers The Callback Triggers screen is displayed Figure 28 HMC Cellular Call Triggers Screen 4 Select the checkbox When selected the channel is allocated to Callback Note To clear a check...

Страница 46: ...llular Card The SMS Trigger screen of that cellular card is displayed 4 Optionally select a Number Filter see Number Filters on page 125 5 Select or clear the checkbox for each module When selected an...

Страница 47: ...te extension to a VoIP phone number to a Cellular phone number to a PSTN phone number Figure 30 The Callthough Sequence To configure Callthrough 1 Ensure that at least one Cellular Card Media Connecti...

Страница 48: ...lular Card Media Connection branch select the channel and click Unlink 4 From the Group dropdown list select the Group that will be allowed to use this Callthrough Resource These are the Groups that a...

Страница 49: ...with Callback Callthrough features To apply a dialing filter to a module 1 From the Cellular Cards branch of the HMC navigation pane click the Dial Filters sub branch The Cellular Card Dial Filters s...

Страница 50: ...code To enter a SIM card s PIN code 1 From the Cellular Cards branch of the HMC navigation pane click the PIN Codes sub branch The PIN Codes screen is displayed Figure 34 HMC Cellular PIN Codes Screen...

Страница 51: ...n on the PBX 1 From the Cellular Cards branch of the HMC navigation pane click the MSN Values sub branch The MSN Values screen is displayed Figure 35 Cellular MSN Values 2 If more than one slot is dis...

Страница 52: ...pane click the Reset sub branch The Reset screen is displayed Figure 36 Cellular Card Reset screen 2 If more than one slot is displayed select a specific Cellular Card The Reset screen of that cellula...

Страница 53: ...8 HMC Module Info Screen 2 If more than one slot is displayed select a specific Cellular Card The Module Info screen of that cellular card is displayed Serial Numbers Use the Serial Numbers screen to...

Страница 54: ...he cellular modules support SIM locks 2 From the Cellular Cards branch of the HMC navigation pane click the Locks sub branch The Locks screen is displayed Figure 40 HMC Cellular Locks Screen 3 If more...

Страница 55: ...are associated with the SIM Auto Manage feature 1 From the Cellular Cards branch of the HMC navigation pane click the SIM Select sub branch The SIM Select screen is displayed Figure 41 HMC SIM Select...

Страница 56: ...ot is displayed select a specific Cellular Card The SIM Counters screen of that cellular card is displayed 3 Optionally select from the following controls Reset Resets the counter for the specific ste...

Страница 57: ...Switch column The SIM column checkboxes and Minutes column fields are displayed 4 To assign a SIM card to a module select the checkboxes in the SIM column Note In Figure 43 each module has two SIM ca...

Страница 58: ...llular Call Counter Steps Screen To configure Counters Steps 1 If more than one slot is displayed select a specific Cellular Card The SIM Counters screen of that cellular card is displayed 2 Select a...

Страница 59: ...ing sub branch The CLI Blocking screen is displayed Figure 45 HMC Cellular CLI Blocking Screen 2 If more than one slot is displayed select a specific Cellular Card The CLI Blocking screen of that cell...

Страница 60: ...imits Set the limit for an outgoing cellular call to be answered When enabled enter a duration of time measured in seconds that the gateway will wait for the call to be answered Set the maximum length...

Страница 61: ...channel contains specific parameters needed by a mobile in order that it can identify the network and gain access to it Typical information includes the LAC Location Area Code and RAC Routing Area Co...

Страница 62: ...t cellular card is displayed 3 From the Select module dropdown box select a module This is the module that the Camp selection will be applied to 4 In one of the CellID boxes click Camp The screen indi...

Страница 63: ...nd string for adding value charging the SIM card 2 From the Cellular Cards branch of the HMC navigation pane click the USSD SIM Bal ance sub branch The USSD SIM Balance screen is displayed Figure 48 H...

Страница 64: ...the Cellular Cards branch of the HMC navigation pane click the Settings sub branch The Cellular Card Settings screen is displayed Figure 49 HMC Cellular Card Settings Screen 2 If more than one slot i...

Страница 65: ...isplayed here and on the Status screen but not on the Reception screen Figure 50 Cellular Cards Reception Screen The screen displays the following information Module This indicates the card and the SI...

Страница 66: ...Slot selection box and the reception information A module can support either GSM or CDMA Module 1 2 3 4 This indicates the card s SIM slot number Operator This is the cellular network associated with...

Страница 67: ...the status of SIM slots on a specific cellular module 1 Expand the Monitor Cellular Cards sub branch and select Status 2 Select a specific slot The Cellular Cards Status screen for that card is displ...

Страница 68: ...HMC Product Manual 58 Release 3 4 May 2010 Monitoring Cellular Cards This page is intentionally blank...

Страница 69: ...ppear based upon the customization This section includes Overview on page 60 Linking to LCR on page 61 Groups on page 66 Resource Map on page 68 Rules on page 72 Filters on page 75 Time Frames on page...

Страница 70: ...ing and potentially saves money The best practice order of building the LCR plan is Note A best practice is a technique or methodology that through experience and research has been proven to efficient...

Страница 71: ...branches Cellular PRI and VoIP includes a sub branch named Media Connections Linking from a Media Branch To link a media to LCR 1 From the HMC navigation pane click a Media Connections sub branch The...

Страница 72: ...hidden Figure 56 Channel Row Configured 6 Optionally repeat the process for additional channels and other media types 7 Click Apply Settings and wait for Configuration Saved to be displayed 8 When fi...

Страница 73: ...navigation pane s LCR branch click the Media Connections sub branch The LCR Media Matrix is displayed Figure 58 LCR Media Matrix 2 Click within a Resource row The row turns yellow 3 Click Edit The row...

Страница 74: ...lease 3 4 May 2010 Linking to LCR Figure 60 LCR Row Dropdown Lists 5 Click Save The configuration dropdown boxes are hidden Figure 61 LCR Row Configured 6 Click Apply Settings and wait for Configurati...

Страница 75: ...becomes configurable 4 From the dropdown menus edit the settings 5 Click Save The configuration dropdown boxes are hidden 6 Click Apply Settings and wait for Configuration Saved to be displayed Breaki...

Страница 76: ...not the Group will be cyclic Yes The LCR module begins searching for an available channel from the last used channel No The LCR module begins searching for an available channel from the first channel...

Страница 77: ...ct or clear the Report Calls checkbox When selected calls are sent to an external Hypermedia application for billing Note To purchase the billing application contact Hypermedia 9 Click Save Settings U...

Страница 78: ...CR Resource Map to assign Resources to Groups Sample Assignment The picture below illustrates Resource assignment The first 30 Resources are assigned to the PBX the second 30 are assigned to the PSTN...

Страница 79: ...ch click the Resource Map sub branch The Resource Map screen is displayed Figure 66 LCR Resource Map Before Assignments 2 Click a cell to select it To select many cells hold down the Shift key and cli...

Страница 80: ...MC Product Manual 70 Release 3 4 May 2010 Resource Map Figure 67 Selecting LCR Resources 3 From the Select Group dropdown list select a Group This is the Group the shaded cells will be associated with...

Страница 81: ...ick Set The assignment is applied and saved 5 From the Resource Type dropdown list select either Bi Directional This Resource can be used for both incoming calls and for outbound calls Outbound Only T...

Страница 82: ...layed Figure 69 LCR Rules Screen 2 Place the cursor in an empty Rule Prefix cell 3 Enter the Prefix that is the first numbers of the destination number The Prefix is often the first numbers of a mobil...

Страница 83: ...ng with 082 will be routed according to Rule 1 and all other calls beginning with 08 will be routed according to Rule 2 If Rule 2 is placed above the 082 calls will also be routed according to it and...

Страница 84: ...screen The Create button appears within the Create Default Rules prompt Figure 70 Create Default Rules Button 3 Enter the first numbers prefixes of phone numbers used by mobile service providers Note...

Страница 85: ...eted from the beginning of the destination number Add Left Enter the number or numbers that will be added to the beginning of the destination number Match Condition Enter the exact numbers appearing i...

Страница 86: ...rames sub branch The Time Frames screen is displayed All four rows are gray Figure 72 LCR Time Frames Screen 2 Click More Two rows are enabled Figure 73 Time Frame Rows when Configurable 3 In the Fram...

Страница 87: ...click Disable Feature 5 Optionally to add additional Time Frames click More and enter the Start Time 6 Click Save Settings Disabling Time Frames To disable the Time Frames feature 1 From the HMC navig...

Страница 88: ...eps a Prepare and upload the Number List b Define the ACR rules c Enable a specific rule or the default ACR rule on the LCR Rules screen Modifying the Existing ACR Number List To modify the existing A...

Страница 89: ...lick Import The report of total lists and total numbers is automatically updated Creating a New ACR Number List File To define a number list 1 Create a new file whose file name ends with the extension...

Страница 90: ...v file is displayed on the Number Lists Screen 8 Select either Overwrite When selected the old csv file is deleted and the new file replaces it Append When selected the entries on the new csv file are...

Страница 91: ...the phone number from which the call was placed On Destination checks the target phone number that is the phone number of the called party If an indication is selected a dialog box similar to the fol...

Страница 92: ...p Calls matching the indications are routed through the LCR Group defined here On Source Phone numbers of calls matching the indications are altered as defined here On Destination Phone numbers of cal...

Страница 93: ...alls either via the PBX to a corporate extension to a VoIP phone number to a Cellular phone number to a PSTN phone number Figure 81 The Callthrough Sequence To configure Callthrough 1 From the HMC nav...

Страница 94: ...and click Unlink Note The Status column indicates if the Resource is or is not available It also indicates the type of equipment used to process the Callthrough Note The Other Leg column displays the...

Страница 95: ...rate license Creating a Number Filter To create a Number Filter 1 From the HMC navigation pane expand the Manage branch 2 Click the Number Filters sub branch The Number Filters screen is displayed Fig...

Страница 96: ...ds the suffix 9 to all outgoing calls which have five or more digits for getting an outside line d d d d d 9 1 In Use In filters to apply the filters to incoming calls 7 Using standard Regular Express...

Страница 97: ...ge and require a separate license 1 From the HMC navigation pane s LCR branch click the Callthrough Filters sub branch The Callthrough Filters screen is displayed Figure 86 Callthrough Filter Screen 2...

Страница 98: ...everal Resources are dedicated to Callback incoming calls are automatically routed to the first available Resource For a Resource to be allocated to Callback it must be linked to itself Its Target Lin...

Страница 99: ...hat can now be allocated as Callback Triggers Figure 90 LCR Callback Triggers Screen 4 Select the checkboxes When selected the Resource is allocated to Callback Note To clear a checkbox from the LCR M...

Страница 100: ...nal storage device will result in loss of CDR data The memory device should not be removed On PC based systems the CDR files are stored on the hard drive On CB as well as PC based systems the user is...

Страница 101: ...the CDR File A CDR line is created in the file each time a LCR call ends All CDR fields appear on a single line For example 12364 5003 0546858576 0546858576 1 2 2008 09 05 13 48 13 2008 09 05 13 48 14...

Страница 102: ...is sent out from the LCR Dial Date Time The moment the gateway received the call request for mat YYYY MM DD HH MM SS Alert Date Time The moment the remote party had begun ringing if reported by the re...

Страница 103: ...terminated the call 1 call was terminated by LCR due to termination by the source party etc Hangup Reason Cause code as reported by the party that had first termi nated the call Call Duration In secon...

Страница 104: ...ram group select HGS Setup Parameters The HGS Setup Parameters logon screen is displayed 3 Enter your password and click Submit The HGS Setup Parameters screen is displayed Figure 92 HGS Setup Paramet...

Страница 105: ...click Edit The Value field becomes editable Figure 94 Editable Disable LCR Value Field 7 Enter 0 zero Zero indicates that LCR is enabled 8 Click Save 9 Click Submit 10 From the HGS Server system funct...

Страница 106: ...on Deciphering the CDR File A CDR line is created in the file each time a LCR call ends All CDR fields appear on a single line For example 12364 5003 0546858576 0546858576 1 2 2008 09 05 13 48 13 2008...

Страница 107: ...he remote party had begun ringing if reported by the remote party and supported by the outgoing resource Answer Date Time The moment the call had been connected i e answered by the remote party Hangup...

Страница 108: ...HMC Product Manual 98 Release 3 4 May 2010 LCR CDRs This page is intentionally blank...

Страница 109: ...e 3 4 May 2010 Chapter 5 CONFIGURING THE VOIP CARD This section contains VoIP Media Connections on page 100 Callthrough on page 103 VoIP Settings on page 105 VoIP Management Features on page 107 Monit...

Страница 110: ...ociate a VoIP channel with another media channel 1 From the VoIP Card branch of the HMC navigation pane click the Media Connections sub branch The Media Matrix is displayed Figure 96 HMC VoIP Card Med...

Страница 111: ...ated appears 6 From the second dropdown list assign this channel to a specific channel on the target card Figure 98 Assigning a Target Link 7 Click Save The configuration dropdown boxes are hidden 8 O...

Страница 112: ...llocation 1 From the VoIP Card branch of the HMC navigation pane click the Media Connections sub branch The Media Matrix is displayed 2 Click within a channel row The row turns yellow Figure 99 Breaki...

Страница 113: ...Cellular phone number to a PSTN phone number To configure Callthrough 1 Ensure that at least one VoIP Card Media Connection channel is linked to the target Callthrough equipment and is unallocated se...

Страница 114: ...ction branch select the channel and click Unlink Note The Other Leg column displays the equipment used for the 2nd leg of the Callthrough 4 From the Group dropdown list select the Group that will be a...

Страница 115: ...hen No is selected the Gateway assigns incoming VoIP calls to the first available channel Early Media Select either Yes or No When Yes is selected the Gateway transmits VoIP media as soon as the media...

Страница 116: ...Order them according to the sequence which the Gateway will use Payloads per Packet Enter the number of Codec payloads that are carried by each RTP packet SIP Proxy Enable or disable use of a SIP Pro...

Страница 117: ...ed routing and review VoIP messages IP Filters Use IP Filters to create a White List of IP addresses This is a list of destinations prefixes that can be dialed through the system 1 From the HMC naviga...

Страница 118: ...g IP White List 8 Click Add Entry The new Group and the IP White List are displayed in the box below Note To review the list of IP addresses associated with a Group open the dropdown list in the Group...

Страница 119: ...rom which a user is permitted to receive calls via the VoIP Gateway 6 Click Add DDI to list The new DDI appears in the DDI Prefix White List box 7 Repeat steps 5 6 until all DDI Prefixes associated wi...

Страница 120: ...ge 125 1 From the HMC navigation pane expand the Manage branch 2 Expand the VoIP branch 3 Click Dial Filters The VoIP Dial Filter List screen is displayed Figure 106 HMC VoIP Card Dial Filter List Scr...

Страница 121: ...will be applied to Figure 108 HMC VoIP Card VoIP Channel Restrictions Screen 6 From the IP restriction group dropdown menu select a pre defined filter 7 From the DDI Prefix restriction group dropdown...

Страница 122: ...call will be connected to 6 If necessary in the PIN Code field enter the PIN code 7 Click Add Entry The new entry is displayed in the area below DDI Blocking Use the DDI Blocking screen to import a co...

Страница 123: ...easing the a call The Hypermedia Gateway can manipulate the releasing Cause code that is Convert to Value if we do not want to report the exact reason for call release 1 From the HMC navigation pane e...

Страница 124: ...May 2010 VoIP Management Features 5 Select a new value 6 Click Save 7 Click Submit 8 Two additional options exist Show Converted Displays the converted values Reset Codes Assigns the original cause co...

Страница 125: ...to the line or from the line to network State Connected indicates that the channel is busy Idle indicates that there is no call activity on a channel To This displays the destination number that the c...

Страница 126: ...nu 3 Select from the following controls Fast Block Changes the State to Fast Blocked The line cannot be used Fast Unblock Returns the State to Idle The line is available Send DTMF Opens the Send DTMF...

Страница 127: ...rowser Open or Save dialog box is displayed 3 Click either Open or Save 4 Review the file Deciphering the VoIP CDR File A CDR line is created in the file each time a VoIP call ends All CDR fields appe...

Страница 128: ...The number that the call is being made from 6 E164Dest The number that the call is being made to 7 Start Time Time when the call started in ISO 8601 format two way RTP audio channels open e g 2004 08...

Страница 129: ...ues are 0 Network 1 Line 17 TxRTP Number of RTP packets sent during the session 18 RxRTP Number of RTP packets received during the session 19 Lost RTP Number of RTP packets lost during the session 20...

Страница 130: ...HMC Product Manual 120 Release 3 4 May 2010 Monitoring VoIP Cards This page is intentionally blank...

Страница 131: ...al 121 Release 3 4 May 2010 Chapter 6 MANAGING via the HMC This section contains Add User on page 122 User List on page 123 VPN Groups on page 124 Number Filters on page 125 Scheduler on page 127 Call...

Страница 132: ...ate license Add User Use the Add User branch to define Gateway users and to manage their Callback access To add a new user 1 From the HMC navigation pane expand the Manage branch 2 Click the Add User...

Страница 133: ...one of the following Use CLI The Hypermedia Gateway uses Caller Line Identification CLI to automatically identify the phone number to be called back Use Line ID Enter the Line Number The Hypermedia G...

Страница 134: ...roup Note VPN Groups belong to the Hypersavings Package and require a separate license To create a VPN Group 1 From the HMC navigation pane expand the Manage branch 2 Click the VPN Groups sub branch T...

Страница 135: ...ly to Hypermedia HG4000 Gateways To create a Number Filter 1 From the HMC navigation pane expand the Manage branch 2 Click the Number Filters sub branch The Number Filters screen is displayed Figure 1...

Страница 136: ...ds the suffix 9 to all outgoing calls which have five or more digits for getting an outside line d d d d d 9 1 In Use In filters to apply the filters to incoming calls 7 Using standard Regular Express...

Страница 137: ...asks and Table of Scheduled Tasks Switch SIM per Slot Use the Switch SIM per Slot task to configure a GSM slot to use specific SIM cards for a defined period of time 1 From the HMC navigation pane exp...

Страница 138: ...Clicking menu deletes the new task The table of schedules tasks is redisplayed 6 Configure the task s schedule a Click calendar icon A calendar opens in a new browser tab Note First set the time As s...

Страница 139: ...he Scheduler sub branch The Task Scheduler screen is displayed 3 From the Add New Command dropdown menu select Switch SIM per System The Task Scheduler automatically advances to the next screen Figure...

Страница 140: ...task is configured to repeat select a Repeat Period The Repeat Period can be either months days hours or minutes 7 Click Set Command The new Task is displayed in the Task Scheduler screen 8 Click Uplo...

Страница 141: ...gure 128 Task Scheduler Set Command Screen WARNING Clicking menu deletes the new task The table of schedules tasks is redisplayed 6 Configure the task s schedule a Click calendar icon A calendar opens...

Страница 142: ...SIM The Task Sched uler automatically advances to the next screen Figure 129 Task Scheduler Set Multi SIM Screen 4 Configure the task parameters Slot Select or clear the checkboxes Each checkbox repr...

Страница 143: ...the date the browser tab closes and the date and time are entered into the Start Time field d From the Repeat drop down menu select either Yes or No e If the task is configured to repeat select a Repe...

Страница 144: ...selected channels Clear Disconnects all current calls on the selected channels 5 Select the checkboxes of the channels that the task will be applied to Note Select All to apply the task to all the ch...

Страница 145: ...is configured to repeat select a Repeat Period The Repeat Period can be either months days hours or minutes 8 Click Set Command The new Task is displayed in the Task Scheduler screen 9 Click Upload S...

Страница 146: ...ate that the command will start When you click the date the browser tab closes and the date and time are entered into the Start Time field d Enter the command For help with command syntax click e From...

Страница 147: ...expand the Manage branch and the Callback sub branch 2 Click the Remote Delegation sub branch The Remote Delegation screen is displayed Figure 134 HMC Remote Delegation Screen 3 In the Match CLI Rule...

Страница 148: ...ranch The Extended Authentication screen is dis played Figure 135 HMC Extended Authentication Screen 3 In the Match CLI Rule field enter the user s phone number When the Gateway identi fies the number...

Страница 149: ...reliably lead to the desired result A Hypermedia Gateway includes many additional Callback and Callthrough parameters that are used in specific settings and are not related to Best Practices They are...

Страница 150: ...identifies the user as a user authorized to activate Callback b the Gateway disconnects the call c the Gateway searches for an available Callback Resource d the Gateway calls back the User e optionall...

Страница 151: ...fies the CLI and begins the Callback process Fixed trigger With a fixed trigger the Hypermedia Gateway does not authorize the user Users call a pre allocated corporate telephone number that has been a...

Страница 152: ...trix is displayed b If more than one slot is displayed select a specific card The Media Matrix of that card is displayed c Click within a Resource row The row turns yellow d Click Edit The row becomes...

Страница 153: ...ranch or Cellular Cards Callbacks Call Triggers The Callback Triggers screen is displayed b Select the checkboxes of the Resources that are allocated as Callback Triggers Figure 139 Allocating Resourc...

Страница 154: ...ed select a specific card The Media Matrix of that card is displayed c Click within a Resource row The row turns yellow d Click Edit The row becomes configurable Figure 141 Media Matrix Row when Confi...

Страница 155: ...anches either the PRI Cards Callbacks sub branch or Cellular Cards Callbacks Resources The Callback Resources screen is displayed Figure 143 Callback Resources Screen b Select the checkbox of the Reso...

Страница 156: ...m the Configure branch of the HMC navigation pane click the Call Parameters sub branch The Call Configuration screen is displayed 2 Scroll down to the Callback Authentication Policy parameter Figure 1...

Страница 157: ...Screen 3 Enter the following user information User ID This can be any string The information reappears in the All Users table Full Name This information reappears in the All Users table Code Any rando...

Страница 158: ...ler Line Identification CLI to automatically identify the phone number to be called back Use Line ID Enter the Line Number The Hypermedia Gateway calls back the number entered in the Line Number field...

Страница 159: ...via the PBX to a corporate extension to a VoIP phone number to a Cellular phone number to a PSTN phone number A Callthrough is initiated by a call to a Resource allocated to Callthrough The call init...

Страница 160: ...k the Media Connections sub branch of either the Cellular Cards PRI Cards or LCR The Media Matrix is displayed b If more than one slot is displayed select a specific card The Media Matrix of that card...

Страница 161: ...figuration Saved to be displayed 2 Set the Resource as 1st Leg a Select one of the Callthrough Resources sub branches either the Cellular PRI LCR or VoIP Cards Callthroughs sub branch The Callthrough...

Страница 162: ...t Practice Figure 152 Selecting the Authorized Group d Click Apply Settings and wait for Configuration Saved to be displayed The allocation is confirmed in the Callback Resources table of both legs Fi...

Страница 163: ...The Call Configuration screen is displayed 2 Scroll down to the Callthrough Authentication Policy parameter 3 From the dropdown menu select an option described in the table of authentication poli cie...

Страница 164: ...tion pane expand the Monitor branch 2 Expand the LCR Card sub branch and select CB CT CDRs The list of CDR files is dis played Figure 155 Callback Callthrough CDR Files Screen 3 Click a file name The...

Страница 165: ...ns The Console Suite including CDR Console on page 156 Log Console on page 157 Decoding Logs on page 158 Service Console on page 167 Additional Configuration and Management Tools including HGS Setup P...

Страница 166: ...creen opens in the default browser 3 Click the warning bar at the top of the screen and from the dropdown menu click Allow Blocked Content Confirm your choice by clicking Yes at the confirmation messa...

Страница 167: ...Click the warning bar at the top of the screen and from the dropdown menu click Allow Blocked Content Confirm your choice by clicking Yes at the confirmation message Note To avoid recurring displays o...

Страница 168: ...5 03 09 56 24 242 debug provideAnswer 25 03 09 56 24 302 debug Started media accepting call 2cf9b58a f8f3ae56 ad3c20da d44bfdec 192 168 1 67 25 03 09 57 04 233 Received Packet HangingUp A24 I3 o1 R10...

Страница 169: ...1031 o0 H5 S31 h11 s0 n0210 N0774445016 25 03 10 07 22 114 debug Sending INVITE YWZmYjRiMjY3OGMyYzJkMGU1MjQxZDcxODkzMDBjYTY m_tokenToSession insert 25 03 10 07 24 283 debug Started media accepting cal...

Страница 170: ...cation Callthrough Leg1 25 03 10 21 42 563 MGWCallthrough 1032 Authentication successfull CLI found 0544331123 25 03 10 21 45 997 debug OnDTMF notification Digit 0 nHW 11 nTS Type 0 2 25 03 10 21 46 3...

Страница 171: ...inating user CLI and or PIN Code and the predefined registered user 5 After the HG assumes the correct user authentication the User gets a dial tone from the HG 6 The User can dial the destination num...

Страница 172: ...03 10 21 50 365 Sending Dialing A24 x0 0 I1 o0 H5 S32 h5 s33 N n0774445016 Client ID 10 26 03 10 22 20 336 HMCServer received ping from 127 0 0 1 127 0 0 1 4043 Explanation Callback works as follows...

Страница 173: ...544331123 i0 G 0774445016 26 03 10 39 44 391 Adding message SMSRawCallback A24 z I1050 r1 N 972544331123 i0 G 0774445016 to eventQueue for Client 1 Application ID 0 26 03 10 39 47 459 Creating session...

Страница 174: ...168 1 70 remoteNumber 8888 localNumber 750 remoteIP 192 168 1 70 26 03 10 52 16 534 debug Number is not in BlockedDDIs list 26 03 10 52 16 537 debug source DDI 750 allowed DDI 26 03 10 52 16 541 debu...

Страница 175: ...sources In our case the incoming call 192 168 1 70 is forwarded to LCR 6 As a regular LCR configuration it was separated for two groups incoming and termi nating 1st LCR Group accepts the incoming VoI...

Страница 176: ...s 8 Every incoming VoIP call that dialed the digits 750 will terminate at the destination party 192 168 1 67 9 When the destination party answers the call the HG prints the following to the Log provid...

Страница 177: ...een opens in the default browser 3 Click the warning bar at the top of the screen and from the dropdown menu click Allow Blocked Content Confirm your choice by clicking Yes at the confirmation message...

Страница 178: ...meters tool 1 Click the Windows Start button All Programs 2 From the Hypermedia program group select HGS Setup Parameters The HGS Setup Parameters logon screen is displayed 3 Enter your password and c...

Страница 179: ...reen is displayed in Edit mode Figure 160 HGS Setup Parameters Screen in Edit Mode 6 On a parameter line click Edit The Value field becomes editable Figure 161 Editable Value Field 7 Enter the new val...

Страница 180: ...From the Hypermedia program group select PRI Cause Conversion The PRI Cause Conversion logon screen opens in the default browser 3 Click the warning bar at the top of the screen and from the dropdown...

Страница 181: ...Edit A dropdown menu is displayed in the Convert to Value field Figure 163 Editable Value Field 6 Select a new value 7 Click Save 8 Click Submit 9 Two additional options exist Show Converted Displays...

Страница 182: ...rograms 2 From the Hypermedia program group select Server List The HyperGateway Servers Address List screen opens in the default browser 3 Click the warning bar at the top of the screen and from the d...

Страница 183: ...g Other Tools via the Server List Use the Gateway Server List to open Table 10 Tools Available from the Server List Clicking the name that appears in the Server Name column Opens the Hypermedia Manage...

Страница 184: ...No synchronization of PRI card Check connections to the PRI card at the PBX or line Verify that the PRI cable is connected Verify that all pins in the PRI connector are con nected in accordance to th...

Страница 185: ...r LED Red is blinking Ready LED Yel low does not light Card is either not inserted correctly or faulty Reinsert the card and restart the system If problem continues replace the card Table 14 MG Card D...

Страница 186: ...HMC Product Manual 176 Release 3 4 May 2010 Troubleshooting This page is intentionally blank...

Страница 187: ...entication for callback 138 B balancing SIMs 53 BCCH 51 BER 55 56 bi directional LCR resource 71 billing 67 blocking 82 calling line identification 49 DDI 112 SIM card 47 voip channels 133 voip lines...

Страница 188: ...voip 117 clear voip call 116 CLI allow duplicate 27 blocking 49 callback trigger 123 148 code 122 147 codecs 106 consoles CDR 156 log 157 service 167 counters 46 48 reset SIM 130 cyclic 66 105 D dBm 5...

Страница 189: ...163 callthrough 160 GSM to VoIP 159 LCR 164 VoIP to GSM 158 log console 157 M match condition 75 maximum length of call 50 media card fallback 27 media connections cellular 32 LCR 61 63 voip 100 mobil...

Страница 190: ...voip 104 setup parameters 168 SIM automatic management 47 balance 53 counters 46 48 locks 44 minutes until blocked 47 minutes until switched 47 multi set 132 reset counters 130 schedule switch per sl...

Страница 191: ...010 code 122 147 ID 122 147 mobile number 122 147 user input indication 106 USSD 53 V voip to line cyclic channel allocation 105 volume settings 31 VPN 123 124 147 W waiting for answer timeout 50 web...

Страница 192: ...HMC Product Manual 182 Release 3 4 May 2010...

Отзывы: