14
LP-171 Rev. 3.3.15
Failure to follow all instructions can result in flue gas spillage and carbon monoxide emissions, causing severe personal injury or death.
When removing an existing heater, follow the steps below with each appliance remaining connected to the common venting system in
operation, while other appliances remaining connected to common venting system are not operating.
1. Seal any unused openings in the common venting system.
2. Visually inspect the venting system for proper size and horizontal pitch to
determine if there is blockage, leakage, corrosion or other deficiencies that could
cause an unsafe condition.
3. If practical, close all building doors, windows and all doors between the space
in which the appliance remains connected to the common venting system located
and other spaces in the building. Turn on clothes dryers and any appliances not
connected to the common venting system. Turn on any exhaust fans, such as
range hoods and bathroom exhausts, at maximum speed. Do not operate a
summer exhaust fan. Close all fireplace dampers.
4. Place in operation the appliance being inspected. Follow the lighting
instructions. Adjust the thermostat so the appliance will operate continuously.
5. Test for spillage at the draft hood relief opening after 5 minutes of main burner
operation. Use the flame of a match or candle or smoke from a cigarette.
6. After it has been determined that each appliance remaining connected to
common venting system properly vents when tested as outlined, return doors, windows, exhaust fans, fireplace dampers and any other
gas burning appliance to their previous condition of use.
7. Any improper operation of the common venting system should be corrected to conform to the National Fuel Gas Code, ANSI Z223.1.
When resizing any portion of the common venting system, the system should approach the minimum size as determined using the
appropriate tables in Appendix G in the National Fuel Gas Code, ANSI Z 223.1.
PART 4 – PREPARE HEATER
UNCRATING HEATER
– Any claims for damage or shortage in shipment must be filed immediately against the transportation company
by the consignee.
COLD WEATHER HANDLING
– If the heater has been stored in a very cold location (BELOW 0
o
F) before installation, handle with care
until the plastic components come to room temperature.
A. REMOVE HEATER FROM BOX
The heater is easy to handle. Care must be taken to place it in a safe location prior to installation to prevent damage to the bottom
mechanical connections.
B. WALL MOUNTING CONSIDERATIONS
These heaters are wall mounted. Use only the wall mounting instructions included in installation envelope.
The wall must be capable of carrying the weight of the heater and its related components. The weights of the heaters are
approximately:
MC-50
– 71 lbs MC-80 – 74 lbs
MC-99
– 84 lbs MC-120 – 84 lbs
Failure to comply with above could result in substantial property damage, severe personal injury, or death.
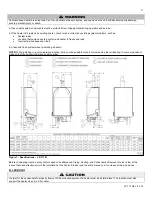
Figure 3
Содержание MC120
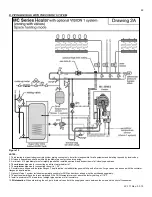
Страница 21: ...21 LP 171 Rev 3 3 15 M PIPING DETAILS Figure 5 ...
Страница 53: ...53 LP 171 Rev 3 3 15 Figure 30 ...
Страница 71: ...71 LP 171 Rev 3 3 15 Figure 34 ...
Страница 72: ...72 LP 171 Rev 3 3 15 Figure 35 ...
Страница 73: ...73 LP 171 Rev 3 3 15 Figure 36 ...
Страница 76: ...76 LP 171 Rev 3 3 15 ...
Страница 77: ...77 LP 171 Rev 3 3 15 ...
Страница 78: ...78 LP 171 Rev 3 3 15 MAINTENANCE NOTES ...


