Hardware options installation 38
11.
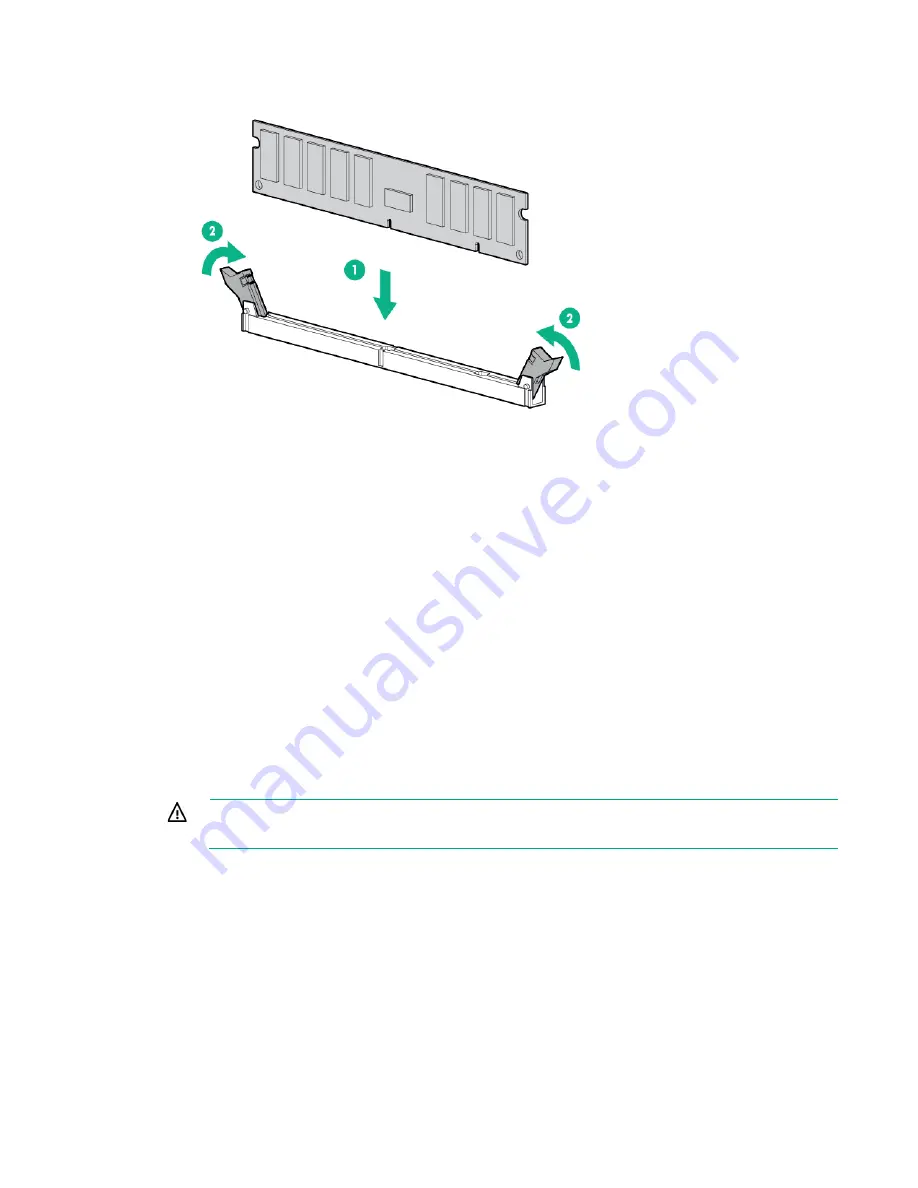
Install the DIMM.
12.
Install the processor air baffle.
13.
Install the GPU cage
14.
Install the SFF hot-plug drive cage.
15.
Install the shipping brackets and shipping plates.
16.
Install the server into the chassis ("
Installing the server into the chassis
" on page
17.
Power up the server (on page
After installing the DIMMs, to configure memory protection mode, use RBSU ("
Hot-plug hard drive guidelines
When adding hard drives to the server, observe the following general guidelines:
•
The system automatically sets all device numbers.
•
If only one hard drive is used, install it in the bay with the lowest device number.
•
Drives should be the same capacity to provide the greatest storage space efficiency when drives are
grouped together into the same drive array.
WARNING:
To reduce the risk of injury from electric shock, do not remove more than one drive
carrier at a time.
Содержание ProLiant SL270s Gen8
Страница 16: ...Operations 16 5 Remove the shipping plates 6 Remove the hard drive cage...
Страница 17: ...Operations 17 7 Loosen screws securing the GPU shelf 8 Remove the GPU shelf...
Страница 18: ...Operations 18 9 Remove the processor air baffle To replace the component reverse the removal procedure...
Страница 36: ...Hardware options installation 36 5 Remove the shipping plates 6 Remove the hard drive cage...
Страница 42: ...Hardware options installation 42 6 Remove the hard drive cage 7 Loosen screws securing the GPU shelf...
Страница 45: ...Hardware options installation 45 7 Remove the hard drive cage 8 Loosen screws securing the GPU shelf...
Страница 47: ...Hardware options installation 47 o Left node o Right node...
Страница 49: ...Hardware options installation 49 5 Remove the shipping plates 6 Remove the hard drive cage...
Страница 50: ...Hardware options installation 50 7 Loosen screws securing the GPU shelf 8 Remove the GPU shelf...
Страница 53: ...Hardware options installation 53 4 Remove all shipping brackets 5 Remove the shipping plates...
Страница 54: ...Hardware options installation 54 6 Remove the hard drive cage 7 Loosen screws securing the GPU shelf...
Страница 55: ...Hardware options installation 55 8 Remove the GPU shelf 9 Remove the PCI cage...
Страница 59: ...Hardware options installation 59 5 Remove the shipping plates 6 Remove the hard drive cage...
Страница 60: ...Hardware options installation 60 7 Loosen screws securing the GPU shelf 8 Remove the GPU shelf...
Страница 61: ...Hardware options installation 61 9 Remove the PCI cage 10 Install the riser card into the PCI cage...
Страница 67: ...Hardware options installation 67 6 Remove the hard drive cage 7 Loosen screws securing the GPU shelf...
Страница 72: ...Cabling 72 Right node Capacitor pack to FBWC on controller card cabling o Left node...
Страница 73: ...Cabling 73 o Right node...
Страница 97: ...Support and other resources 97...
Страница 98: ...Support and other resources 98...
Страница 106: ...Index 106 V ventilation 19 W warnings 21 website Hewlett Packard Enterprise 91...


