


Installation
Connecting the Jukebox as the Only Peripheral
Chapter 2
2-9
In
stallat
io
n
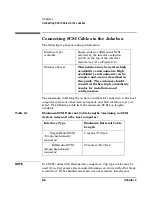
3. Select either the single-ended or differential SCSI interface using the
SCSI interface selection switch on the top of the interface assembly
(under the left access cover (see “6” on Figure 2-2).
4. Connect a cable between the host computer and one of the jukebox
SCSI connectors of the selected interface type.
The SCSI cable may be connected to either of the two ports of an
interface type.
NOTE
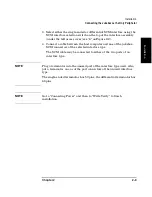
Plug a terminator into the unused port of the interface type used. Also,
put a terminator on
one
of the port connectors of the unused interface
type. .
The single-ended terminator has 50 pins, the differential terminator has
68 pins
NOTE
Go to “Connecting Power” and then to “Write Verify” to finish
installation.
Содержание Surestore 160ex - Optical Jukebox
Страница 10: ...TOC x Contents ...
Страница 14: ...Tables TOC xiv ...
Страница 15: ...Chapter 1 1 1 Product Information 1 Product Information ...
Страница 26: ...Product Information Environmental Specifications Chapter 1 1 12 ...
Страница 27: ...Chapter 2 2 1 Installation 2 Installation ...
Страница 30: ...Installation Identifying Controls and Features Chapter 2 2 4 Figure 2 2 Left Side ...
Страница 47: ...Chapter 3 3 1 Operation and Configuration 3 Operation and Configuration ...
Страница 50: ...Operation and Configuration Operating the Control Panel Chapter 3 3 4 Figure 3 1 The Jukebox Control Panel ...
Страница 52: ...Operation and Configuration Operating the Control Panel Chapter 3 3 6 Figure 3 2 Jukebox Display Menu Tree ...
Страница 60: ...Operation and Configuration Changing the Administration Menu Password Chapter 3 3 14 flash ROM ...
Страница 75: ...Chapter 4 4 1 Troubleshooting and Diagnostics 4 Troubleshooting and Diagnostics ...
Страница 122: ...Troubleshooting and Diagnostics Running an Internal Test Chapter 4 4 48 ...
Страница 123: ...Chapter 5 5 1 Removal and Replacement 5 Removal and Replacement ...
Страница 129: ...Removal and Replacement Service Access Chapter 5 5 7 Removal and Replacement Front Panel ...
Страница 136: ...Removal and Replacement Replacing the Control Panel Assembly Chapter 5 5 14 oriented incorrectly ...
Страница 188: ...Removal and Replacement Replaceable Parts Chapter 5 5 66 Figure 5 43 Exploded View 1 of 3 ...
Страница 189: ...Removal and Replacement Replaceable Parts Chapter 5 5 67 Removal and Replacement Figure 5 44 Exploded View 2 of 3 ...
Страница 190: ...Removal and Replacement Replaceable Parts Chapter 5 5 68 Figure 5 45 Exploded View 3 of 3 ...
Страница 191: ...Removal and Replacement Replaceable Parts Chapter 5 5 69 Removal and Replacement Figure 5 46 Power Cabling ...
Страница 192: ...Removal and Replacement Replaceable Parts Chapter 5 5 70 Figure 5 47 Rope and Pulley System ...
Страница 193: ...Chapter 6 6 1 Theory of Operation 6 Theory of Operation ...
Страница 218: ...Theory of Operation Optical Drive Mechanism Chapter 6 6 26 ...
Страница 219: ...Appendix A A 1 Safety and Regulatory A Safety and Regulatory Information ...