Removal and replacement procedures 36
b.
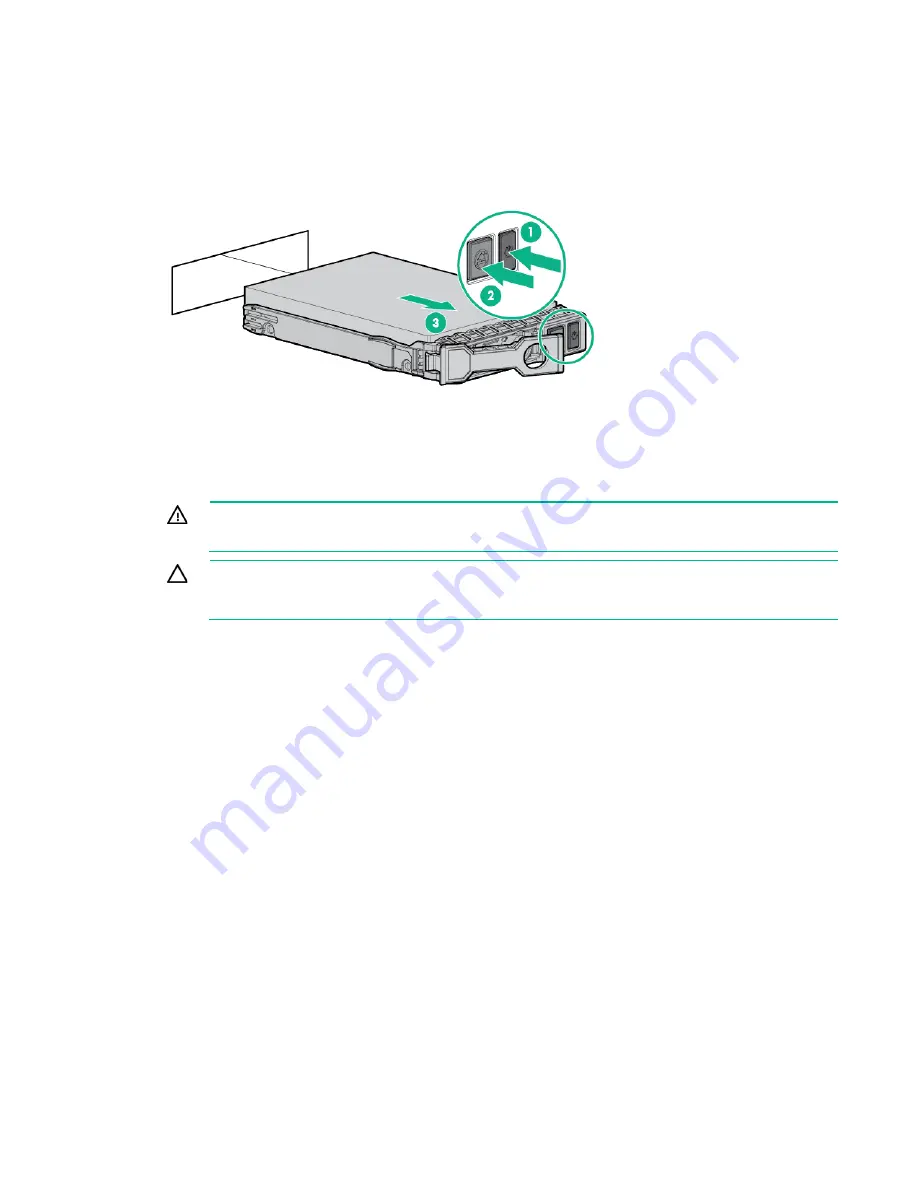
The Do Not Remove button will illuminate and flash. Do not depress the button while it is
illuminated.
c.
Wait until the flashing stops and the icon on the button is no longer illuminated.
d.
Depress the Do Not remove button to release the release lever.
e.
Pull the release lever to disengage the drive from the backplane and slide the drive out of the
drive bay.
To replace the drive, slide the drive into the bay until it is fully seated, and then close the release lever to
lock the drive in the bay.
M.2 SSD enablement board assembly
WARNING:
To reduce the risk of personal injury from hot surfaces, allow the drives, power
input modules, and the internal system components to cool before touching them.
CAUTION:
To prevent damage to electrical components, take the appropriate anti-static
precautions before beginning any system installation. Improper grounding can cause
electrostatic discharge.
To remove the component:
1.
Back up all server data.
2.
Do one of the following:
o
For tower models, open and remove the tower bezel ("
o
For rack models, if installed, remove the security bezel ("
Remove the security bezel (optional)
on page
3.
Power down the server (on page
4.
Remove all power:
a.
Disconnect each power cord from the power source.
b.
Disconnect each power cord from the server.
5.
Do one of the following:
o
For tower models, place the server on a flat, level surface with the access panel facing up.
o
For rack models, extend the server from the rack (on page
6.
Remove the access panel.
7.
Remove the air baffle (on page
8.
Remove the M.2 SSD enablement board assembly:
Содержание ProLiant ML350 Gen9
Страница 5: ...Contents 5 Index 123 ...
Страница 13: ...Customer self repair 13 ...
Страница 14: ...Customer self repair 14 ...
Страница 15: ...Customer self repair 15 ...
Страница 18: ...Illustrated parts catalog 18 ...
Страница 64: ...Removal and replacement procedures 64 LFF configuration SFF configuration ...
Страница 91: ...Component identification 91 o Rack orientation 24 LFF drives o Tower orientation ...
Страница 104: ...Cabling 104 Storage controller installed in slot 1 to 4 Storage controller installed in slot 6 to 9 ...
Страница 105: ...Cabling 105 HPE Smart Storage Battery cabling Power supply backplane cabling GPU power cabling ...
Страница 109: ...Cabling 109 Embedded SATA cabling LFF configuration SFF configuration ...
Страница 112: ...Cabling 112 o SFF configuration o LFF configuration SAS Expander cabling One SAS Expander ...
Страница 113: ...Cabling 113 o LFF configuration o SFF configuration ...
Страница 114: ...Cabling 114 Two SAS Expanders Express bay cabling Express bay bridge card installed in PCIe slot 3 ...


