Setup 40
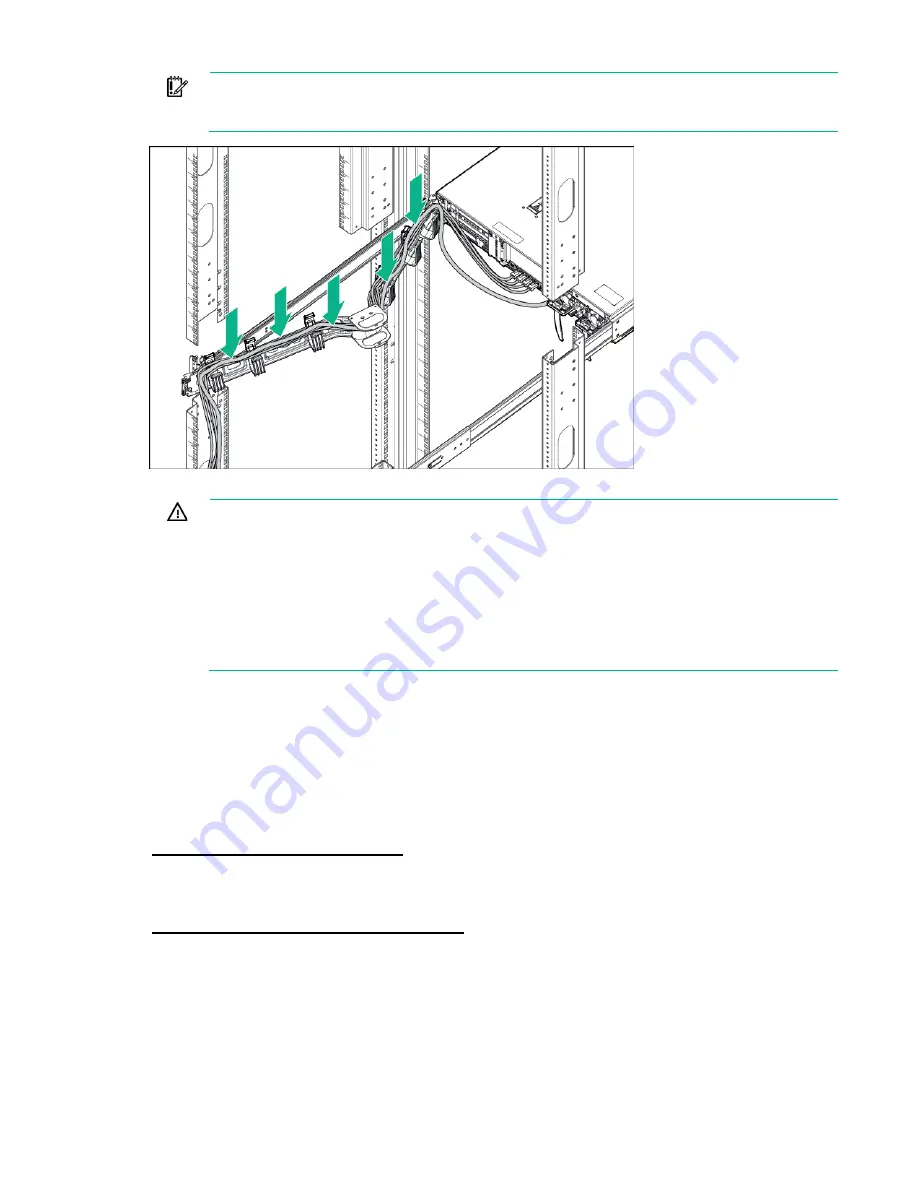
IMPORTANT:
When using cable management arm components, be sure to leave enough
slack in each of the cables to prevent damage to the cables when the server is extended from
the rack.
6.
Connect the power cord to the AC power source.
WARNING:
To reduce the risk of electric shock or damage to the equipment:
•
Do not disable the power cord grounding plug. The grounding plug is an important safety
feature.
•
Plug the power cord into a grounded (earthed) electrical outlet that is easily accessible at all
times.
•
Unplug the power cord from the power supply to disconnect power to the equipment.
•
Do not route the power cord where it can be walked on or pinched by items placed against
it. Pay particular attention to the plug, electrical outlet, and the point where the cord extends
from the server.
Installing the operating system
This ProLiant server does not ship with provisioning media. Everything needed to manage and install the
system software and firmware is preloaded on the server.
To operate properly, the server must have a supported operating system. Attempting to run an
unsupported operating system can cause serious and unpredictable results. For the latest information on
operating system support, see the Hewlett Packard Enterprise website
http://www.hpe.com/info/supportos
Failure to observe UEFI requirements for ProLiant Gen9 servers can result in errors installing the
operating system, failure to recognize boot media, and other boot failures. For more information on these
requirements, see the
HPE UEFI Requirements
on the Hewlett Packard Enterprise website
http://www.hpe.com/info/ProLiantUEFI/docs
To install an operating system on the server, use one of the following methods:
•
Intelligent Provisioning—For single-server deployment, updating, and provisioning capabilities.
To install an operating system on the server with Intelligent Provisioning (local or remote):
a.
Connect the Ethernet cable between the network connector on the server and a network jack.
b.
Press the Power On/Standby button.
Содержание ProLiant DL380 Gen9
Страница 34: ...Operations 34 5 Install the air baffle ...
Страница 90: ...Hardware options installation 90 o Connected to a PCI expansion board ...
Страница 97: ...Hardware options installation 97 o Connected to onboard SATA connectors o Connected to a PCI expansion board ...
Страница 102: ...Hardware options installation 102 o Connected to a PCI expansion board ...
Страница 104: ...Hardware options installation 104 o Secondary riser cage o PCI blank ...
Страница 105: ...Hardware options installation 105 6 Remove the rear wall blank 7 Install the drive cage compatible rear wall ...
Страница 120: ...Hardware options installation 120 o H240 or P440 o P840 8 Install the riser board assembly o H240 or P440 ...
Страница 128: ...Hardware options installation 128 o 24SFF drive backplanes Group C SAS cables ...
Страница 142: ...Cabling 142 o Connect to the x2 SATA port and optical disk drive connector o Connect to a PCI expansion board ...
Страница 143: ...Cabling 143 o Connect to a PCI expansion board and the 12 LFF drive backplane o Connect to an HPE 12G SAS Expander Card ...
Страница 145: ...Cabling 145 o Connect to a PCI expansion board o Connect to a PCI expansion board and the 12 LFF drive backplane ...
Страница 148: ...Cabling 148 o Connect to a PCI expansion board ...
Страница 149: ...Cabling 149 o Connect to an HPE 12G SAS Expander Card Bay 2 installation ...
Страница 152: ...Cabling 152 8SFF drive cage installed in bay 1 Connect using the 8SFF drive cage power cable 776399 001 ...
Страница 154: ...Cabling 154 Drive bay 1 is empty Connect using the NVMe power cable 776392 001 ...
Страница 167: ...Cabling 167 12LFF configuration Connect the two 12LFF Mini SAS cables to the P840ar controller ...
Страница 171: ...Cabling 171 x4 SATA connector Connect the 2 SFF drive bay power cable ...
Страница 173: ...Cabling 173 Secondary PCI riser cage ...
Страница 204: ...Support and other resources 204 ...
Страница 205: ...Support and other resources 205 ...


