Hardware options installation 74
CAUTION:
Unlike traditional storage devices, NVDIMMs are fully integrated in with the
ProLiant server. Data loss can occur when system components, such as the processor or HPE
Smart Storage Battery fails. HPE Smart Storage battery is a critical component required to
perform the backup functionality of NVDIMM. It is important to take action when HPE Smart
Storage Battery related failures occur. Always follow best practices for ensuring data
protection.
1.
Power down the server (on page
2.
Remove all power:
a.
Disconnect each power cord from the power source.
b.
Disconnect each power cord from the server.
3.
Do one of the following:
o
Extend the server from the rack (on page
o
Remove the server from the rack (on page
4.
Remove the access panel (on page
5.
Remove the air baffle (on page
6.
Locate any NVDIMM already installed in the server.
7.
Verify that all LEDs on any installed NVDIMMs are off. For more information on NVDIMM LEDs, see
"NVDIMM LEDs (on page
)."
8.
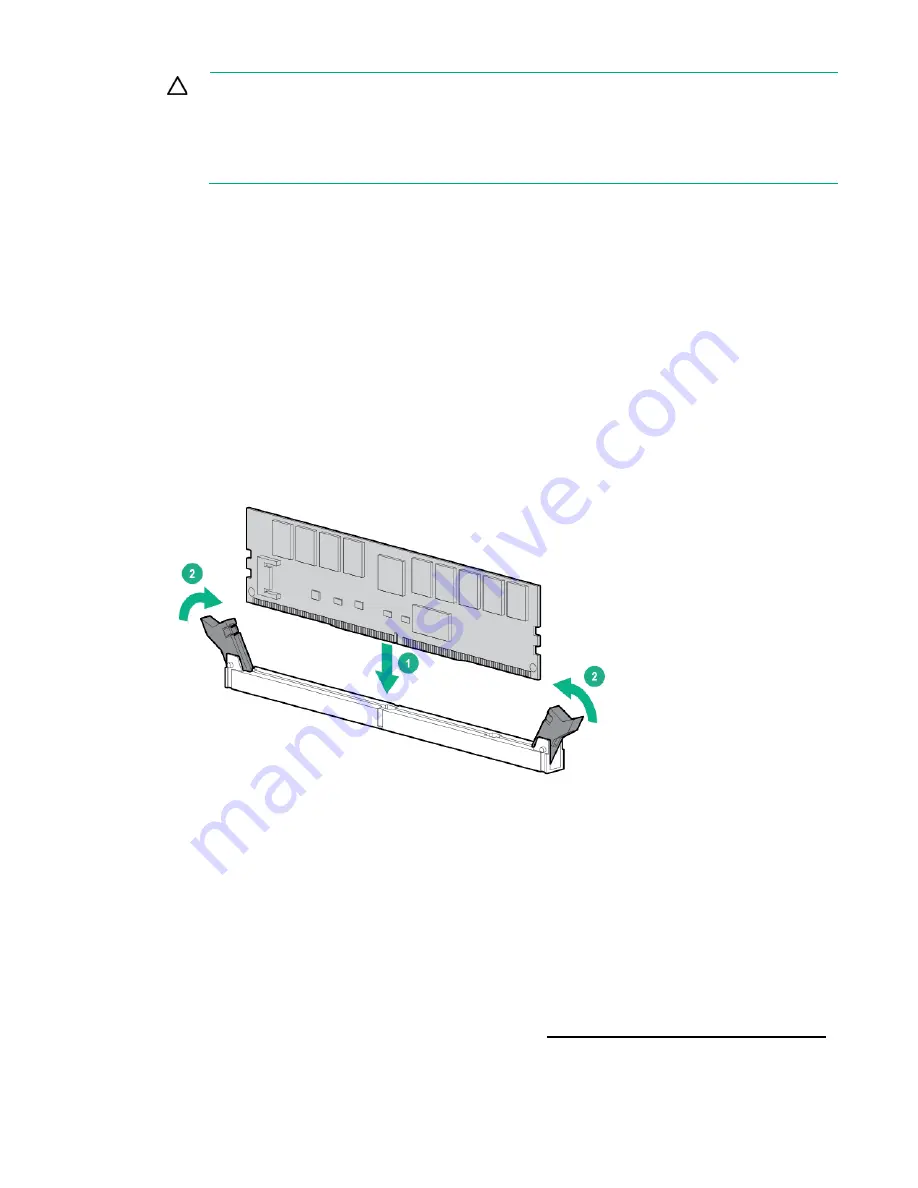
Install the NVDIMM.
9.
Install the HPE Smart Storage Battery ("
10.
Install the air baffle (on page
11.
Install the access panel (on page
12.
Do one of the following:
o
Slide the server into the rack.
o
Install the server into the rack ("
Installing the server into the rack
13.
Connect each power cord to the server.
14.
Connect each power cord to the power source.
15.
Power up the server ("
16.
Sanitize the NVDIMM-Ns, if required. For more information, see the HPE 8GB NVDIMM User Guide
on the Hewlett Packard Enterprise Information Library (
http://www.hpe.com/info/NVDIMM-docs
Содержание ProLiant DL380 Gen9
Страница 34: ...Operations 34 5 Install the air baffle ...
Страница 90: ...Hardware options installation 90 o Connected to a PCI expansion board ...
Страница 97: ...Hardware options installation 97 o Connected to onboard SATA connectors o Connected to a PCI expansion board ...
Страница 102: ...Hardware options installation 102 o Connected to a PCI expansion board ...
Страница 104: ...Hardware options installation 104 o Secondary riser cage o PCI blank ...
Страница 105: ...Hardware options installation 105 6 Remove the rear wall blank 7 Install the drive cage compatible rear wall ...
Страница 120: ...Hardware options installation 120 o H240 or P440 o P840 8 Install the riser board assembly o H240 or P440 ...
Страница 128: ...Hardware options installation 128 o 24SFF drive backplanes Group C SAS cables ...
Страница 142: ...Cabling 142 o Connect to the x2 SATA port and optical disk drive connector o Connect to a PCI expansion board ...
Страница 143: ...Cabling 143 o Connect to a PCI expansion board and the 12 LFF drive backplane o Connect to an HPE 12G SAS Expander Card ...
Страница 145: ...Cabling 145 o Connect to a PCI expansion board o Connect to a PCI expansion board and the 12 LFF drive backplane ...
Страница 148: ...Cabling 148 o Connect to a PCI expansion board ...
Страница 149: ...Cabling 149 o Connect to an HPE 12G SAS Expander Card Bay 2 installation ...
Страница 152: ...Cabling 152 8SFF drive cage installed in bay 1 Connect using the 8SFF drive cage power cable 776399 001 ...
Страница 154: ...Cabling 154 Drive bay 1 is empty Connect using the NVMe power cable 776392 001 ...
Страница 167: ...Cabling 167 12LFF configuration Connect the two 12LFF Mini SAS cables to the P840ar controller ...
Страница 171: ...Cabling 171 x4 SATA connector Connect the 2 SFF drive bay power cable ...
Страница 173: ...Cabling 173 Secondary PCI riser cage ...
Страница 204: ...Support and other resources 204 ...
Страница 205: ...Support and other resources 205 ...


