Upgrading a 20-Slot Library to 40 or 60 Slots
Upgrading 20-Slot Libraries to 40 Slots
Chapter 2
2-7
U
pgrad
ing 2
0
-S
lo
t
Li
brari
e
s
5.
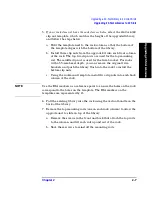
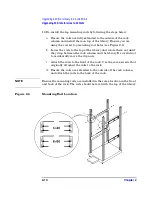
If your rack does not have threaded screw holes,
select the 4/40 or 6/60
clip nut template, which matches the height of the upgraded library,
and follow the steps below:
a. Hold the template next to the rack column so that the bottom of
the template aligns with the bottom of the library.
b. Install three clip nuts from the upgrade kit into each front column
of the rack. The top two clip nuts are used for the top mounting
rail. The middle clip nut is used for the trim bracket. For racks
with a 55-mm bezel depth, you can remove the original trim
brackets and push the library flush into the rack to install the
bottom clip nuts.
c. Using the rackmount template, install two clip nuts into each back
column of the rack.
NOTE
Use the EIA markers as a reference point to ensure the holes on the rack
correspond to the holes on the template. The EIA markers on the
templates are represented by #>.
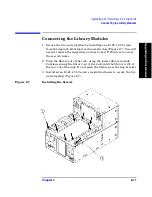
6. Pull the existing library into the rack using the vertical handle on the
back of the library.
7. Remove the top mounting rails (one on each rack column) to allow the
upgrade unit to slide on top of the library.
a. Remove the screws in the front and back that attach the top rails
to the column, and lift each rail up and out of the rack.
b. Save these screws to reinstall the mounting rails.
Содержание ProBook 440
Страница 7: ...Chapter 1 1 1 Preparing for the Upgrade 1 Preparing a 2 20 and 4 40 Library for the Upgrade ...
Страница 17: ...Chapter 2 2 1 Upgrading 20 Slot Libraries 2 Upgrading a 20 Slot Library to 40 or 60 Slots ...
Страница 39: ...Chapter 3 3 1 Upgrading 40 Slot Libraries 3 Upgrading a 40 Slot Library to 60 Slots ...
Страница 56: ...Upgrading a 40 Slot Library to 60 Slots Verifying the Connection Chapter 3 3 18 ...
Страница 57: ...Chapter 4 4 1 Upgrading Library 6 140 4 Upgrading Library Model 6 140 ...

