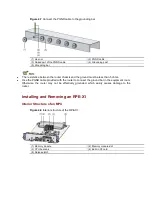
Figure 4-17
Fasten the captive screws on the RSE-X1
Step5
Turn on the power switch of the router if the router is powered off.
Step6
After the RSE-X1 is powered on, the RUN LED (green) flashes fast (at 8 Hz). It flashes slowly
(at 1 Hz) after the RSE-X1 application is loaded. This means that the RSE-X1 runs normally.
The RSE-X1s of the device are hot-swappable.
When two RSE-X1s are installed on device, the ACT LED (green) is on.
For more information about the RSE-X1 LEDs, refer to Table 1-11 in Chapter 1 “Router
Overview.”
Removing an RSE-X1
1)
For a device configured with only one RSE-X1, you need to power off the device before
removing the RSE-X1. Online removal of the RSE-X1 may cause damages to the RSE-X1,
FIPs, and HIMs/MIMs.
2)
For a device configured with two RSE-X1s, you can remove one of the RSE-X1s when both of
them are operating normally.
To remove the active RSE-X1, you are recommended to use the
slave switchover
command
to implement manual active/standby switchover in system view of the active RSE-X1. For details
about this command, refer to
HA
in the
System Volume
of
HP SR6600 Routers User Manual
.
To remove the standby RSE-X1, follow steps mentioned below.
Follow these steps to remove an RSE-X1:
Step1
Face the front panel of the router.
Step2
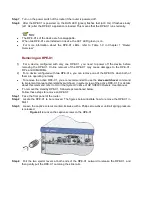
Locate the RSE-X1 to be removed. The figures below illustrate how to remove the RSE-X1 in
Slot 5.
Step3
Loosen the captive screws counterclockwise with a Philips screwdriver until all spring pressure
is released.


