


76
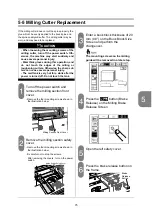
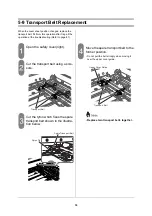
5-5 Milling Cutter Replacement
Remove the four mounting screws
on the milling cutter.
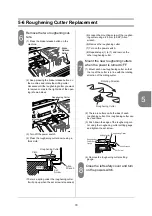
(1) Keep pressing the brake release button on
the machine and rotating milling cutter clock-
wise until a mounting screw of the milling cut-
ter moves into the center of the 20 mm (0.8”)
gap.
(2) Turn off the power switch.
(3) Remove the mounting screw from the mill-
ing cutter using the supplied hexagon Allen
wrench. The screw will be very tight.
(4) Turn on the power switch.
(5) Repeat steps (1) to (4) to remove all four
mounting screws.
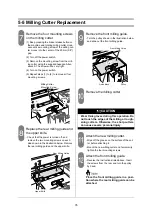
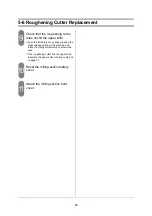
Replace the rear milling guide and
the upper knife.
- Check that the power is turned off, and
remove the two mounting screws on each
side shown in the illustration below. Remove
the rear milling guide and the upper knife.
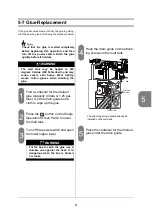
Remove the front milling guide.
- Turn the pulley shown in the illustration below
and slide out the front milling guide.
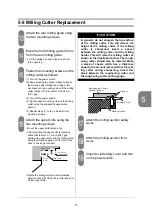
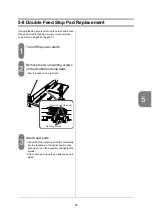
Remove the milling cutter.
Attach the new milling cutter.
- Wipe off the grease on the surface of the cut-
ter before attaching it.
- Mount the new milling cutter and temporarily
tighten the four mounting screws.
Attach the front milling guide.
- Reverse the instructions listed above. Insert
the screws from the rear and turn the pulley
by hand.
Place the front milling guide in a posi-
tion where the rear milling guide can be
attached.
Loosened
Milling Cutter
Mounting Screw
Clockwise
Upper Knife
Rear Milling Guide
CAUTION
Wear thick gloves during this operation. Do
not touch the edges of the milling or rough-
ening cutters. Otherwise, the sharp cutters
can cause severe personal injury.
Guide Block
Pulley
Front Milling Guide
Содержание BQ-270
Страница 60: ...54...
Страница 102: ...96...
Страница 120: ...114 9 4 Option Extractor VS 270 1 pc Weekly Timer 1 pc...