background image

M O N I T O R I N G   A   S I T E

Video Control

60


MAXPRO


NVR


Operator’s


Guide

4

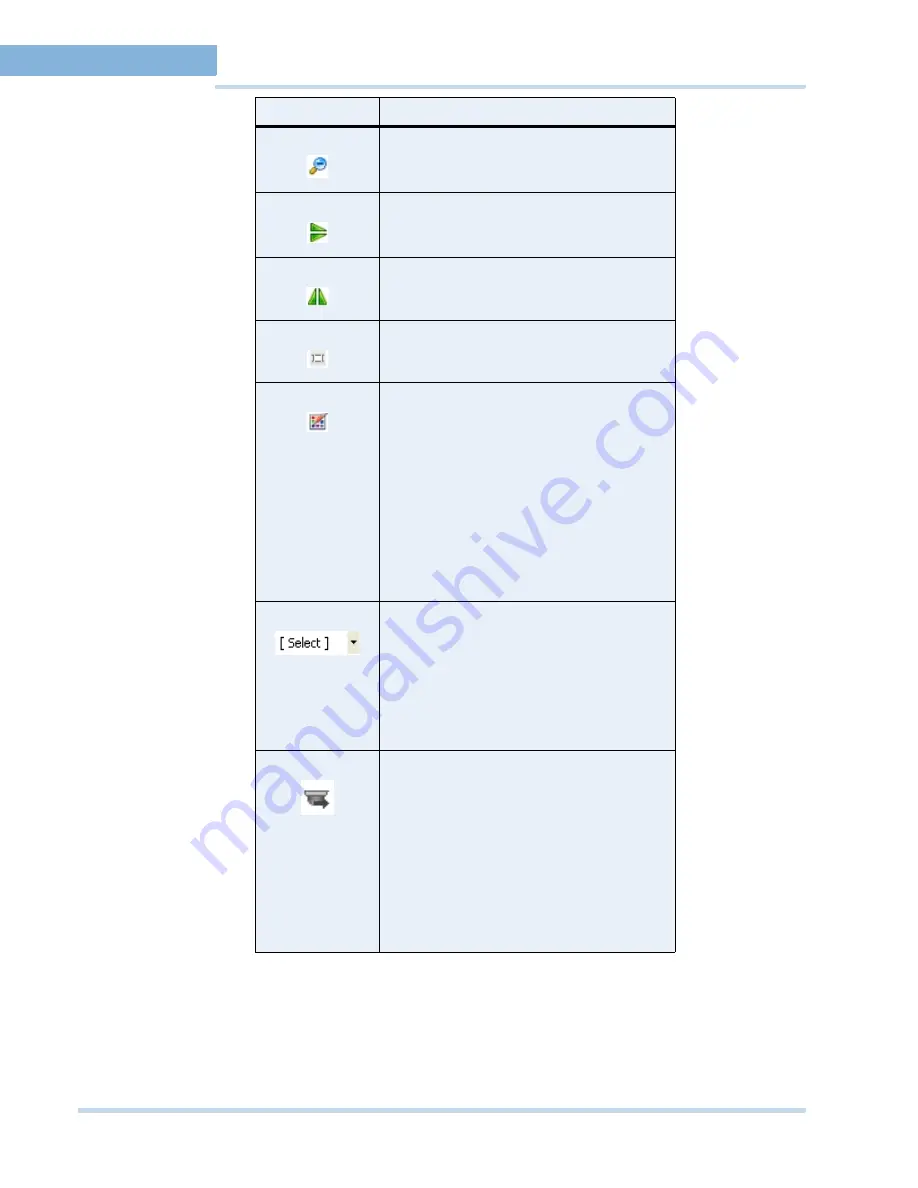
zoom out of the video.

flip the video display. Alternatively, you can 
click this icon in the toolbar on the top of the 
salvo layout.

view the mirror image of the video display. 
Alternatively, you can click this icon in the 
toolbar on top of the salvo layout.

reset the digital PTZ effects on the video 
display

display the color correction window. Move 
the sliders to set the brightness, contrast, 
hue, and saturation. You can select the Blur 
check box to blur the video display and the 
Sharpness check box to increase the image 
sharpness or clarity.

Alternatively, you can click this icon in the 
toolbar.

Note: 

Select the

 Apply color changes

 check 

box to save the settings. Clicking the 

Reset


button sets the color correction settings to 
default values. 

displays a drop-down list of presets. You can 
select a preset for the camera. 

Note: 

The drop-down list is disabled when 

digital PTZ is enabled. You need to disable 
the digital PTZ feature to select a preset. See 

Panning, tilting, and zooming 

on page 

61

 for 

information on enabling and disabling the 
digital PTZ feature.

move a preset camera position. 

To move a preset, select a preset number 
from the drop-down list and then click the 
icon. The camera position (pan, tilt, and 
zoom) is moved to the selected preset. 

Note: 

The icon is disabled when digital PTZ 

is enabled. You need to disable the digital 
PTZ feature to move a preset. See 

Panning, 

tilting, and zooming 

on page 

61

 for 

information on enabling and disabling the 
digital PTZ feature.

Icon 

Click to...

Содержание MAXPRO NVR SE

Страница 1: ...Issue 1 Document 800 09356V1 Rev A 10 11 MAXPRO NVR Operator s Guide ...

Страница 2: ...This page is intentionally left blank ...

Страница 3: ...cription 1 0 July 13 2011 New document 1 1 October 13 2011 Added the following Changed the CONFIGURATION screen on p 13 Changed the storage capacity of MAXPRO NVR SE on p 9 Added the PAL version of MAXPRO NVR SE system diagram ...

Страница 4: ...This page is intentionally left blank ...

Страница 5: ...profile 22 Setting the default profile 22 Modifying a profile 22 Deleting a profile 23 Logging off 23 Closing the MAXPRO NVR user interface 23 Familiarizing with the MAXPRO NVR user interface 23 Viewer tab 24 Configurator tab 28 Search tab 29 Report tab 30 Setting preferences 30 Settings for video rendering 30 Pausing the video rendering 31 Settings for alarm preview pane 31 Setting the alarm thre...

Страница 6: ...Video 51 Viewing live video 51 Context menu options 52 Playing a sequence 52 Video Recording and Viewing 53 Video recording 53 About the recording settings for MAXPRO NVR 53 Viewing recorded video 53 Timeline 54 Playing recorded video using the timeline 54 Viewing thumbnails 55 Player controls 55 Context menu options 56 Playing recorded video using mark in and mark out points in the timeline 57 Cr...

Страница 7: ...Images 64 Viewing options for images 65 Viewing video related to an image 65 Clips 65 Deleting images and clips 65 Alarms 65 Acknowledging alarms 66 Context menu options 67 Clearing acknowledged alarms 67 Context menu options 68 Searching For Recorded Video In MAXPRO NVR 71 Generating Reports 73 Overview 73 Generating The Event History Report 73 Generating The Operator Log Report 74 Viewing Printi...

Страница 8: ...M A X P R O N V R Table of Contents 8 This page is intentionally left blank ...

Страница 9: ...VR as a Single box solution offers the following features Comes bundled with the software hardware and licenses Connects up to 16 IP cameras in MAXPRO NVR XE Xpress Edition and 32 IP cameras in MAXPRO NVR SE Standard Edition including support for IP High definition cameras Supports Honeywell Performance Series IP EQUIP Series cameras including HD PSIA cameras Please visit the following URL http ww...

Страница 10: ...uage support French German Russian English Italian and Spanish Honeywell s patented Video Surround feature simplifies the process of tracking subjects through a set of surrounding cameras Create save and name salvos under My Salvos or Shared Salvos IP PTZ control and digital zoom on fixed cameras Fast search by date time timeline time jump bookmarks preview film strip view and events Event History...

Страница 11: ...ollowing figure illustrates the PAL version of MAXPRO NVR SE Standard Edition system digram MAXPRO NVR SE SYSTEM DIAGRAM NTSC VERSION The following figure illustrates the NTSC version of MAXPRO NVR SE Standard Edition system digram HCD554IP HD3MDIP HD4DIP MAXPRO NVR SE Client Workstation DVI VGA DVI VGA CAT5e CAT5e CAT5e CAT5e CAT5e Network Switch PoE ...

Страница 12: ...A BO UT M A XP R O N VR Introducing MAXPRO NVR 12 MAXPRO NVR Operator s Guide ...

Страница 13: ... A BO UT M A XP R O N VR Introducing MAXPRO NVR MAXPRO NVR Operator s Guide 13 MAXPRO NVR XE SYSTEM DIAGRAM The following figure illustrates the MAXPRO NVR XE Xpress Edition system diagram ...

Страница 14: ...A BO UT M A XP R O N VR Introducing MAXPRO NVR 14 MAXPRO NVR Operator s Guide This page is intentionally left blank ...

Страница 15: ...ick the Language option and then select the required language from the drop down list The supported languages are French German Russian Italian Spanish and English The default language is English US English if you want to change the default settings select YES or NO corresponding to the fields listed in the following table or click STEP 2 to accept the default settings and proceed to the CAMERA DI...

Страница 16: ...ynchronizes any change in the camera s IP address For example if a camera is restarted and a new IP is associated to the camera then the MAXPRO NVR software automatically detects the changed IP address and synchronizes it to the camera so that live viewing and recording is not disturbed Auto Add Discovered Camera Any newly connected camera is automatically discovered and added to the camera s list...

Страница 17: ... the settings that you have saved on the CONFIGURATION page are listed along with the discovered cameras As each connected camera is discovered notice the message that displays on the lower right of your monitor it is added to the list This list disappears as the cameras are added to the MAXPRO NVR software ...

Страница 18: ...oxes corresponding to a camera from the discovered list and click ADD to add the cameras Click BACK to return to the CONFIGURATION page or Click DONE when the number of cameras discovered equals the number of connected cameras 3 Step 3 The INSTALLATION page displays Click LAUNCH The MAXPRO NVR Log On dialog displays Please wait while the system logs you on automatically as a Windows Logged In User...

Страница 19: ... varies with MAXPRO NVR SE Standard Edition or MAXPRO NVR XE Xpress Edition You can view the version and license information of MAXPRO NVR from the User menu 1 Click the User menu the name of the currently logged in user is displayed as the User menu on the top right of each screen The User menu options appear 2 Click About The version and license information of MAXPRO NVR is displayed ...

Страница 20: ...L I C E N S I N G I N F O R M A T I O N Viewing The Version and License Information of MAXPRO NVR 20 MAXPRO NVR Operator s Guide 1 This page is intentionally left blank ...

Страница 21: ...R 1 Double click on the desktop The Log On dialog box appears Or Click Start Programs Honeywell MAXPRO NVR The LogOn dialog box appears 2 Click the Language option and then select the required language from the drop down list The supported languages are French German Russian Italian Spanish and English The default language is English 3 Type your User Name The default user name is Admin 4 Type your...

Страница 22: ...fault in the server settings dialog box to set the profile as the default profile SETTING THE DEFAULT PROFILE To set the default profile 1 Select the profile you want to set as default before logging on to MAXPRO NVR 2 In the User menu the name of the currently logged in user is displayed as the user menu on the top right of each screen click Profiles and select Set Default Profile The profile is ...

Страница 23: ...User menu The name of the currently logged in user is displayed as the user menu on the top right of each screen To close the MAXPRO NVR 1 Click the User menu The user menu options appear 2 Click Exit A dialog box appears prompting you to confirm the action 3 Click Yes FAMILIARIZING WITH THE MAXPRO NVR USER INTERFACE The user interface of MAXPRO NVR is easy to use because of its intuitive icons an...

Страница 24: ...G I NG O N A N D FAM I L I A R I Z A T I O N Familiarizing with the MAXPRO NVR user interface 24 MAXPRO NVR Operator s Guide 2 VIEWER TAB The following figure illustrates the Viewer tab Figure 2 1 Viewer tab ...

Страница 25: ... searching For example ca camera names that begin with the ca are displayed ca camera names that end with the ca are displayed ca camera names that contain ca are displayed ca cameras that do not have ca in their name are displayed Select the required filter string and click on the filter button You can toggle between the Filter On and Off mode using the option or right click and select between Fi...

Страница 26: ...he respective folder Show Video to show the video Delete to delete an image Show In Folder to view the folder in which the images are stored See Images and Clips on page 62 Sequences window Click to display a floating window that lists the sequences You can play the sequence using the play sequence action You can right click on the devices to display a context menu The context menu options include...

Страница 27: ...ews to My Salvo Views by dragging and dropping a salvo view You can right click on the salvo view to display a context menu The context menu options include Show to view the salvo view Rename to rename a salvo view Remove to remove a salvo view Save to save a salvo view Add to Shared Salvo Views to add a salvo view to the Shared Salvo views Show Device ID to display the device ID Hide Device ID to...

Страница 28: ...video devices and set up the MAXPRO NVR system Components Description System tab Helps you to configure the system level information for MAXPRO NVR Disk tab Helps you to configure the disk settings for video storage Camera tab Helps you to configure the camera settings Schedules tab Helps you to configure the schedules for live video IO tab Helps you to configure the input and output for a camera ...

Страница 29: ... TAB The following figure illustrates the Search tab Figure 2 3 Search tab You can search for recorded video and events in MAXPRO NVR from the Search tab Search filter Selecting Recorder Selecting Cameras associated to the Recorder Selecting the Events Selecting the Date and Time Search results window Search tab Salvo layouts Toolbar ...

Страница 30: ...ect the default values for the general and OSD settings using the Preferences option SETTINGS FOR VIDEO RENDERING There are two types of rendering modes Default and No Video Display The Default rendering is the recommended mode which enables the user to view live video from multiple cameras at optimum quality Selecting No Video Display does not display any video You can also set the frame rate for...

Страница 31: ...deo starts again when you select a different tab in the user interface To select the tab which pauses video rendering 1 Click the Preferences option in the User menu The Preferences dialog box displays By default the General Settings tab is selected 2 For Pause Video Rendering select the check box next to the tab names that you want to select 3 Click Apply 4 Click OK to close the dialog box SETTIN...

Страница 32: ...old value 1 Click the Preferences option in the User menu The Preferences dialog box displays By default the General Settings tab is selected 2 Under Server level settings type the Alarm Severity Threshold 3 Click Apply 4 Click OK to close the dialog box CONFIGURING THE SNAPSHOT CLIP EXPORT SETTINGS You can configure the time interval for the exported snapshot To configure the time interval for th...

Страница 33: ...rences dialog box CONFIGURING THE DIAGNOSTIC SETTINGS To configure the diagnostic settings 1 Click the Preferences option in the User menu The Preferences dialog box displays 2 Click the Diagnostic Settings tab 3 Under Change log level settings select the required log 4 Click Apply in the Preferences dialog box 5 Click OK to close the Preferences dialog box CONFIGURING THE DEFAULT SETTINGS To appl...

Страница 34: ...L O G G I NG O N A N D FAM I L I A R I Z A T I O N Setting preferences 34 MAXPRO NVR Operator s Guide 2 This page is intentionally left blank ...

Страница 35: ...b The System page appears by default GENERAL SYSTEM SETTINGS The general settings enable configuring of the device address device name and device description for MAXPRO NVR To configure the general system settings 1 Under General Settings The Device Address displays by default The Device Name displays by default Note MAXPRO NVR comes with a default IP address and a computer name If you are going t...

Страница 36: ...ble EMAIL SETTINGS The email settings enable configuring of the SMTP server settings for email communication of events 3 Under Email Settings Type the SMTP Server Name The Port displays by default Type a new Port number as applicable Type the User Name of the user Type the Password of the user Note Select the Use Default Credentials check box if you want to use the credentials that are used while ...

Страница 37: ...s the drive type Fixed or Network Note By default only the fixed drives are listed See step 5 to explicitly add a network drive or fixed drive Storage Path displays the default storage path for saving the recorded video You can type a new path for saving the recorded video Selected for Storage By default this check box is selected for all the fixed drives that are listed except C To disable video ...

Страница 38: ...drives Caution The Low disk alarm at value must be always greater than the Recording recycle at value Note Click Refresh to refresh the information under Disk Space at any point of time 5 Click Add Drive to add a fixed drive or a network drive The fixed drive that you are adding must be available on the MAXPRO NVR system else an Invalid Drive text displays in the Total Space GB column Add a networ...

Страница 39: ...overed cameras To add only specific cameras first clear the check boxes of the cameras you do not want to add and then click Add The selected cameras appear under the Camera pane Note The cameras added have the default parameters for all their settings 4 Under the Camera pane select a camera to change the default parameters for the following settings Enable Disable Enables or disables a camera for...

Страница 40: ...View for Advanced Set Up to launch the web page for the camera Use the camera s web page to view IP and firmware settings bit rate statistics camera exposure day night and white balance settings and set up video motion detection and other analytic events Select the Video Format NTSC or PAL The NTSC and PAL are the widely used video formats The Compression Format is defaulted to MPEG4 The Resolutio...

Страница 41: ...d by controlling GOP The formula for this is calculated as follows Recording Quality resulting FPS Live FPS GOP I Frame Number for recording For example in the following table if Live FPS is configured as 30 and Continuous recording is set to record Every I frame and Event recording set to Same as Live with GOP value set to 5 results in 6 FPS continuous recording quality and 30 FPS event recording...

Страница 42: ...RY SETTINGS The advanced discovery settings enable you to choose between NTSC and PAL format for a camera Advanced discovery settings can be configured for cameras connected to MAXPRO NVR Note Advanced Discovery Settings is only applicable for a PSIA camera To configure the Advanced Discovery Settings 1 On the Camera page Advanced Discovery Settings pane perform the following Select NTSC or PAL fr...

Страница 43: ...edules in MAXPRO NVR DELETING A SCHEDULE You can delete a schedule for the camera when you do not want to record video at recurring intervals To delete a schedule 1 Click the Configurator tab The System page displays by default 2 Click the Schedule tab to navigate to the Schedule page 3 Under Schedules select the schedule you want to delete from the list The schedule s details appear 4 Click Delet...

Страница 44: ...en the I O page 3 The Input s pane lists the inputs for the configured cameras 4 The Output s pane lists the outputs for the configured cameras 5 In the Output s pane select a output and then click On to turn on the relay manually or Click Off to turn off the relay manually 6 Click Save or click Reset to undo the changes CONFIGURING THE SEQUENCES A sequence is a set of live video streamed one afte...

Страница 45: ... Note The drop down list is not visible in the Preset column for a fixed camera 6 Click Save REARRANGING THE CAMERAS IN THE SEQUENCE You can rearrange the cameras and presets in the sequence When you rearrange them the sequence of live video streaming from each of the cameras is altered based on the rearrangement To rearrange the cameras 1 Select the check box corresponding to the camera you want ...

Страница 46: ...re also assigned to the user THE ADMIN USER The first time MAXPRO NVR is installed a default user named admin is created The admin user is assigned the role NVRAdministrator Only the user having NVRAdministrator privilege can add new users assign roles to the added users add or modify the privileges to the users and perform various configurations in MAXPRO NVR ADDING A USER You can add a user by p...

Страница 47: ...e selected input event appears under Associated List Click to associate all the input events to Associated List To remove an input event under Associated List select a check box corresponding to the input event and then click The selected input event appears under Available List Click to disassociate all the input events to Available List 13 Click the Camera Event Association tab to associate came...

Страница 48: ...er all the associations made to the user are also removed To delete a user 1 Click the Configurator tab The System page displays by default 2 Click the User tab to navigate to the User page 3 Select the check box corresponding to the user you want to delete 4 Click Delete A confirmation message appears at the bottom of the display area 5 Click Yes ...

Страница 49: ...s are available before you drag and drop multiple video sources on the salvo layout This is necessary to avoid automatic closing of the present video display For example if a salvo layout consists of only one panel displaying video select another salvo layout containing more panels before dragging and dropping multiple video sources MULTIPLE PANEL SELECTION You can select multiple panels on the sa...

Страница 50: ...eo display cancel the digital PTZ effects on the video display and perform color correction on the video display You can also move the camera to a preset position save a preset position and start recording video See Video control options in the panel toolbars on page 59 SALVO VIEW A salvo layout that is customized based on your preference is a salvo view You can select the cameras and scan sequenc...

Страница 51: ...ING TO THE SURROUNDING CAMERA VIEW FOR A CAMERA Click on the toolbar The surrounding cameras salvo layout appears Select the camera from the Site window The surrounding cameras salvo layout starts displaying video from the camera and the associated cameras Or Hover the mouse over the panel displaying video from the camera A panel toolbar appears Click in the Panel Toolbar The surrounding cameras s...

Страница 52: ...ting and zooming on page 61 for information on digital PTZ Add Bookmark add a bookmark in the timeline You can also add a bookmark by pressing the CTRL B keys See Video Recording and Viewing on page 53 Mark In add a mark in point in the timeline You can also add a mark in point by pressing the CTRL I keys See Video Recording and Viewing on page 53 Mark Out add a mark out point in the timeline You ...

Страница 53: ...n the specified date and time VIEWING RECORDED VIDEO You can use the following to play recorded video Timeline You can easily retrieve and view recorded video using the timeline and the date and time controls in the Timeline window When you select a camera from the Devices window to view video a timeline appears in the Timeline window The name of the corresponding camera appears on the left of eac...

Страница 54: ... layout The video is displayed in the panel Alternatively you can click on a panel displaying video to select the corresponding camera from which you want to view video A timeline appears in the Timeline window with the name of the camera on the left in full timeline mode 3 Play the recorded video from a date and time in one of the following ways Click on the timeline from where you want to view v...

Страница 55: ...k icon or icon to forward play video To reverse play the video click Change the playing speed Hover the mouse over the while video is playing and move the slider to change the playing speed Note To move the slider you can use the mouse scroll wheel Scrolling up increases the speed and scrolling down decreases the speed The speed appears in the icon when you move the slider For example 1x in the ic...

Страница 56: ...nu Command Click to Full Screen maximize the salvo layout to full screen Alternatively you can click in the toolbar on the top of the salvo layout Remove Text Overlay to remove text overlay displayed on the video Alternatively you can click in the toolbar on the top of the salvo layout Digital PTZ enable digital PTZ See Panning Tilting and Zooming for information on digital PTZ See Panning tilting...

Страница 57: ...d a mark in and click Alternatively you can right click the point in the timeline where you want to add a mark in and click Add Mark In in the context menu The mark in can also be added from a panel displaying video Right click the panel and click Add Mark In in the context menu The mark in is added at the corresponding date and time in the timeline 3 To set the end date and time of the loop add a...

Страница 58: ...review the portion later you can add a bookmark You can also add comments to the bookmarks and browse from one bookmark to the other in the timeline In addition you can cut and copy a bookmark and paste it at a different point in the timeline The bookmark comments appear as tool tips in the timeline at marked points and are helpful while reviewing recorded video ADDING A BOOKMARK You can add a boo...

Страница 59: ...vious Bookmark to view video from the previous bookmarked point in the timeline CUT COPY AND PASTE BOOKMARKS To cut copy and paste bookmarks 1 Right click a bookmark in the timeline to display the context menu Click the Cut or Copy command in the context menu as needed 2 Right click the point in the timeline where you want to paste the bookmark and click Paste in the context menu DELETING A BOOKMA...

Страница 60: ...lect the Apply color changes check box to save the settings Clicking the Reset button sets the color correction settings to default values displays a drop down list of presets You can select a preset for the camera Note The drop down list is disabled when digital PTZ is enabled You need to disable the digital PTZ feature to select a preset See Panning tilting and zooming on page 61 for information...

Страница 61: ...panel You can click to zoom in and to zoom out the video display PANNING AND TILTING To perform digital PTZ 1 Right click on the video display in a panel A context menu appears 2 Select Digital PTZ The digital PTZ feature is enabled for the video display in the panel 3 Zoom the video display store a preset camera position To store a preset select a preset number from the drop down list and then cl...

Страница 62: ...ts The Save As dialog box appears when you select the Save Image As command You can select the format in the Save As Type box and type the File Name You can also select a folder to save the image To save the salvo layout as an image Click on the toolbar on top of the salvo layout The salvo layout is saved as an image BMP format in the ImagesAndClips folder Note The images saved in the ImagesAndCli...

Страница 63: ...ignature check box A package is created with all the exported clips and stored in the specified location 10 Type the Comments for the job to be created 11 Click OK to create the clip The clip creation status is indicated in the status bar The clip is saved with an automatically generated name Note The playback session is closed while creating a clip from the cameras connected to the recorder with ...

Страница 64: ... view is saved Inside the folder the clips are saved in the Clips sub folder and images are saved in the Images sub folder 4 You can refresh the list of images and clips in the Image Clip window to update the list Refreshing the list displays the latest images and clip names To refresh right click in the Image Clip window to display a context menu and click Refresh IMAGES To view the images In the...

Страница 65: ...the clip to display a context menu and select Image View The salvo layout changes and the first frame from the clip is displayed on the screen DELETING IMAGES AND CLIPS In the Image Clip window you can delete the images and clips that you do not need To delete an image or clip 1 Click the Viewer tab 2 Expand the folder in which the image or clips is saved in the Images Clip window 3 Right click th...

Страница 66: ...u can acknowledge an alarm to accept that the necessary response action is being taken To acknowledge an alarm 1 Click the Viewer tab and then click Alarm tab 2 Click to select the alarm you want to acknowledge in the Alarm window The unacknowledged alarms are listed in the first table in the Alarm window Note To select more than one unacknowledged alarm press the CTRL key 3 Click Acknowledge The ...

Страница 67: ...ur panel salvo layout See Setting preferences on page 30 for more information Show Details view the details of the alarm This feature lists the device from which the alarm was triggered description date time when the alarm was triggered status of the alarm global even ID and the event attribute associated to the alarm You can also use the previous and next buttons to view the details of the alarms...

Страница 68: ...ists the device from which the alarm was triggered description date time when the alarm was triggered status of the alarm global event ID and the event attribute associated to the alarm You can also use the previous and next buttons to view the details of the alarms listed in the alarms window Freeze stop receiving the new or unacknowledged alarms in the Alarm window You can click this command aga...

Страница 69: ... M O N I T O R I N G A S I T E Alarms MAXPRO NVR Operator s Guide 69 Receive Both Alarms and Events to list both alarms and events in the Alarm window Command Click to ...

Страница 70: ...M O N I T O R I N G A S I T E Alarms 70 MAXPRO NVR Operator s Guide 4 This page is intentionally left blank ...

Страница 71: ...oday video recorded in MAXPRO NVR today Yesterday video recorded in MAXPRO NVR yesterday Last 7 Days video recorded in MAXPRO NVR in the last seven days Last 30 Days video recorded in MAXPRO NVR in the last 30 days On video recorded on a particular date in MAXPRO NVR The From box to select the date is enabled when you select On On or Before video recorded in the MAXPRO NVR up to a particular date ...

Страница 72: ...n makes the search of cameras simpler and easier When a part of the camera name is typed in the text box the Intellisense search displays the list of cameras that are connected to various recorders in the Devices window For example if you are searching for Camera 2 connected to particular recorder then type Ca in the text box the list of camera names that contain ca displays Intellisense search al...

Страница 73: ...ng a time period For example creating clips adding bookmarks and other actions performed by a user You can select the users and the list of activities you want to view while generating the report GENERATING THE EVENT HISTORY REPORT To generate an event history report 1 Click the Report tab 2 In the Reports window select the Event History Report 3 Click Show Report The Event History Report dialog b...

Страница 74: ...e events that you want to include in the event history report The selected events appear in the Selected Events box To select a device Select the check box next to the event name and click You can select more than one event To select all the events in the Events box click To select a device Select the check box next to the event name and click You can select more than one event To select all the e...

Страница 75: ...the operator log report in a table or Graphical to view the operator log report in a graph 8 Click Generate Report The operator log report is generated and appears in the display area VIEWING PRINTING AND SAVING THE REPORT You can use the following options in the toolbar on top of the report Icon Click to save the report By default the report is saved in Crystal Reports rpt format You can also sav...

Страница 76: ...G E NE R AT I N G R E P O R T S Viewing Printing And Saving The Report 76 MAXPRO NVR Operator s Guide 6 close the current view Icon Click to ...

Страница 77: ...s 35 Configuring the OSD Settings 32 Configuring the Snapshot Clip Export Settings 32 Configuring the Timeline Settings 32 Creating clips 62 D Default 22 Default Settings 33 Deleting A Profile 23 Deleting Cameras 42 Devices Window 25 Display Video on Alarm 22 E Email Settings 36 Event history report 73 Event Recording 41 Event Recording Settings 36 F Familiarizing 23 FPS 31 G General System Settin...

Страница 78: ...creen Display OSD s 30 Operator log report 74 P Playing a sequence 52 PTZ 61 R Report tab 30 S Salvo layouts 49 Salvo view 50 Saving images 62 Search tab 29 Server IP Name 22 Setting preferences 30 Setting up a site 35 Single box 9 Surrounding cameras 51 T Timeline 54 trinity 21 U Updating Cameras 41 User menu 19 V Video Control 59 Video recording 53 Video Rendering 30 Viewing images and clips 64 ...

Страница 79: ...This page is intentionally left blank ...

Страница 80: ...eywell Security Deutschland Johannes Mauthe Straße 14 D 72458 Albstadt Germany www honeywell com security de 49 74 31 8 01 18 70 Honeywell Security France Immeuble Lavoisier Parc de Haute Technologie 3 7 rue Georges Besse 92160 Antony France www honeywell com security fr 33 0 1 40 96 20 50 Honeywell Security Italia SpA Via della Resistenza 53 59 20090 Buccinasco Milan Italy www honeywell com secur...

Отзывы: