Lyric Gateway Installation and Reference Guide
- 11 -
Installing the Gateway
Installing the Gateway
Installing the Gateway
Installing the Gateway (Continued)
Communication Modules
Communication Modules
Communication Modules
Communication Modules (Continued)
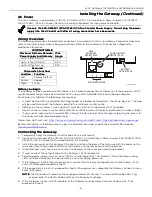
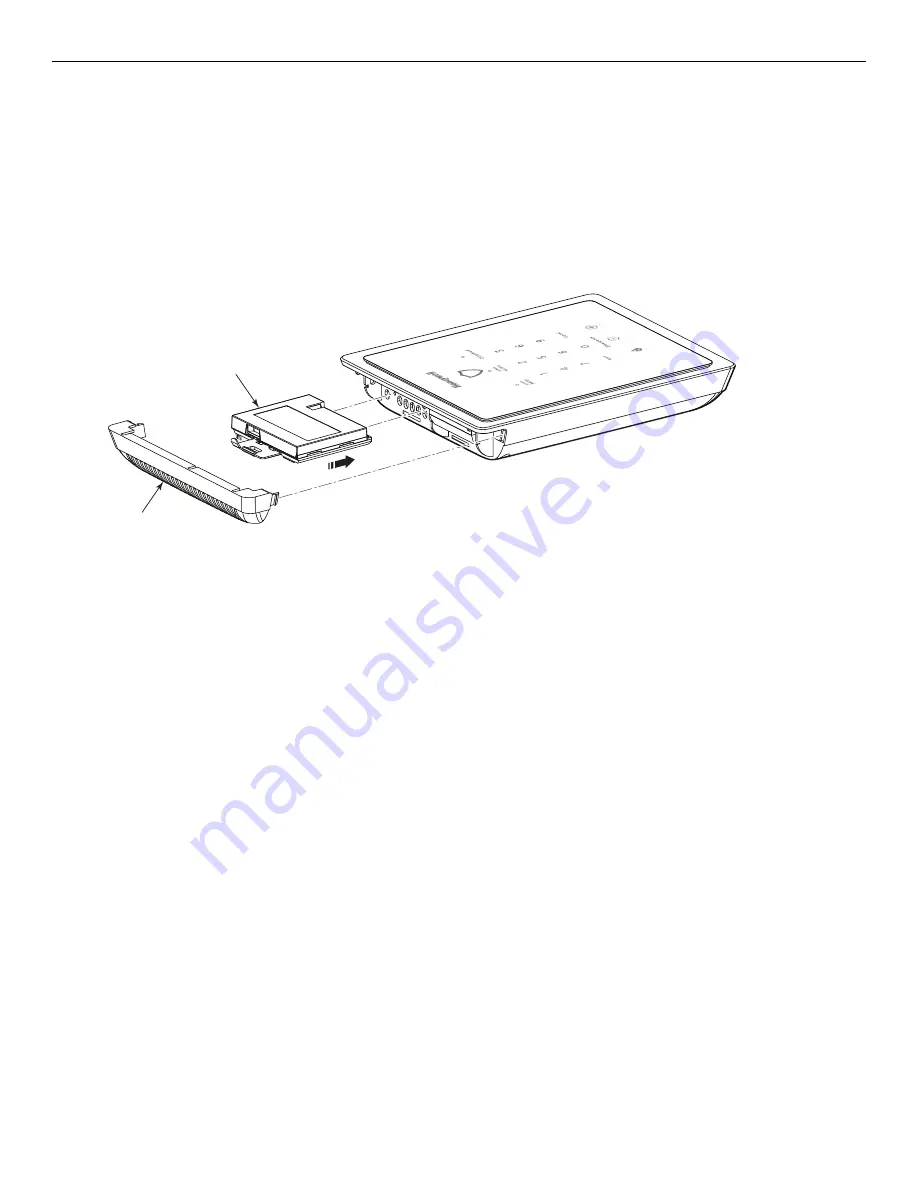
5. Install the Cellular Communications Module into the Gateway.
6. Ensure that the Communications Module is properly seated into the Gateway.
7. Insert the cover (bezel) into the top of the Gateway
8. Slide the cover (bezel) down to lock it in place and secure the Communications Module.
9. Select OK to complete the installation.
NOTE:
NOTE:
NOTE:
NOTE: The Communication Path dynamically adjusts when a Cellular Communication Module is installed or
removed.
COMMUNICATION
MODULE
COVER
gw-keypad-010-V1
Installing Communications Modules
Installing Communications Modules
Installing Communications Modules
Installing Communications Modules
Install the Cellular Communication Module in a Registered Gateway
Install the Cellular Communication Module in a Registered Gateway
Install the Cellular Communication Module in a Registered Gateway
Install the Cellular Communication Module in a Registered Gateway
Follow the steps and refer to the figure to install the Communications Module in a Gateway that is already
registered.
1. At the AN360 app’s Installer Tools screen, select “Advanced”.
2. Select “Install Cellular Module” and follow the prompts displayed on the Smart Device or follow the steps
below:
3. Remove Gateway upper cover (bezel).
4. Install the Cellular Communications Module into the Gateway.
5. Ensure that the Communications Module is properly seated into the Gateway.
6. Insert the cover (bezel) into the Gateway.
7. Slide the cover (bezel) down to lock it in place and secure the Communications Module.
8. Go to the AlarmNet 360 “SETTINGS” Page->”COMMUNICATOR” Section and change Communication Path
(Internal Device) to “Cellular” or “Cellular and IP”.
9. Select “SAVE”. The changes to the “Communication Path” will be reflected.
10. Select “SEND DATA”.
Checking Signal Strength
Checking Signal Strength
Checking Signal Strength
Checking Signal Strength
When choosing a suitable mounting location, check the communications module’s signal strength to ensure
proper operation. For most installations, using the module’s internal antenna, mounting the Lyric Gateway as
high as practical, and avoiding large metal components provides adequate signal strength for proper operation.
To check signal strength, perform the following test.
Check Signal Strength
Check Signal Strength
Check Signal Strength
Check Signal Strength
1. At the AN360 app’s Installer Tools screen, select “Advanced”. The signal strength is displayed in bars (1 -5
bars) on the “Cellular Information” button.
2. Verify that adequate Signal Strength (greater than 1 bar) is available. If necessary, relocate the Gateway to
obtain better signal strength (select “Cellular Information” again to refresh the reading).
3. If adequate signal strength cannot be achieved, External Antenna Kit model Cell-ANTST should be used.
Signal strength
Signal strength
Signal strength
Signal strength
4-5 bars ................................................................................ Excellent
2-3 bars ........................................................................................ Okay
1 bar ................................................................................................. Poor
Содержание Lyric LCP300-LC
Страница 42: ...Lyric Gateway Installation and Reference Guide 42 Notes Notes Notes Notes ...
Страница 43: ...Lyric Gateway Installation and Reference Guide 43 Notes Notes Notes Notes ...
Страница 44: ...Lyric Gateway Installation and Reference Guide 44 Notes Notes Notes Notes ...
Страница 45: ...Lyric Gateway Installation and Reference Guide 45 Notes Notes Notes Notes ...


