Configuration
Document 800-03650
Rev D
97
02/09
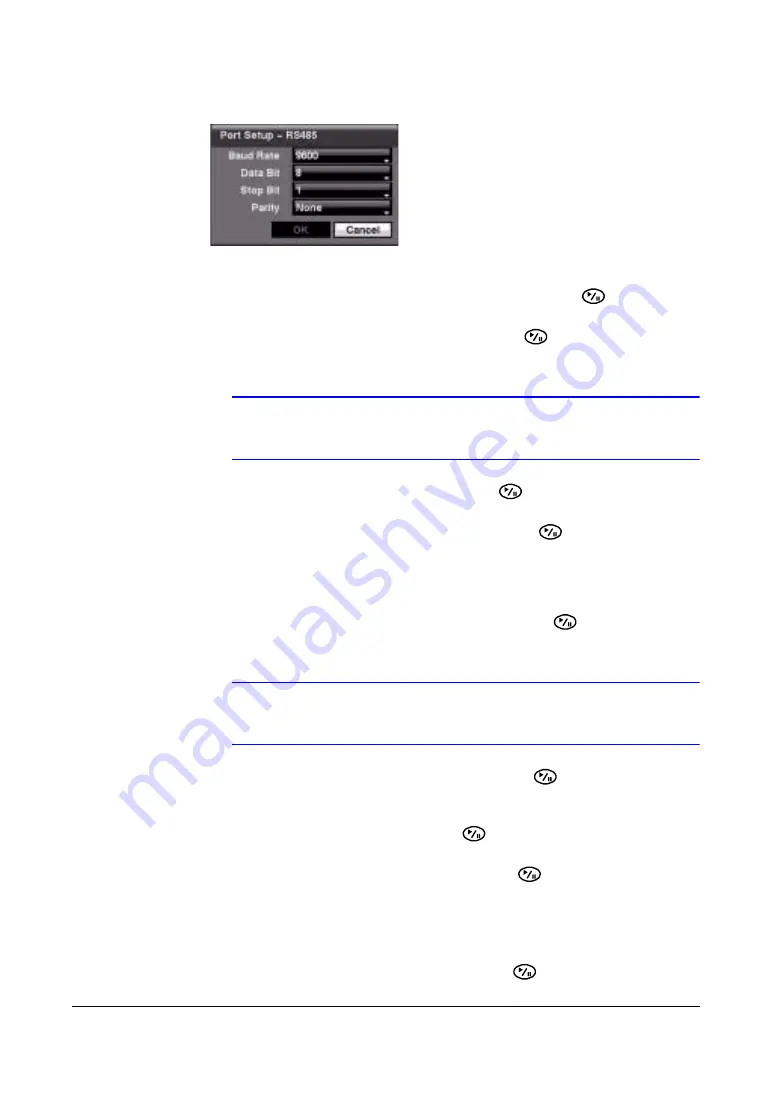
Figure 3-71
Port Setup Screen
3.
Use the ATM or POS manufacturer's recommended settings when configuring the
RS232C, RS485 or USB-Serial ports. You need to know the Baud Rate, Data Bit
number, Stop Bit number, and Parity. Highlight OK and press
to load the
settings.
4.
Highlight the field beside Text-In Product and press
. Select your device from
the list.
Note
The screen changes for different types of text input devices, so
there are different parameter fields for you to enter information.
5.
Highlight the field beside Virtual Port, and press
. Adjust the port number to
use. This field is activate only when setting up the VP Filter device.
6.
Highlight the field beside Transaction Start and press
. Use the virtual
keyboard to enter the Transaction Start string. Refer to the device manufacturer's
documentation for the text string that the device first sends when a transaction
starts.
7.
Turn on Any Character if you want the DVR to react to any character sent from
the text input device. Highlight Any Character and press
to toggle between
On and Off.
Note
If Any Character is turned On, you cannot enter any text in the
Transaction Start field.
8.
Highlight the field beside Transaction End and press
. Use the virtual
keyboard to enter the Transaction End string. Refer to the device manufacturer's
documentation for the text string that the device sends when a transaction ends.
9.
Highlight the more line(s) field and press
. Select the number of additional
lines of text that you want the DVR to record. You can choose from 0 to 10.
10. Highlight the field beside Line Delimiter and press
. Use the virtual keyboard
to enter the character(s) that the device uses to indicate the end of a line.
Special characters can be created using ^ and a capital letter: for example, ^J
for NL (New Line), ^M for CR (Carriage Return). Refer to the device
manufacturer's documentation for Line Delimiter character(s).
11. Highlight the field beside Ignore String and press
. Use the virtual keyboard
to enter any strings of text that you want the DVR to ignore.
Содержание HRSD16
Страница 12: ...Tables 12 ...
Страница 18: ...18 ...
Страница 22: ...Introduction 22 ...
Страница 138: ...Operation 138 ...
Страница 140: ...USB Hard Disk Drive Preparation 140 ...
Страница 158: ...Time Overlap 158 ...
Страница 160: ...Troubleshooting 160 ...
Страница 162: ...Connector Pinouts 162 ...
Страница 163: ...Map of Screens Document 800 03650 Rev D 163 02 09 H Map of Screens ...
Страница 164: ...Map of Screens 164 ...
Страница 166: ...System Log Notices 166 ...
Страница 175: ......

