800-15802 - A - 12/2013
System Setup | 83
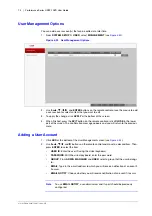
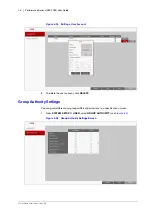
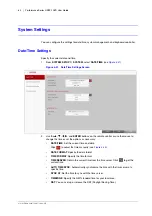
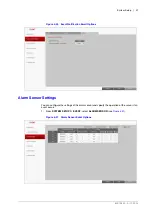
Figure 4-32
Date/Time Manual Setting
Note
Both
TIME SERVER
and
TIME SYNC
will be enabled only if the DVR is
connected to the Internet.
3.
To apply the change, click
APPLY
at the bottom of the screen.
4.
When finished, press the
EXIT
button on the remote control or click
CLOSE
in the lower
part of the screen. The confirmation message appears and you will return to the previous
menu.
System Management Settings
You can check, update or reset the system information.
1.
From
SYSTEM SETUP
SYSTEM
, select
SYSTEM MANAGEMENT
(see
Содержание HREP216
Страница 2: ......
Страница 3: ...User Guide ...
Страница 4: ...Revisions Issue Date Revisions A 09 2013 New document prepared for product launch ...
Страница 10: ...10 Performance Series HREP2 DVR User Guide www honeywell com security ...
Страница 16: ...16 Performance Series HREP2 DVR User Guide www honeywell com security ...
Страница 22: ...22 Performance Series HREP2 DVR User Guide www honeywell com security ...
Страница 24: ...24 Performance Series HREP2 DVR User Guide www honeywell com security ...
Страница 32: ...32 Performance Series HREP2 DVR User Guide www honeywell com security ...
Страница 42: ...42 Performance Series HREP2 DVR User Guide www honeywell com security ...
Страница 122: ...122 Performance Series HREP2 DVR User Guide www honeywell com security ...
Страница 128: ...128 Performance Series HREP2 DVR User Guide www honeywell com security ...
Страница 168: ...168 Performance Series HREP2 DVR User Guide www honeywell com security ...
Страница 186: ...186 Performance Series HREP2 DVR User Guide www honeywell com security Figure 11 9 Backup Player About Screen ...
Страница 190: ...190 Performance Series HREP2 DVR User Guide www honeywell com security ...
Страница 194: ...194 Performance Series HREP2 DVR User Guide www honeywell com security ...
Страница 199: ......

