5.3
CONTROL OPTIONS, CONTINUED
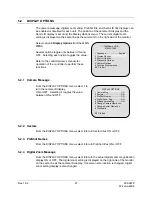
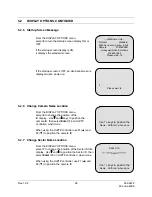
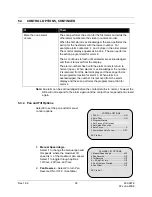
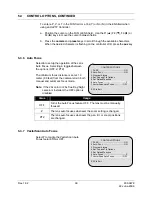
To perform this function:
1. Position the camera lens so it is not vertical.
2. Using the controller, tilt the camera down until the camera lens is vertical (pointing at
the floor) and continue tilting down with the controller.
3. The pan and tilt unit pans the camera 180° and then begins to tilt up.
It continues to tilt up as long as the controller remains in the “down” position.
When the Scan unit reaches its tilt up limit, the Scan returns to normal operation.
If the controller is returned to its neutral position before the Scan reaches its tilt up
limit, the Scan returns to normal operation.
5.3.3 Program
Alarms
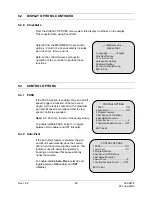
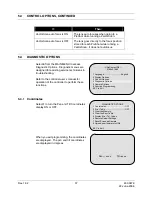
The HD6 has four alarm inputs for normally
open dry contacts. When a contact closes,
an alarm occurs. Alarms can be enabled or
disabled and the scan can be programmed
to go to a PreShot, start a VectorScan, or
start a PTZ tour when an alarm occurs.
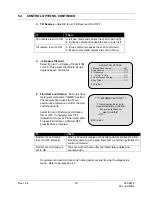
CONTROL OPTIONS
1 PASS ............................................... ON
2 Auto-Pivot........................................ ON
3 Program Alarms
4 Set Pan and Tilt Options
5 Set Default Function
6 Auto Focus..........................................Z
7 VectorScan Auto Focus.................OFF
ESC to Exit
Note:
If an alarm is disabled, the HD6
does not
respond to a change of state in the
alarm contact. The HD6
does not
perform the programmed PreShot, VectorScan,
or PTZ. If a PreShot, VectorScan, or PTZ Tour is not programmed for an alarm,
the HD6
does not
respond to a change of state in the contact.
Rev. 1.02
30
900.0679
22-June-2006
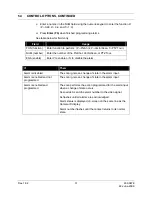
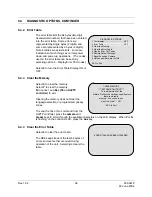
To program alarms, select
3
from the Control
Options Menu.
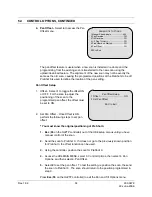
The Program Alarms screen displays.
To enter a P, V, or T in the FUN field or a Yes
(Y) or No (N) in the ENA field when using an
HJZTP Controller,
a. Position the cursor on the FUN or ENA
field. Use the F1 (
S
) F2 (
T
), F3 (
W
) or F4 (
X
) keys to move the cursor between
fields.
Program Alarms
FUN
NUM
ENA
1 _
__
_
2 _
__
_
3 _
__
_
4 _
__
_
PVT
Y-N
Press ‘Enter’ when done.
b. Press
the
camera
and
preset
keys to scroll through the available characters on the
controller’s LCD. When the desired character is flashing on the LCD, press the
aux
key.
Содержание HD6 Series
Страница 1: ...HD6 Series PTZ Camera in a Dome User Manual 900 0679 June 2006 Rev 1 02 ...
Страница 4: ...Rev 1 02 iv 900 0679 22 June 2006 ...
Страница 18: ...Rev 1 02 4 900 0679 22 June 2006 Notes ...
Страница 32: ...Rev 1 02 18 900 0679 22 June 2006 Notes ...
Страница 38: ...Rev 1 02 24 900 0679 22 June 2006 Notes ...
Страница 96: ...Rev 1 02 82 900 0679 22 June 2006 Notes ...
Страница 122: ...Rev 1 02 108 900 0679 22 June 2006 Notes ...
Страница 130: ...Rev 1 02 116 900 0679 22 June 2006 Notes ...
Страница 134: ...Rev 1 02 120 900 0679 22 June 2006 Notes ...
Страница 143: ...14 9 HD6 SCAN CONTINUED Rev 1 02 129 900 0679 22 June 2006 ...
Страница 148: ...Rev 1 02 134 900 0679 22 June 2006 Notes ...
Страница 149: ...Rev 1 02 135 900 0679 22 June 2006 Notes ...
Страница 150: ...Rev 1 02 136 900 0679 22 June 2006 Notes ...
Страница 151: ...Rev 1 02 137 900 0679 22 June 2006 Notes ...

