Performance Series Network Video Recorder User Guide
60
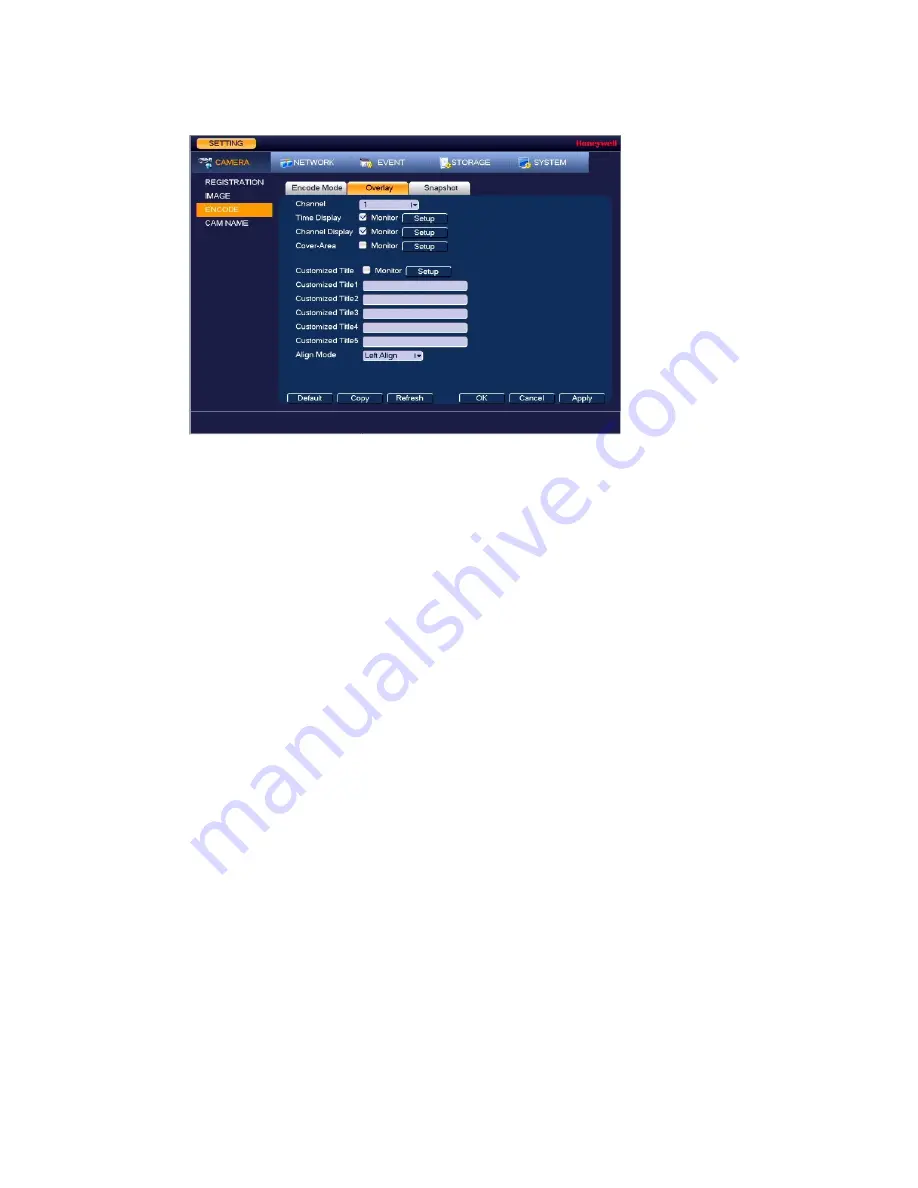
Figure 6-5 Camera Text Overlay Setting Tab
2.
In the Channel box, select the camera that you want to configure.
3.
To set the time display, next to
Time Display
, select the
Monitor
check box, and then click
Setup
. Drag the time display to the desired position on the screen. Right-click to save the
position and return to the Overlay screen.
4.
To set the channel display, next to
Channel Display
, select the
Monitor
check box, and
then click
Set
. Drag the channel display to the desired position on the screen. Right-click
to save the position and return to the Overlay screen.
5.
To set the customized title display, enter the customized title text in the lines that apply,
next to
Customized Title
, select the
Monitor
check box, and then click
Set
. Drag the title
text to the desired position on the screen. Right-click to save the position and return to
the Overlay screen.
6.
Click
Apply
to save your settings.
7.
To copy the settings to one or more additional cameras, follow these steps:
a.
Click
Copy
.
b.
Click the specific camera(s) to which you want to copy the settings, or click
All
to
select all the cameras, and then click
OK
.
8.
If you want to save your settings and exit the
SETTING
menu, click
OK
.
Changing a Camera Name
By default, the cameras are named "CAM 1", "CAM 2," "CAM 3," and so on. You can assign each
camera a descriptive name specific to your application (for example, "Front Entrance").
1.
Go to
Main Menu
Setting
CAMERA
Cam Name
, the following window is
displayed:
Содержание 2450Cm Series
Страница 2: ......
Страница 27: ...Getting Started 13 ...
Страница 28: ...Performance Series Network Video Recorder User Guide 14 ...
Страница 29: ...Getting Started 15 ...


