background image

EHC-NERIS_ENG-Rev.0-23-09-2021 


7

/

19


                  Fig. 4                          Fig. 5  


Содержание NERIS500

Страница 1: ...EHC NERIS_ENG Rev 0 23 09 2021 1 19 INSTALLATION OPERATING INSTRUCTIONS NERIS500 NERIS750 ...

Страница 2: ...nstalled as per the instructions within this manual 3 Before connecting the appliance make sure the mains voltage is the 230 Volts and corresponds to the marked label of the appliance 4 Check that the power is sufficient to supply the appliance The total draw of the Towel Rail currents must not exceed the capacity of the circuit and the breaker that protects them 5 This Towel Rail cannot be used i...

Страница 3: ...rvision or have received instructions regarding the use of the device as security and they have perfectly understood the potential dangers Children between 3 and 8 years old should not connect adjust or clean the appliance or perform any maintenance measure 15 Warning Do not use this heater near baths showers or swimming pools It should not be possible to access the device s controls from a bath s...

Страница 4: ...should be installed at higher level to avoid anyone touching the heater 24 WARNING This appliance is only intended for drying towels that have become damp with fresh water and not any other substance as this could result in damaging the heater and invalidate its warranty SPECIFIC SAFETY INSTRUCTIONS FOR THIS DEVICE The appliance must remain in a vertical position Make sure the appliance is always ...

Страница 5: ...his appliance within Zones 0 or 1 of a bathroom is totally prohibited Figure 2 bellow is only for information purposes we suggest you contact a professional electrician for installation of your heater Zone 1 Appliances supplied to Safety Extra Low Voltage SELV Zone 2 Electrical Appliances Class II IP X24 Fig 2 WALL MOUNTING The towel radiator is equipped with the following components 4 towel radia...

Страница 6: ...nto the wall 26 as shown in Fig 2 Fix using the screws washers and plugs provided as shown in Fig 2 Fig 2 5 Screw the smaller diameter brackets 19 onto the heater with the 4 x M4 screws and 4 x M4 washers as shown in Fig 3 Fig 3 6 Insert the brackets 19 fixed to the heater into the brackets 26 fixed to the wall and secure using the fixing screws as shown in Fig 4 5 ...

Страница 7: ...EHC NERIS_ENG Rev 0 23 09 2021 7 19 Fig 4 Fig 5 ...

Страница 8: ... This appliance does not require earthing connection as it is double insulated Contact a fully qualified electrician for assistance TECHNICAL CHARACTERISTICS Type NERIS 500 NERIS 750 Rated Voltage 230 V 230 V Rated Frequency 50 Hz 50 Hz Rated Power Input 500 W 750 W Electrical Protection Class II II IP Protection Deg IP24 IP24 Dimensions LxHxD mm 505x780x100 505x1140x100 Weight kg 3 8 5 1 HOW TO P...

Страница 9: ... 2 hour time period the device returns to previous operational mode For safety reasons during the 2 hour time period the room temperature is automatically controlled in order not to exceed 32 C mode The electronic control operates according to a daily weekly program The program is user defined Stand by The electric resistance is not powered and all lights are turned off however the device is still...

Страница 10: ...When activated the bottom part of the display shows the current time while the configured operative mode and the temperature are shown in the upper part When in Stand by mode current time day of the week and the message Stb are displayed NOTE When the device goes into Stand by mode it beeps twice for 0 5s When the device is activated it beeps once for 1s ...

Страница 11: ...o the Comfort mode temperature For this reason the Night mode temperature can be set to a value between 7 C and the configured Comfort mode temperature 0 5 C The temperature of Comfort mode can be configured in the whole Night temperature 0 5 C 32 C range 3 OPERATING THE DEVICE Press the PROG button to select the desired operative mode An icon on the display indicates the selected operating mode a...

Страница 12: ...hr Boost mode is automatically deactivated after a period of 2 hours and the device returns to the operative mode previously set The user can switch to another operative mode at any time by simply pressing the PROG button PILOT WIRE MODE Only for product versions equipped with Pilot Wire Only France In Pilot Wire mode the device is managed by a central control system that sets the operating mode f...

Страница 13: ... Prog button to enter the editing mode The blinking arrow indicates the currently selected day Pressing the buttons the desired day can then be set Press again the Prog button to confirm the selected day After that the procedure for entering the time starts and the display shows the currently selected time Hours Use the and buttons to set the correct hour and confirm the selected value pressing th...

Страница 14: ...button or the Night temperature empty bar by pressing the button see picture Press PROG to confirm the entered configuration for day 1 and repeat the same procedure for the remaining 6 days of the week KEY LOCK It is possible to lock the buttons of the device to avoid inadvertent modifications of the settings Press together the PROG buttons for 3 seconds to lock all the buttons except the On Stand...

Страница 15: ... to commit and return into Stand by mode When this function is enabled the Open Window icon on the display is lit When the device detects that the window is potentially opened the Open Window icon starts blinking When the function is disabled the Open Window icon is not shown on the display Note The device could fail in detecting an opened window e g if the thermostat is located on an isolated are...

Страница 16: ...enance operation Let it cool down before cleaning Do not use detergent solvent abrasive products or any other chemical product to clean the radiator NEVER immerse the device in water or any other liquids You can use a vacuum or flexible brush to clean the air grilles This maintenance must be carried out regularly to ensure optimum performance Ensure the radiator is totally dry before turning it ba...

Страница 17: ...jm es Hereby declare that the following equipment complies with all the essential requirements for health and safety of European Directives 2014 30 EC EMC DIRECTIVE 2014 35 EC LV DIRECTIVE 2011 65 UE RoHS DIRECTIVE 2009 125 EC ErP Directive With reference to the application of the followinf standards Em aplicação das seguintes normas 2014 30 EC EMC DIRECTIVE EN 55014 1 2006 A1 2009 A2 2011 EN 5501...

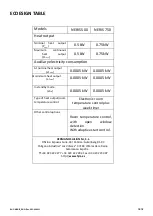
Страница 18: ...put el max 0 0005 kW 0 0005 kW In standby mode el SB 0 0005 kW 0 0005 kW Type of heat output room temperature control Electronic room temperature control plus week timer Other control options Room temperature control with open window detection With adaptive start control HERMANOS JULIÁN M S L Oficina Esposos Curie 44 Fábrica Gutenberg 91 93 Polígono Industrial Los Villares 37184 Villares de la Rei...

Страница 19: ...mprise it and reduce the impact on human health and the environment The crossed out wheeled bin is marked on all Electrical and Electronic products to remind the consumer of their obligation dispose of them separately The consumer must contact the local authority or the vendor to learn about the correct disposal of his her old electrical household appliance Fábricado por Fabricado por HERMANOS JUL...

Отзывы: