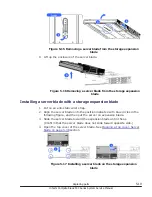


Figure 5-38 Installing a PCI expansion blade on the shelf
5
.
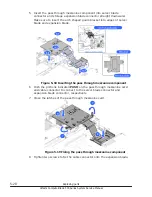
(Skip this step when the connection kit L/P is not installed.)
Align the connector of the connection board of the connection kit L/P with
the male connector on the main board of the server blade, and then push
in the connection board straight downward by pushing the portion
indicated Push and opposite side at the same time.
Figure 5-39 Inserting the connection kit L/P
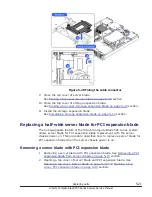
6
.
Put in the connection bracket, and then tighten a thumbscrew of the
connection bracket.
Replacing parts
5-33
Hitachi Compute Blade 500 Series System Service Manual
Содержание CB 520A A1
Страница 26: ...xxvi Preface Hitachi Compute Blade 500 Series System Service Manual ...
Страница 152: ...4 64 Common process for replacement Hitachi Compute Blade 500 Series System Service Manual ...
Страница 294: ...6 12 Identifying RAID rebuild status Hitachi Compute Blade 500 Series System Service Manual ...
Страница 432: ...9 16 Updating firmware Hitachi Compute Blade 500 Series System Service Manual ...
Страница 439: ...Change LOM configuration 10 7 Hitachi Compute Blade 500 Series System Service Manual ...
Страница 442: ...10 10 Change LOM configuration Hitachi Compute Blade 500 Series System Service Manual ...
Страница 450: ...10 18 Change LOM configuration Hitachi Compute Blade 500 Series System Service Manual ...
Страница 464: ...11 14 Troubleshooting Hitachi Compute Blade 500 Series System Service Manual ...
Страница 465: ...Hitachi Compute Blade 500 Series System Service Manual ...