4-9
3. Image Memory Input
Chapter
4
Us
ing
the Util
ity Mo
d
e
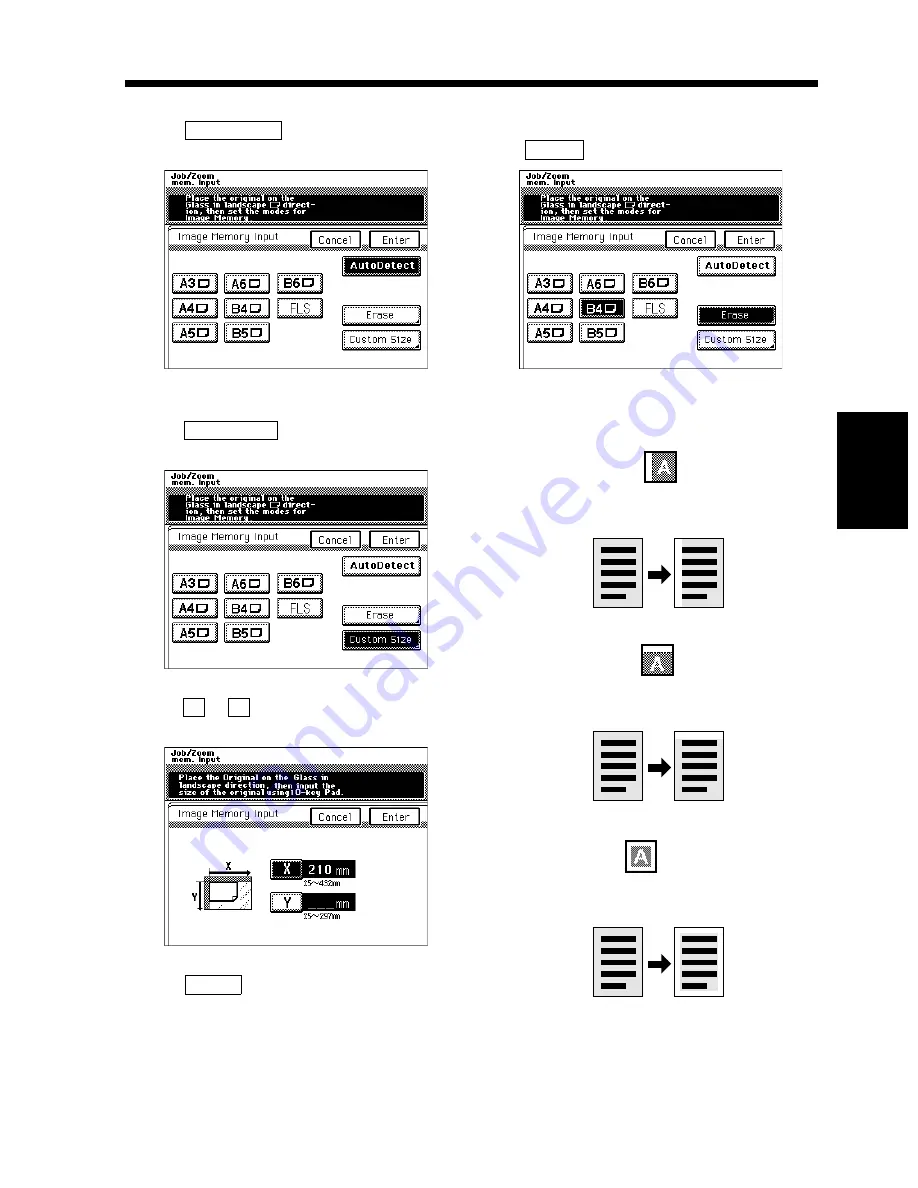
<Auto size detection>
• Touch
on the screen given in step
5.
<Size input>
• Touch
on the screen given in step
5.
• Touch
or
and enter the original size from
the 10-Key Pad.
• Touch
.
If you want to erase the image on the left,
top, or along the frame of the original, touch
.
You have a choice of the following three
types of erase:
AutoDetect
1155O589DA
Custom Size
1155O591DA
X
Y
1155O593DA
Enter
6
Erase
1155O595DA
1149O053AA
• Left edge erase
Stores the image after erasing the left
edge of the original.
1149O056AA
• Top edge erase
Stores the image after erasing the top
edge of the original.
1149O055AA
• Frame erase
Stores the image after erasing the four
edges of the original.
Содержание DDC 52N
Страница 4: ......
Страница 15: ...1 1 Chapter 1 Safety Notes Chapter 1 Safety Notes ...
Страница 19: ...2 1 Chapter 2 Getting to Know Your Copier Chapter 2 Getting to Know Your Copier ...
Страница 39: ...3 1 Chapter 3 Making Copies Chapter 3 Making Copies ...
Страница 132: ...3 94 11 Typical Function Combinations Chapter 3 Making Copies ...
Страница 133: ...4 1 Chapter 4 Using the Utility Mode Chapter 4 Using the Utility Mode ...
Страница 163: ...5 1 Chapter 5 When a Message Appears Chapter 5 When a Message Appears ...
Страница 191: ...6 1 Chapter 6 Troubleshooting Chapter 6 Troubleshooting ...
Страница 195: ...7 1 Chapter 7 Miscellaneous Chapter 7 Miscellaneous ...
Страница 205: ...7 11 4 Description of Paper Size and Zoom Ratio Table Chapter 7 Miscellaneous ...
Страница 208: ...Index 3 Index Index Index ...
Страница 209: ......


