44 Assembly
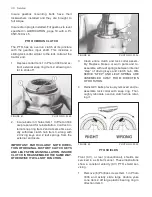
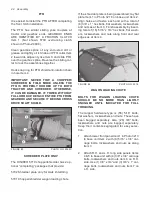
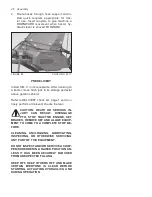
3. Install (8) 5/16” x 3/4” carriage bolts, lock
washers, and nuts along bottom (6) of upper
chute panel.
FIGURE 89 PHOTO NO. 3228
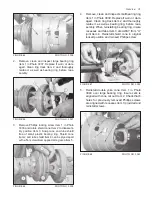
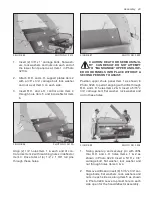
1. With drifts on each side at Items 1 & 2 as
shown in Photo 3223, align lower chute
panel Item 3, and its holes, with side pan-
els Items 4 & 5. Ensure drifts are securely
seated. Lift panel up and install a 5/16” x
3/4” carriage bolt, flat washer, lock washer
and nut on each side as at Item 6.
2. Leave 3rd and 4th holes from top of lower
chute panel open. Install (3) 5/16” x 3/4” car-
riage bolts, flat washers, lock washers and
nuts on each side as along Item 7.
3. Extract drifts Items 1 & 2 and install a 5/16”
x 3/4” carriage bolt, flat washer, lock washer
and nut in those open holes.
FIGURE 90 PHOTO NO. 3223
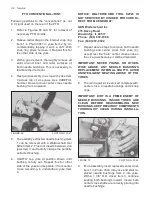
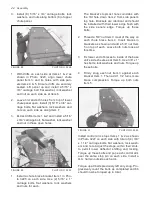
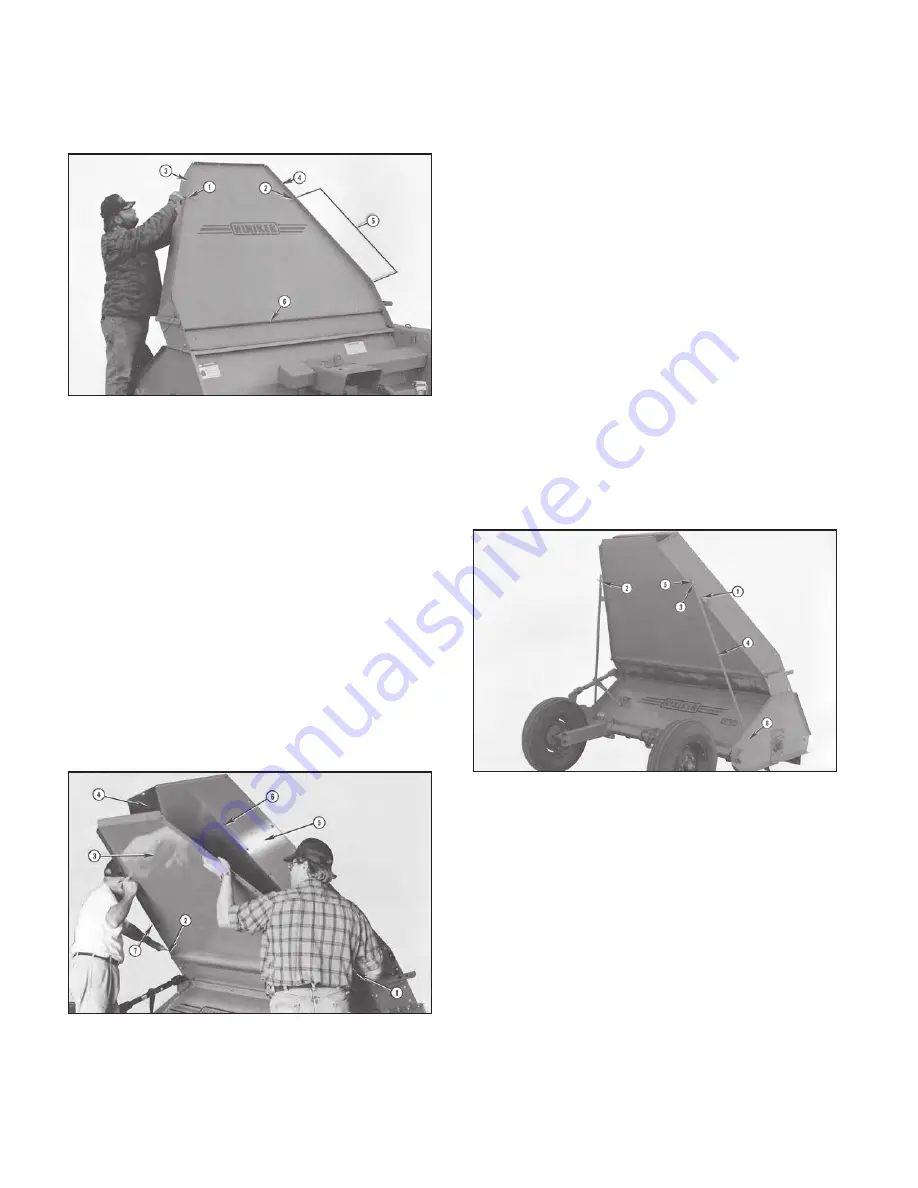
1. Install a chute brace bracket Item 1 in Pho-
to 3225 on each side. Use (2) 5/16” x 1”
carriage bolts, flat washers, lock washers
and nuts for each.
The bracket’s topmost hole coincides with
the 3rd hole down Item 2 from side panel’s
top hole. Brackets are identical and should
be installed with their lower edge flush with
the side panel’s edge. Torque up these
bolts.
2. Thread a 5/8” nut Item 3 most of the way on
each chute brace Item 4. Insert braces in
brackets as shown and add a 5/8” nut Item
5 on top of each. Leave both nuts loose at
this time.
3. Fix lower end of braces to inside of the base
unit’s side sheets as at Item 6. Use 3/8” x 1”
hex bolts, lock washers and nuts. Torque up
these bolts.
4. Firmly snug each nut Item 3 against each
bracket Item 1. Then add 1 1/2 turns more
brace compression. Torque up both nuts
Item 5.
FIGURE 91 PHOTO NO. 3225
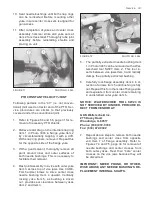
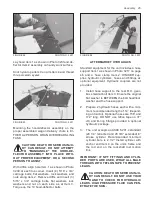
Install control arm stops Items 1 & 2 as shown
in Photo 3227 on each side with total of (4) 3/8”
x 1 1/4” carriage bolts, flat washers, lock wash-
ers and nuts. Adjust the stops, within their slots,
to permit lower deflector shifting and locking.
Torque up these bolts and pop each control arm
over the same stop pin on each side. Install a
Q.A. hairpin outside each arm.
Torque up all bolts previously left only snug. Pro-
gressively count the bolts as completed and 66
should now be torqued up in total.
Содержание 5710
Страница 2: ......
Страница 12: ...10 Decal Location FIGURE 23 520 03139 Danger Shield Missing FIGURE 24 71504131 Danger Keep Flippers ...
Страница 50: ...NOTES 48 Notes ...

