Step By Step Instructions for Typical Use Cases
37/89
NXHX 52-JTAG | Getting Started
DOC131004GS02EN | Revision 2 | English | 2013-11 | Released | Public
© Hilscher 2013
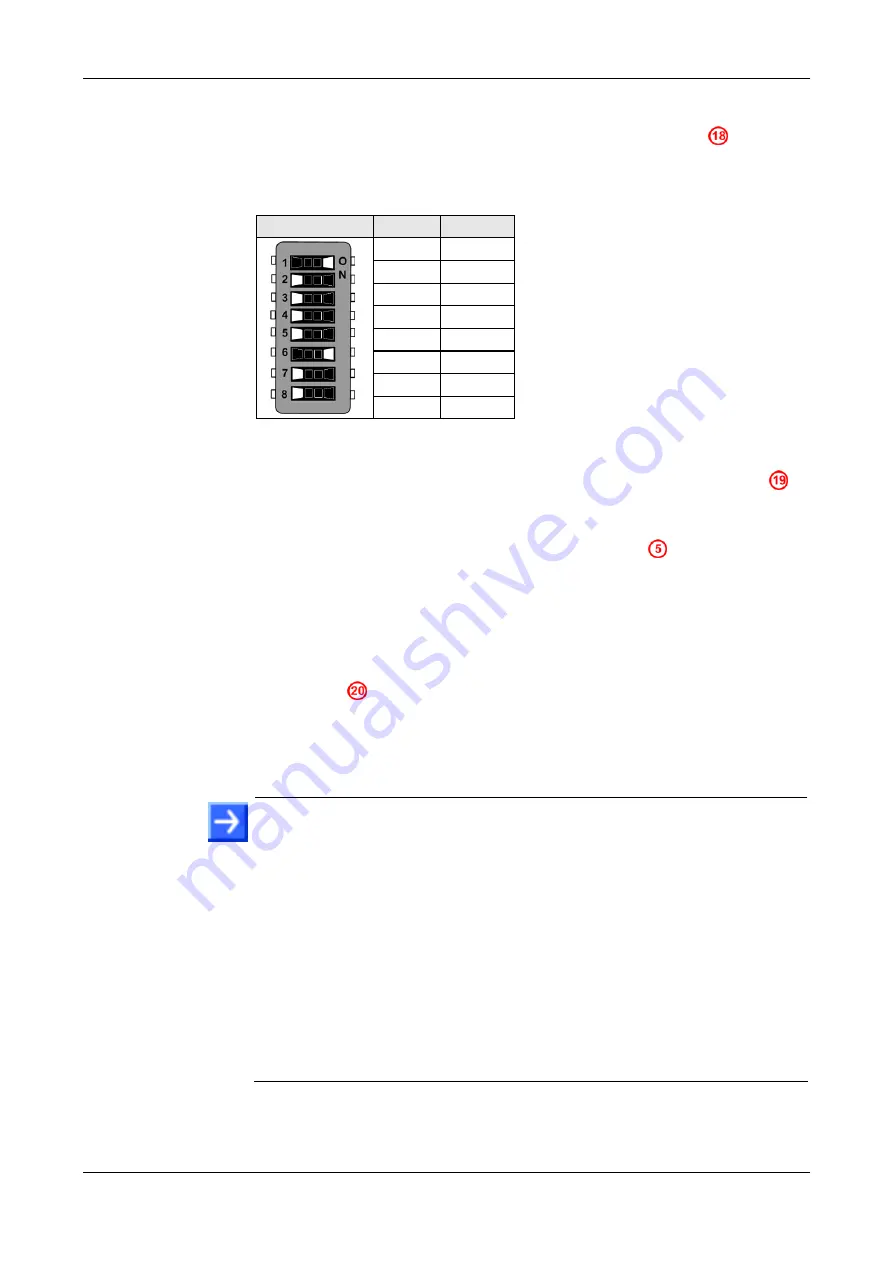
5. Put the NXHX 52-JTAG into serial boot mode.
Use the S1 switch on the NXHX board (see position
in
Drawing and Positions of the NXHX 52-JTAG
chapter on page 12) to
set the boot strap options to
SERIAL boot mode
. Use the following
settings:
S1
SW
Setting
1 on
2 off
3 off
4 off
5 off
6 on
7 off
8 off
Table 3: Settings for Serial Boot Mode at Switch S1
Push the
Reset
button (T1) on the NXHX board (see position
in
Device Drawing and Positions of the NXHX 52-JTAG
chapter on page
The SYS LED on the NXHX board (see position
and Positions of the NXHX 52-JTAG
chapter on page 12) which up to
this point has been blinking yellow (on/off) now alternates between
brighter and darker yellow, indicating serial boot mode.
6. Establish an USB connection.
Plug an USB cable into the Mini-B USB socket on the NXHX board (see
position
Device Drawing and Positions of the NXHX 52-JTAG
section on page 12) and connect the USB cable to your PC.
You may have to push the
Reset
button (T1) on the NXHX board again,
in order that Windows can recognize the new device connected by
USB.
Note:
The USB drivers needed for connecting the Bootwizard to the
NXHX board have automatically been installed on your PC by the
Bootwizard setup program
.
However, under
Windows XP
, the installation
process of the USB drivers needs to be completed in the
Found New
Hardware Wizard
, which opens when you connect the NXHX board for
the first time to your PC. For finishing the installation of the USB drivers in
the wizard, follow the instructions given below. The
Found New
Hardware Wizard
opens twice: for the
netX52 Bootmonitor (CDC)
driver
and for the
netX52 USB Bootmonitor (ROM)
driver.
Under
Windows 7
and
8
, the
Installing device driver software
message
appears in the Windows task bar when you connect the NXHX board to
the PC via USB cable for the first time. Windows then automatically
copies the driver files to the appropriate Windows directories; you do not
need to take any action in this.


