


DS-PR1-60 User Manual
UM DS-PR1-60 090920NA
28
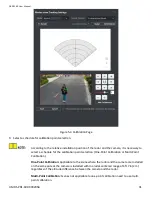
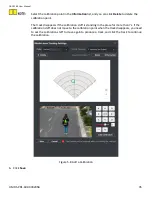
Figure 5-2 Set Initial Position
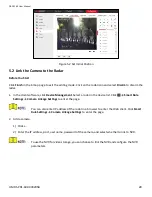
5.2
Link the Camera to the Radar
Before You Start
Click
Finish
in the E-map page to exit the editing mode. Click on the radar icon and select
Disarm
to disarm the
radar.
1.
In the client software, click
Device Management
. Select a radar in the device list. Click
→ Smart Rule
Settings → Camera Linkage Settings
to enter the page.
You can also enter IP address of the radar in a browser to enter the Web client. Click
Smart
Rule Settings → Camera Linkage Settings
to enter the page.
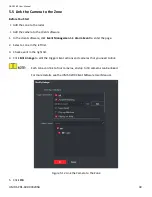
2.
Add a camera.
1)
Click
+
.
2)
Enter the IP address, port, user name, password of the camera, and select whether to link to NVR.
To use the NVR for video storage, you can choose to link the NVR and configure the NVR
parameters.
Содержание DS-PR1-60
Страница 1: ...DS PR1 60 Security Radar User Manual...
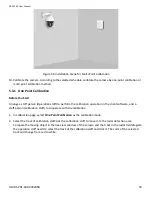
Страница 32: ...DS PR1 60 User Manual UM DS PR1 60 090920NA 32 Figure 5 5 Installation Scene for One Point Calibration...
Страница 42: ...DS PR1 60 User Manual UM DS PR1 60 090920NA 42...
Страница 69: ...DS PR1 60 User Manual UM DS PR1 60 090920NA 69...
Страница 70: ...DS PR1 60 User Manual UM DS PR1 60 090920NA 70...
Страница 71: ...DS PR1 60 User Manual UM DS PR1 60 090920NA 71 UD13649B...