


Note
You should configure the template before access group settings. Refer to Configure Schedule
and Template for details.
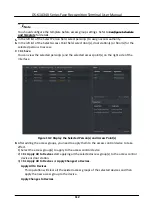
5. In the left list of the Select Person field, select person(s) to assign access authority.
6. In the left list of the Select Access Point field, select door(s), door station(s) or floor(s) for the
selected persons to access.
7. Click Save.
You can view the selected person(s) and the selected access point(s) on the right side of the
interface.
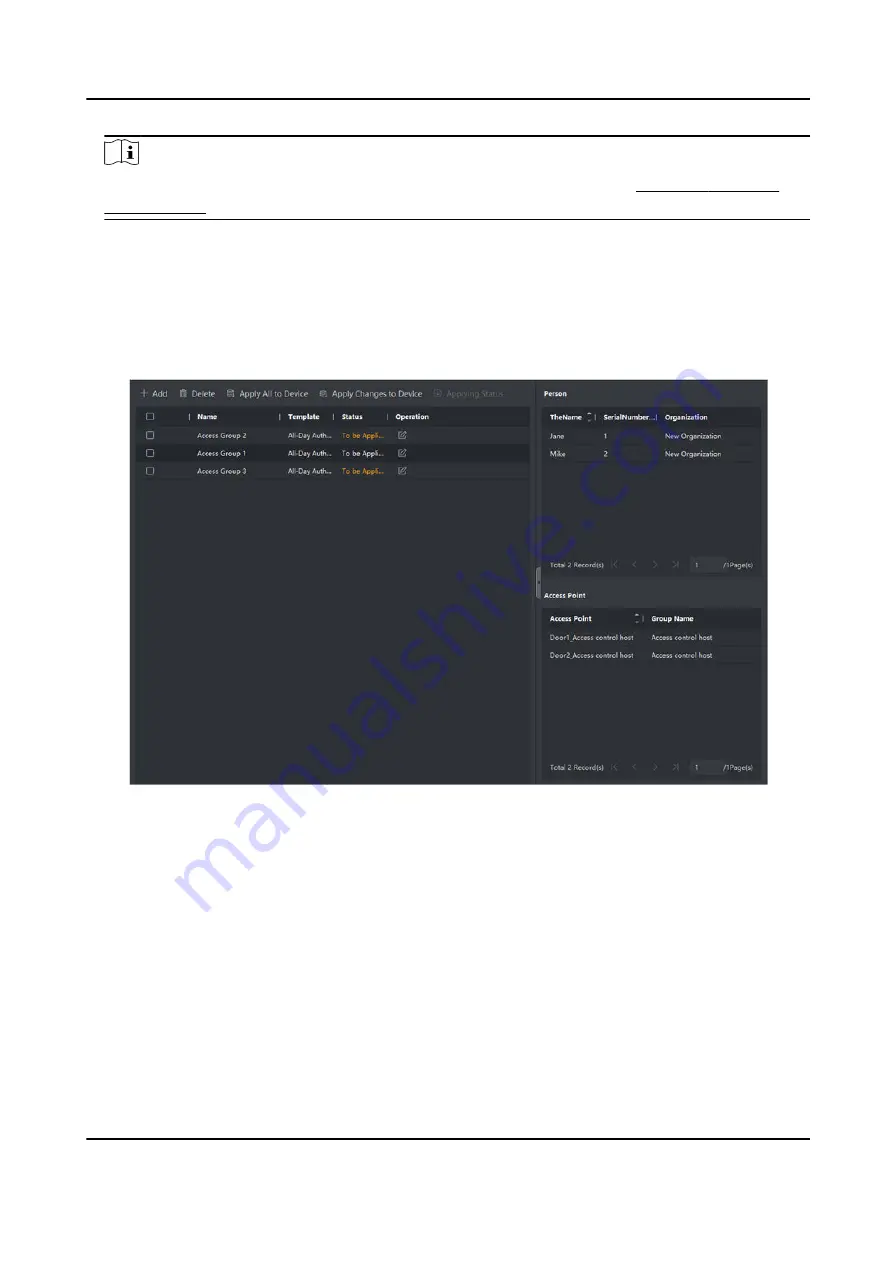
Figure 10-2 Display the Selected Person(s) and Access Point(s)
8. After adding the access groups, you need to apply them to the access control device to take
effect.
1) Select the access group(s) to apply to the access control device.
2) Click Apply All to Devices start applying all the selected access group(s) to the access control
device or door station.
3) Click Apply All to Devices or Apply Changes to Devices.
Apply All to Devices
This operation will clear all the existed access groups of the selected devices and then
apply the new access group to the device.
Apply Changes to Devices
DS-K1A340 Series Face Recognition Terminal User Manual
112
Содержание DS-K1A340 Series
Страница 1: ...DS K1A340 Series Face Recognition Terminal User Manual ...
Страница 22: ...Figure 3 6 Secure Device DS K1A340 Series Face Recognition Terminal User Manual 8 ...
Страница 67: ...Figure 8 1 Device Information DS K1A340 Series Face Recognition Terminal User Manual 53 ...
Страница 72: ...Figure 8 4 Wi Fi 3 Add Wi Fi 1 Tap DS K1A340 Series Face Recognition Terminal User Manual 58 ...
Страница 75: ...Figure 8 7 Add User 2 Set the following parameters DS K1A340 Series Face Recognition Terminal User Manual 61 ...
Страница 151: ...UD24081B B ...


