background image

Steps
1. 
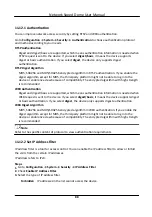
Go to Configuration → Network → Advanced Settings → Alarm Server .
2. Enter Destination IP or Host NameURL, and Port.
3. Select Protocol.

Note

HTTP, HTTPS, and ISUP are selectable. It is recommended to use HTTPS, as it encrypts the data

transmission during communication.

4. Click Test to check if the IP or host is available.
5. Click Save.

10.12 TCP Acceleration

TCP acceleration is used to improve latency and reduce packet loss caused by network congestion

in poor network condition, and guarantee the fluency of live view.

10.13 Traffic Shaping

Traffic shaping is used to shape and smooth video data packet before transmission.
It helps to improve latency and reduce packet loss caused by network congestion and ensure the

video quality as well. Shaping level is configurable.

10.14 Set SRTP

The Secure Real-time Transport Protocol (SRTP) is a Real-time Transport Protocol (RTP) internet

protocol, intended to provide encryption, message authentication and integrity, and replay attack

protection to the RTP data in both unicast and multicast applications.
Steps
1. 
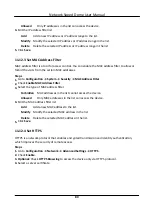
Go to Configuration → Network → Advanced Settings → SRTP .
2. Select Server Certificate.
3. Select Encrypted Algorithm.
4. Click Save.

Note

Only certain device models support this function.

If the function is abnormal, check if the selected certificate is abnormal in certificate

management.

Network Speed Dome User Manual

83

Содержание DS-2DE7A232IW-AEB

Страница 1: ...Network Speed Dome User Manual ...

Страница 2: ...the stakeholders and not installing highly invisible video products The purpose of video products is to record real activities within a specific time and space and under specific conditions Therefore every user shall first reasonably define his her own rights in such specific scope in order to avoid infringing on a third party s portraits privacy or other legitimate rights During the use of video ...

Страница 3: ...at these products will also play an active role in more aspects of social life Any abuse of video products in violation of human rights or leading to criminal activities are contrary to the original intent of technological innovation and product development Therefore each user shall establish an evaluation and tracking mechanism of their product application to ensure that every product is used in ...

Страница 4: ...CT BY YOU IS AT YOUR OWN RISK IN NO EVENT WILL HIKVISION BE LIABLE TO YOU FOR ANY SPECIAL CONSEQUENTIAL INCIDENTAL OR INDIRECT DAMAGES INCLUDING AMONG OTHERS DAMAGES FOR LOSS OF BUSINESS PROFITS BUSINESS INTERRUPTION OR LOSS OF DATA CORRUPTION OF SYSTEMS OR LOSS OF DOCUMENTATION WHETHER BASED ON BREACH OF CONTRACT TORT INCLUDING NEGLIGENCE PRODUCT LIABILITY OR OTHERWISE IN CONNECTION WITH THE USE ...

Страница 5: ...OF CHEMICAL OR BIOLOGICAL WEAPONS ANY ACTIVITIES IN THE CONTEXT RELATED TO ANY NUCLEAR EXPLOSIVE OR UNSAFE NUCLEAR FUEL CYCLE OR IN SUPPORT OF HUMAN RIGHTS ABUSES IN THE EVENT OF ANY CONFLICTS BETWEEN THIS MANUAL AND THE APPLICABLE LAW THE LATER PREVAILS Network Speed Dome User Manual iv ...

Страница 6: ...Plug in Installation 5 2 2 2 Admin Password Recovery 6 2 2 3 Illegal Login Lock 6 Chapter 3 Smart Function 8 3 1 Allocate VCA Resource 8 3 2 Set Camera Info 8 3 3 Face Capture 8 3 3 1 Set Auto Face Capture Rule 8 3 3 2 Operate Manual Face Capture 10 3 3 3 Overlay and Capture 11 3 3 4 Face Capture Algorithm Parameters 11 3 4 Smart Display 13 Chapter 4 PTZ 14 4 1 PTZ Control 14 4 2 Set Preset 16 4 2...

Страница 7: ...cus 23 Chapter 5 Live View 25 5 1 Live View Parameters 25 5 1 1 Start and Stop Live View 25 5 1 2 Aspect Ratio 25 5 1 3 Live View Stream Type 25 5 1 4 Quick Set Live View 25 5 1 5 Select the Third Party Plug in 26 5 1 6 Start Digital Zoom 26 5 1 7 Conduct Regional Focus 26 5 1 8 Conduct Regional Exposure 26 5 1 9 Count Pixel 27 5 1 10 Light 27 5 1 11 Lens Initialization 27 5 1 12 Track Manually 27...

Страница 8: ...Frame Interval 33 6 1 10 SVC 33 6 1 11 Smoothing 33 6 2 Audio Settings 33 6 2 1 Audio Input 33 6 2 2 Audio Output 34 6 2 3 Environmental Noise Filter 34 6 3 Two way Audio 34 6 4 ROI 35 6 4 1 Set ROI 35 6 5 Display Info on Stream 35 6 6 Display Settings 36 6 6 1 Scene Mode 36 6 6 2 Image Parameters Switch 39 6 6 3 Mirror 40 6 6 4 Video Standard 40 6 7 OSD 41 Chapter 7 Video Recording and Picture Ca...

Страница 9: ...ually 50 7 3 3 View and Download Picture 50 Chapter 8 Event and Alarm 51 8 1 Basic Event 51 8 1 1 Set Motion Detection 51 8 1 2 Set Video Tampering Alarm 53 8 1 3 Set Exception Alarm 54 8 1 4 Set Alarm Input 55 8 2 Smart Event 55 8 2 1 Detect Audio Exception 55 8 2 2 Set Intrusion Detection 56 8 2 3 Set Line Crossing Detection 58 8 2 4 Set Region Entrance Detection 59 8 2 5 Set Region Exiting Dete...

Страница 10: ...8 Audible Warning 71 Chapter 10 Network Settings 72 10 1 TCP IP 72 10 1 1 Multicast 73 10 1 2 Multicast Discovery 73 10 2 Port 74 10 3 Port Mapping 75 10 3 1 Set Auto Port Mapping 75 10 3 2 Set Manual Port Mapping 75 10 3 3 Set Port Mapping on Router 76 10 4 SNMP 77 10 5 Access to Device via Domain Name 77 10 6 Access to Device via PPPoE Dial Up Connection 78 10 7 Accessing via Mobile Client 78 10...

Страница 11: ... 11 4 Import and Export Configuration File 85 11 5 Export Diagnose Information 85 11 6 Reboot 85 11 7 Upgrade 85 11 8 View Open Source Software License 86 11 9 Set Live View Connection 86 11 10 Time and Date 86 11 10 1 Synchronize Time Manually 86 11 10 2 Set NTP Server 86 11 10 3 Set DST 87 11 11 Set RS 485 87 11 12 Security 87 11 12 1 Authentication 88 11 12 2 Set IP Address Filter 88 11 12 3 Se...

Страница 12: ...EEE 802 1X 91 11 12 8 SSH 92 11 12 9 Control Timeout Settings 92 11 12 10 Certificate Management 92 11 12 11 User and Account 95 Appendix A Device Command 97 Appendix B Device Communication Matrix 98 Network Speed Dome User Manual xi ...

Страница 13: ...gs museums and banks 1 2 Key Function The key functions of the device are as follows Actual functions may vary for different models You can enable the functions as you need Audio and Visual Alarm The device supports flashing light alarm and audio alarm to warn intruders off Face Capture The device captures human faces and uploads the pictures to the center Event Function The device detects basic e...

Страница 14: ... Display 1024 768 resolution or higher Web Browser Internet Explorer 10 and above version Apple Safari 12 and above version Mozilla Firefox 52 and above version Google Chrome 57 and above version Network Speed Dome User Manual 2 ...

Страница 15: ...nect to the same LAN Steps 1 Change the IP address of your PC to the same subnet as the device The default IP address of the device is 192 168 1 64 2 Open a web browser and input the default IP address 3 Create and confirm the admin password Caution STRONG PASSWORD RECOMMENDED We highly recommend you create a strong password of your own choosing using a minimum of 8 characters including upper case...

Страница 16: ...ch the online devices 2 Find and select your device in online device list 3 Input new password admin password and confirm the password Caution STRONG PASSWORD RECOMMENDED We highly recommend you create a strong password of your own choosing using a minimum of 8 characters including upper case letters lower case letters numbers and special characters in order to increase the security of your produc...

Страница 17: ...stem Security Security Service to turn it off 4 Click Login 5 Download and install appropriate plug in for your web browser For IE based web browser webcomponents and QuickTimeTM are optional For non IE based web browser webcomponents QuickTimeTM VLC and MJEPG are optional 2 2 1 Plug in Installation Certain operation systems and web browser may restrict the display and operation of the device func...

Страница 18: ...te When you need to reset the password make sure that the device and the PC are on the same network segment Security Question You can set the account security during the activation Or you can go to Configuration System User Management click Account Security Settings select the security question and input your answer You can click Forget Password and answer the security question to reset the admin ...

Страница 19: ... Lock Illegal Login Attempts and Locking Duration are configurable Illegal Login Attempts When your login attempts with the wrong password reach the set times the device is locked Locking Duration The device releases the lock after the setting duration Network Speed Dome User Manual 7 ...

Страница 20: ...t Go Open Platform General VCA Resource to set Camera No and Camera Info 3 3 Face Capture Face capture function detects and captures faces in surveillance scenes When the grading of the detected face exceeds an algorithm defined value the device captures the face and triggers linkage actions Set up rule and parameters before using the function Note This function is only supported by certain device...

Страница 21: ...ter the configuration interface You can manually resume the lock when the countdown is over 2 Use PTZ control panel or click to locate a scene with a face 3 Click and draw a detection area on live image 4 Input Mounting Height of the device 5 Input or draw the min pupil distance and the max pupil distance The Min Pupil Distance and the Max Pupil Distance are used to improve detection accuracy Only...

Страница 22: ...re Click and to draw the distance on live image or input values in the text fields of Min Pupil Distance and Max Pupil Distance 5 Click Save 6 Repeat above steps to set other detection scenes and areas 4 Set patrol schedule 1 Click Patrol Schedule 2 Draw time bars as desired 3 Click a time bar and click Configuration 4 Edit patrol path and input dwell time for each detection scene Add a detection ...

Страница 23: ...tal information You can set the background picture quality and resolution If the background image need to be uploaded to surveillance center check Background Upload Text Overlay You can check desired items Device No Camera Info and Capture Time and adjust their order to display on captured pictures by See Set Camera Info to set Device No and Camera Info 3 3 4 Face Capture Algorithm Parameters It i...

Страница 24: ...e target picture once the score of the captured face exceeds the Quick Shot Threshold during the Max Capture Interval Otherwise the device selects and uploads the picture with the highest score during the Max Capture Interval Quick Shot Threshold It refers to the quality of face to trigger quick shot Max Capture Interval It describes the max time occupation for one quick shot Capture Times It refe...

Страница 25: ...0 9600 17843 Live View Parameter Icon Function Capture a picture Start or stop recording Adjust the volume of live view Move the slider to right to turn up the volume and left to turn down the volume Move to the left end to mute the live view Download Display Pictures Click and the device stores captured pictures to the browser cache Hover the pointer over the icon to see the number of pictures in...

Страница 26: ...Speed in Configuration PTZ Basic Settings The speed of pan tilt movement in live view is based on this speed level You can set Max Tilt angle in Configuration PTZ Basic Settings to limit tilt movement range Click the button then the device keeps panning Note You can set Auto Scan Speed in Configuration PTZ Basic Settings The higher the value you set the faster the device pans Drag the slider to ad...

Страница 27: ... tilt speed change according to the amount of zoom When there is a large amount of zoom the pan tilt speed will be slower for keeping the image from moving too fast on the live view image Zoom in out Click the button and the lens zooms in Click the button and the lens zooms out Note You can set Zooming Speed in Configuration PTZ Basic Settings The higher the value is the faster the zooming speed i...

Страница 28: ...only call them but not configure them 4 Repeat the steps above to set multiple presets Click the button to call the preset Click the button to delete the preset Note You can delete all presets in Configuration PTZ Clear Config Click Clear All Presets and click Save What to do next Go to Configuration PTZ Basic Settings to set preset freezing and preset speed After enabling preset freezing the live...

Страница 29: ...44 Call pattern 4 102 Call patrol 5 45 One touch patrol 103 Call patrol 6 46 Day Night Mode 104 Call patrol 7 47 Alarm light on 105 Call patrol 8 4 3 Set Patrol Scan Patrol scan is a function to automatically move among multiple presets Before You Start Make sure that you have defined more than one presets See Set Preset for detailed configuration Steps 1 Click to show the setting panel and click ...

Страница 30: ...ck Clear All Patrols and click Save 4 3 1 Set One Touch Patrol The device automatically adds presets to one patrol path and starts patrol scan Steps 1 Set two or more presets except special presets For setting presets refer to Set Preset The device will automatically add presets to patrol path No 8 2 Choose one of the following methods to enable the function Click Call patrol path No 8 Select and ...

Страница 31: ...e device can only move within the limited range Steps 1 Go to Configuration PTZ Limit 2 Select Limit Type Manual Stops It refers to the movement range limit when you control the device manually Scan Stops It refers to the movement range limit when the device scans automatically Note Scan limit is only supported by the device that has scan function 3 Click Set and set limits according to the prompt...

Страница 32: ... Tasks 2 Check Enable Scheduled Task 3 Select the task type and set the period For setting the period refer to Set Arming Schedule 4 Repeat step 3 to set more than one scheduled tasks 5 Set Park Time During the set task period if you operate the device manually the scheduled task will be suspended When the manual operation is over the device will continue to perform the scheduled task after the se...

Страница 33: ...over certain areas on the live image to prevent certain spots in the surveillance area from being live viewed and recorded Steps 1 Go to Configuration PTZ Privacy Mask 2 Adjust the live image to the target scene via PTZ control buttons 3 Draw the area Draw Area Click Draw Area and click on the live view image to determine the boundary of the mask Stop Drawing ClickStop Drawing after drawing the ma...

Страница 34: ...north direction by controling the left arrow and right arrow on the PTZ panel 3 Click Set as North 3 Input the longitude and latitude of the device manually 4 Click Save What to do next If you lost direction when operating the device you can click Point to North to call the north position that is saved in the device 4 11 Set Power Off Memory This function can resume the previous PTZ status of devi...

Страница 35: ...for calibration 1 Adjust the live image to a desired scene via PTZ control buttons and click Add 2 Set the Rate and the Calibration Point Amount of the added scene Note More calibration points may increase calibration accuracy but more focusing time is required The default amount is recommended 3 Select the scene to display the calibration line A red line displays on live image 4 Adjust the length...

Страница 36: ...9 Click Save Network Speed Dome User Manual 24 ...

Страница 37: ...refers to original ratio window size 5 1 3 Live View Stream Type Select the live view stream type according to your needs For the detailed information about the stream type selection refer to Stream Type 5 1 4 Quick Set Live View It offers the quick access to the display settings OSD and video audio on live view page Steps 1 Click and click General to show quick setup page 2 Set display settings O...

Страница 38: ...oom 2 In live view image drag the mouse to select the desired region 3 Click in the live view image to back to the original image 5 1 7 Conduct Regional Focus You can enable the function to focus on certain area Steps Note This function varies with the device model 1 Click to enable regional focus 2 Drag the mouse on the live view to draw a rectangle as the desired focus area 3 Click to disable th...

Страница 39: ...u can initialize the lens in two ways Click on PTZ control panel to reset the lens parameters once Select Lens Initialization as ON in Configuration Image Display Settings to reset the lens parameters once 5 1 12 Track Manually In live view manually select a target for the device to track Note The function may not be supported by certain device models Steps 1 Click on the toolbar of the live view ...

Страница 40: ...to solve the problem Steps 1 Go to Configuration Local 2 Set the transmission parameters as required Protocol TCP TCP ensures complete delivery of streaming data and better video quality yet the real time transmission will be affected It is suitable for the stable network environment UDP UDP is suitable for the unstable network environment that does not demand high video fluency MULTICAST MULTICAS...

Страница 41: ...vironment the device cannot ensures video fluency even the fluency is enabled Custom You can set the frame rate manually In poor network environment you can reduce the frame rate to get a fluent live view But the rule information may cannot display 3 Click OK Network Speed Dome User Manual 29 ...

Страница 42: ...an do But high resolution and frame rate usually means larger storage space and higher bandwidth requirements in transmission Sub Stream The stream usually offers comparatively low resolution options which consumes less bandwidth and storage space Other Streams Steams other than the main stream and sub stream may also be offered for customized usage 6 1 2 Video Type Select the content video and au...

Страница 43: ...lity requires higher bandwidth 6 1 6 Frame Rate The frame rate is to describe the frequency at which the video stream is updated and it is measured by frames per second fps A higher frame rate is advantageous when there is movement in the video stream as it maintains image quality throughout Note that higher frame rate requires higher bandwidth and larger storage space 6 1 7 Video Encoding It stan...

Страница 44: ... quality H 265 H 265 is an improved compression coding technology based on H 265 By enabling H 265 you can estimate the HDD consumption by its maximum average bitrate Compared to H 265 H 265 reduces storage by up to 50 with the same maximum bitrate in most scenes When H 265 is enabled Max Average Bitrate is configurable The device gives a recommended max average bitrate by default You can adjust t...

Страница 45: ...n the subset bitstream The subset bitstream is derived by dropping packets from the larger bitstream SVC enables forward compatibility for older hardware the same bitstream can be consumed by basic hardware which can only decode a low resolution subset while more advanced hardware will be able decode high quality video stream 6 1 11 Smoothing It refers to the smoothness of the stream The higher va...

Страница 46: ...n is enabled the noise in the environment can be filtered to some extent 6 3 Two way Audio It is used to realize the two way audio function between the monitoring center and the target in the monitoring screen Before You Start Make sure the audio input device pick up or microphone and audio output device speaker connected to the device is working properly Refer to specifications of audio input and...

Страница 47: ...4 Select Region No in Fixed Region to draw ROI region 1 Click Draw Area 2 Click and drag the mouse on the view screen to draw the fixed region 3 Click Stop Drawing Note Select the fixed region that needs to be adjusted and drag the mouse to adjust its position 5 Input the Region Name and ROI Level 6 Click Save Note The higher the ROI level is the clearer the image of the detected region is 7 Optio...

Страница 48: ...shutter and gain You can adjust image effect by setting exposure parameters Exposure Mode Auto The iris shutter and gain values are adjusted automatically You can limit the changing ranges of iris shutter and gain by setting Max Iris Limit Min Iris Limit Max Shutter Limit Min Shutter Limit and Limit Gain for better exposure effect Iris Priority The value of iris needs to be adjusted manually The s...

Страница 49: ... the image and avoid flashing lights Semi auto The device focuses once after the PTZ and lens zooming If the image is clear the focus does not change when the scene changes Manual You can adjust the focus manually on the live view page Min Focus Distance When the distance between the scene and lens is shorter than the Min Focus Distance the lens does not focus Day Night Switch Day Night Switch fun...

Страница 50: ...image brightness Brightness Limit Adjust the upper limit of supplement light power BLC If you focus on an object against strong backlight the object will be too dark to be seen clearly BLC backlight compensation compensates light to the object in the front to make it clear If BLC mode is set as Custom you can draw a red rectangle on the live view image as the BLC area HLC When the bright area of t...

Страница 51: ...ion degree Expert Set the DNR level for both space DNR and time DNR to control the noise reduction degree The higher level means stronger reduction degree White Balance White balance is the white rendition function of the camera It is used to adjust the color temperature according to the environment Defog You can enable the defog function when the environment is foggy and the image is misty It enh...

Страница 52: ...everse of the actual scene this function helps to display the image normally Select the mirror mode as needed Note The video recording will be shortly interrupted when the function is enabled 6 6 4 Video Standard Video standard is an ability of a video card or video display device that defines the amount of colors that are shown and the resolution The two most common video standard used are NTSC a...

Страница 53: ...ters and click Save to take effect Character Set Select character set for displayed information If Korean is required to displayed on screen select EUC KR Otherwise select GBK Displayed Information Set camera name date week and their related display format Text Overlay Set customized overlay text on image OSD Parameters Set OSD parameters such as Display Mode OSD Size Font Color and Alignment Netw...

Страница 54: ...ce Steps 1 Go to Configuration Storage Storage Management HDD Management 2 Select the memory card Note If an Unlock button appears you need to unlock the memory card first See Detect Memory Card Status for details 3 Click Format to initialize the memory card When the Status of memory card turns from Uninitialized to Normal the memory card is ready for use 4 Optional Encrypt the memory card 1 Click...

Страница 55: ... Note If the encryption password is forgotten and you still want to use this memory card see Set New or Unencrypted Memory Card to format and set the memory card All existing contents will be removed 4 Optional Define the Quota of the memory card Input the percentage for storing different contents according to your needs 5 Click Save Detect Memory Card Status The device detects the status of Hikvi...

Страница 56: ... it unlocking will be done automatically and no unlocking procedures are required on the part of users If you use the memory card with a lock on a different device you can go to HDD Management to unlock the memory card manually Select the memory card and click Unlock Enter the correct password to unlock it Remove the Lock a Select the Lock Switch as OFF b Enter the password in Password Settings c ...

Страница 57: ...al Picture Name Set the naming rule for captured pictures You can choose Default in the drop down list to use the default rule that is IP address_channel number_capture time_event type jpg e g 10 11 37 189_01_20150917094425492_FACE_DETECTION jpg Or you can customize it by adding a Custom Prefix to the default naming rule 3 Click Upload Picture to enable uploading snapshots to the FTP server 4 Clic...

Страница 58: ...ng a worn out eMMC may lead to device boot failure 7 1 5 Set Cloud Storage It helps to upload the captured pictures and data to the cloud The platform requests picture directly from the cloud for picture and analysis The function is only supported by certain models Steps Caution If the cloud storage is enabled the pictures are stored in the cloud video manager firstly 1 Go to Configuration Storage...

Страница 59: ...iguration Storage Schedule Settings Record Schedule 2 Check Enable 3 Select a record type Note The record type is vary according to different models Continuous The video will be recorded continuously according to the schedule Motion When motion detection is enabled and trigger recording is selected as linkage method object movement is recorded Alarm When alarm input is enabled and trigger recordin...

Страница 60: ...stream type with higher bitrate the actual time of the pre record and post record may be less than the set value Recording Expiration The recordings are deleted when they exceed the expired time The expired time is configurable Note that once the recordings are deleted they can not be recovered 6 Click Save 7 2 2 Record Manually Steps 1 Go to Configuration Local 2 Set the Record File Size and savi...

Страница 61: ...s manually or automatically and save them in configured saving path You can view and download the snapshots 7 3 1 Capture Automatically This function can capture pictures automatically during configured time periods Before You Start If event triggered capture is required you should configure related linkage methods in event settings Refer to Event and Alarm for event settings Steps 1 Go to Configu...

Страница 62: ...he live view or play back window to capture a picture manually 7 3 3 View and Download Picture You can search view and download the pictures stored in the local storage or network storage Steps 1 Click Picture 2 Set search condition and click Search The matched pictures showed in the file list 3 Select the pictures then click Download to download them Note Go to Configuration Local click Save snap...

Страница 63: ... Normal mode and expert mode are selectable For the information about normal mode see Normal Mode For the information about expert mode see Expert Mode 5 Set the arming schedule See Set Arming Schedule for details 6 Set linkage methods See Linkage Method Settings for details 7 Click Save Normal Mode You can set motion detection parameters according to the device default parameters Steps 1 Select n...

Страница 64: ...ps 1 Select Expert Mode in Configuration 2 Set parameters of expert mode Scheduled Image Settings OFF Image switch is disabled Auto Switch The system switches day night mode automatically according to environment It displays colored image at day and black and white image at night Scheduled Switch The system switches day night mode according to the schedule It switches to day mode during the set pe...

Страница 65: ...elete all the areas 4 Click Save 5 Optional Repeat above steps to set multiple areas 8 1 2 Set Video Tampering Alarm When the configured area is covered and cannot be monitored normally the alarm is triggered and the device takes certain alarm response actions Steps 1 Go to Configuration Event Basic Event Video Tampering 2 Check Enable 3 Set the Sensitivity The higher the value is the easier to de...

Страница 66: ...od 6 Click Save 8 1 3 Set Exception Alarm Exception such as network disconnection can trigger the device to take corresponding action Steps 1 Go to Configuration Event Basic Event Exception 2 Select Exception Type HDD Full The HDD storage is full HDD Error Error occurs in HDD Network Disconnected The device is offline Network Speed Dome User Manual 54 ...

Страница 67: ...r to Set Arming Schedule for setting scheduled time Refer to Linkage Method Settings for setting linkage method 5 Click Copy to to copy the settings to other alarm input channels 6 Click Save 8 2 Smart Event Note For certain device models you need to enable the smart event function on VCA Resource page first to show the function configuration page The function varies according to different models ...

Страница 68: ... different models 8 2 2 Set Intrusion Detection Intrusion detection detects the object movement of entering and loitering in a predefined area When intrusion occurs the device takes linkage actions as response Before You Start You need to enable Smart Event on the VCA Resource page to show the configuration page See Allocate VCA Resource for instructions Steps 1 Go to Open Platform Smart Event Int...

Страница 69: ...parameters Sensitivity It stands for the sensitivity of detecting an target The higher the value of sensitivity is the more easily the target is detected Threshold Threshold stands for the time of the target loitering in the region If the time that she he stays in the region exceeds the threshold the alarm is triggered Detection Target You can specify the object type and the device only detects th...

Страница 70: ...guration interface You can manually resume the lock when the countdown is over 4 Adjust the live image to the desired scene by using PTZ control buttons 5 Draw detection line 1 Select a Line No Up to 4 lines can be set in the scene 2 Click Detection Area A yellow line is displayed on live image 3 Click on the line and drag its end points to adjust the length and position 4 Select the Direction for...

Страница 71: ...again 7 Set detection parameters Sensitivity It stands for the sensitivity of detecting an target The higher the value is the more easily the target is detected Detection Target You can specify the object type and the device only detects the selected type of objects 8 Click Save 9 Repeat above steps to set other lines 10 Set arming schedule See Set Arming Schedule 11 Set linkage method See Linkage...

Страница 72: ... Click Detection Area 3 Click on the live image to draw the boundaries of the detection area and right click to complete drawing 6 Optional Set the minimum size and the maximum size for the target to improve detection accuracy Only targets whose size are between the maximum size and the minimum size trigger the detection 1 Click Max Size and drag the mouse on live image If you want to change the s...

Страница 73: ...VCA Resource page to show the configuration page See Allocate VCA Resource for instructions Steps 1 Go to Open Platform Smart Event Region Exiting Detection 2 Check Enable 3 Optional Click Lock to lock PTZ control to prevent the interruption from other PTZ related action during configuration Normally the PTZ control is automatically locked when you enter the configuration interface You can manuall...

Страница 74: ... the button and draw again 2 Click Min Size and drag the mouse on the live image If you want to change the size click the button and draw again 7 Set detection parameters Sensitivity It stands for the sensitivity of detecting an target The higher the value is the more easily the target is detected Detection Target You can specify the object type and the device only detects the selected type of obj...

Страница 75: ... area 1 Select a Region No Up to 4 regions can be set 2 Click Detection Area 3 Click on the live image to draw the boundaries of the detection area and right click to complete drawing 6 Optional Set the minimum size and the maximum size for the target to improve detection accuracy Only targets whose size are between the maximum size and the minimum size trigger the detection 1 Click Max Size and d...

Страница 76: ...art Event on the VCA Resource page to show the configuration page See Allocate VCA Resource for instructions Steps 1 Go to Open Platform Smart Event Unattended Baggage Detection 2 Check Enable 3 Optional Click Lock to lock PTZ control to prevent the interruption from other PTZ related action during configuration Normally the PTZ control is automatically locked when you enter the configuration inte...

Страница 77: ...d drag the mouse on the live image If you want to change the size click the button and draw again 7 Set detection parameters Sensitivity The value of the sensitivity defines the size of the object which can trigger the alarm when the sensitivity is high a very small object can trigger the alarm Threshold It stands for the time of the objects left in the area Alarm is triggered after the object is ...

Страница 78: ...is zooming control mode For the model with a built in gyroscope try to calibrate the attitude if some zooming problems happen during tracking See Set Device Position for instructions By Target Frame The tracked target has a virtual frame around The device calculates a suitable zoom ratio according to the frame and the set Tracking Zoom Ratio Larger value means bigger zoom ratio Wait to Stop Tracki...

Страница 79: ...adjust the time period Click on the selected time period and drag it on the time bar 4 Optional Click Copy to to copy the same settings to other days 5 Click Save 9 2 Linkage Method Settings You can enable the linkage functions when an event or alarm occurs 9 2 1 Trigger Alarm Output If the device has been connected to an alarm output device and the alarm output No has been configured the device s...

Страница 80: ...Copy to to copy the parameters to other alarm output channels 4 Click Save Manual Alarm You can trigger an alarm output manually Steps 1 Set the manual alarm parameters Alarm Output No Select the alarm output No according to the alarm interface connected to the external alarm device Alarm Name Edit a name for the alarm output Delay Select Manual 2 Click Manual Alarm to enable manual alarm output 3...

Страница 81: ...ss SMTP Server and SMTP Port 2 Optional If your email server requires authentication check Authentication and input your user name and password to log in to the server 3 Set the E mail Encryption When you select TLS and disable STARTTLS emails are sent after encrypted by TLS The SMTP port should be set as 465 When you select TLS and Enable STARTTLS emails are sent after encrypted by STARTTLS and t...

Страница 82: ... After enabling Flashing Light and setting the Flashing Light Alarm Output the light flashes when an alarm event is detected Set Flashing Alarm Light Output When events occur the flashing light on the device can be triggered as an alarm Steps 1 Go to Configuration Event Basic Event Flashing Alarm Light Output 2 Set Flashing Duration Flashing Frequency and Brightness Flashing Duration The time that...

Страница 83: ...detection area audible alarm can be triggered as a warning Steps 1 Go to Configuration Event Basic Event Audible Alarm Output 2 Select Sound Type and set related parameters Select Prompt and set the alarm times you need Select Warning and its contents Set the alarm times you need Select Custom Audio You can select a custom audio file from the drop down list If no file is available you can click Ad...

Страница 84: ...evice IP address is changed after enabling the function You can use SADP to get the device IP address Note The network that the device is connected to should support DHCP Dynamic Host Configuration Protocol Manual You can set the device IPv4 parameters manually Input IPv4 Address IPv4 Subnet Mask and IPv4 Default Gateway and click Test to see if the IP address is available IPv6 Three IPv6 modes ar...

Страница 85: ...ame The device is registered under the register domain name for easier management within the local area network Note DHCP should be enabled for the dynamic domain name to take effect 10 1 1 Multicast Multicast is group communication where data transmission is addressed to a group of destination devices simultaneously Go to Configuration Network Basic Settings Multicast for the multicast settings I...

Страница 86: ...o the port of real time streaming protocol SRTP Port It refers to the port of secure real time transport protocol Server Port It refers to the port through which the client adds the device Enhanced SDK Service Port It refers to the port through which the client adds the device Certificate verification is required to ensure the secure access WebSocket Port TCP based full duplex communication protoc...

Страница 87: ...t Mapping Steps 1 Check Enable UPnP and choose a friendly name for the camera or you can use the default name 2 Select the port mapping mode to Auto 3 Click Save Note UPnP function on the router should be enabled at the same time 10 3 2 Set Manual Port Mapping Steps 1 Check Enable UPnP and choose a friendly name for the device or you can use the default name 2 Select the port mapping mode to Manua...

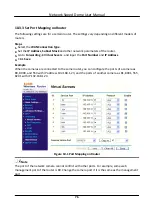
Страница 88: ...umber and IP Address 4 Click Save Example When the cameras are connected to the same router you can configure the ports of a camera as 80 8000 and 554 with IP address 192 168 1 23 and the ports of another camera as 81 8001 555 8201 with IP 192 168 1 24 Figure 10 1 Port Mapping on Router Note The port of the network camera cannot conflict with other ports For example some web management port of the...

Страница 89: ...ngs 4 Click Save 10 5 Access to Device via Domain Name You can use the Dynamic DNS DDNS for network access The dynamic IP address of the device can be mapped to a domain name resolution server to realize the network access via domain name Before You Start Registration on the DDNS server is required before configuring the DDNS settings of the device Steps 1 Refer to TCP IP to set DNS parameters 2 G...

Страница 90: ...rd Password for dial up network access Confirm Input your dial up password again 4 Click Save 5 Access the device By Browsers Enter the WAN dynamic IP address in the browser address bar to access the device By Client Software Add the WAN dynamic IP address to the client software Refer to the client manual for details Note The obtained IP address is dynamically assigned via PPPoE so the IP address ...

Страница 91: ... Connect as the Platform Access Mode 4 Check Enable 5 Click and read Terms of Service and Privacy Policy in pop up window 6 Create a verification code or change the old verification code for the camera Note The verification code is required when you add the camera to Hik Connect service 7 Save the settings Enable Hik Connect Service via SADP Software This part introduce how to enable Hik Connect s...

Страница 92: ...ect user account 3 Log in after registration 10 7 3 Add Camera to Hik Connect Steps 1 Connect your mobile device to a Wi Fi 2 Log into the Hik Connect app 3 In the home page tap on the upper right corner to add a camera 4 Scan the QR code on camera body or on the Quick Start Guide cover Note If the QR code is missing or too blur to be recognized you can also add the camera by inputting the camera ...

Страница 93: ...nline when the function is correctly set 10 9 Set Open Network Video Interface If you need to access the device through Open Network Video Interface protocol you can configure the user settings to enhance the network security Steps 1 Go to Configuration Network Advanced Settings Integration Protocol 2 Check Enable Open Network Video Interface 3 Click Add to configure the Open Network Video Interfa...

Страница 94: ...e to add the device to the client software with SDK over TLS protocol When you use Enhanced SDK Service select the Server Certificate Note Complete certificate management before selecting server certificate Refer to Certificate Management for detailed information When set up connection between the device and the client software it is recommended to use Enhanced SDK Service and set the communicatio...

Страница 95: ...oth video data packet before transmission It helps to improve latency and reduce packet loss caused by network congestion and ensure the video quality as well Shaping level is configurable 10 14 Set SRTP The Secure Real time Transport Protocol SRTP is a Real time Transport Protocol RTP internet protocol intended to provide encryption message authentication and integrity and replay attack protectio...

Страница 96: ... Maintenance 2 Click Restore or Default according to your needs Restore Reset device parameters except user information IP parameters and video format to the default settings Default Reset all the parameters to the factory default Note Be careful when using this function After resetting to the factory default all the parameters are reset to the default settings 11 3 Search and Manage Log Log helps...

Страница 97: ...ion file 4 Click Import 11 5 Export Diagnose Information Diagnose information includes running log system information hardware information Go to Configuration System Maintenance Upgrade Maintenance Check desired diagnose information and click Diagnose Information to export corresponding diagnose information of the device 11 6 Reboot You can reboot the device via browser Go to Configuration System ...

Страница 98: ... number 11 10 Time and Date You can configure time and date of the device by configuring time zone time synchronization and Daylight Saving Time DST 11 10 1 Synchronize Time Manually Steps 1 Go to Configuration System System Settings Time Settings 2 Select Time Zone 3 Click Manual Time Sync 4 Choose one time synchronization method Select Set Time and manually input or select date and time from the...

Страница 99: ...ct Start Time End Time and DST Bias 4 Click Save 11 11 Set RS 485 RS 485 is used to connect the device to external device You can use RS 485 to transmit the data between the device and the computer or terminal when the communication distance is too long Before You Start Connect the device and computer or termial with RS 485 cable Steps 1 Go to Configuration System System Settings RS 485 2 Set the ...

Страница 100: ...c are supported which means authentication information is needed when WEB request is sent to the device If you select digest basic it means the device supports digest or basic authentication If you select digest the device only supports digest authentication WEB Digest Algorithm MD5 SHA256 and MD5 SHA256 encrypted algorithm in WEB authentication If you enable the digest algorithm except for MD5 th...

Страница 101: ...eck Enable MAC Address Filter 3 Select the type of MAC address filter Forbidden MAC addresses in the list cannot access the device Allowed Only MAC addresses in the list can access the device 4 Edit the MAC address filter list Add Add a new MAC address to the list Modify Modify the selected MAC address in the list Delete Delete the selected MAC address in the list 5 Click Save 11 12 4 Set HTTPS HT...

Страница 102: ...nalyze the security log files of the device so as to find out the illegal intrusion and troubleshoot the security events Steps Note This function is only supported by certain camera models 1 Go to Configuration System Maintenance Security Audit Log 2 Select log types Start Time and End Time 3 Click Search The log files that match the search conditions will be displayed on the Log List 4 Optional C...

Страница 103: ...S 2 Set Video Audio DSCP Alarm DSCP and Management DSCP Note Network can identify the priority of data transmission The bigger the DSCP value is the higher the priority is You need to set the same value in router while configuration 3 Click Save 11 12 7 Set IEEE 802 1X You can authenticate user permission of the connected device by setting IEEE 802 1X Go to Configuration Network Advanced Settings ...

Страница 104: ...settings 11 12 10 Certificate Management It manages the server client certificates and CA certificate of the device Server Certificate Client Certificate Note The device has default self signed server client certificate installed The certificate ID is default Create and Install Self signed Certificate Steps 1 Go to Configuration System Security Certificate Management 2 Click Create Self signed Cer...

Страница 105: ...st file 7 Send the file to a trusted third party for signature 8 After receiving the certificated sent back from the third party install it to the device 1 Click Import 2 Input Certificate ID Note The input certificate ID cannot be the same as the existed ones 3 Click Browse to select the certificate file 4 Select Self signed Request Certificate 5 Click OK The imported certificate is displayed in ...

Страница 106: ...umn Functions Install CA Certificate Before You Start Prepare a CA certificate in advance Steps 1 Go to Configuration System Security Certificate Management 2 Input Certificate ID Note The input certificate ID cannot be the same as the existing ones 3 Click Browse to select the certificate file 4 Click OK The imported certificate is displayed in the CA Certificate list If the certificate is used b...

Страница 107: ...months is recommended If the device is used in high risk environment it is recommended that the password should be changed every month or week Steps 1 Go to Configuration System User Management User Management 2 Click Add Enter User Name select Level and enter Password Assign remote permission to users based on needs Administrator The administrator has the authority to all operations and can add u...

Страница 108: ...User Management Online Users to view the list of online users Simultaneous Login The administrator can set the maximum number of users logging into the system through web browser simultaneously Go to Configuration System User Management click General and set Simultaneous Login Network Speed Dome User Manual 96 ...

Страница 109: ...Command Scan the following QR code to get device common serial port commands Note that the command list contains the commonly used serial port commands for all Hikvision network cameras Network Speed Dome User Manual 97 ...

Страница 110: ... B Device Communication Matrix Scan the following QR code to get device communication matrix Note that the matrix contains all communication ports of Hikvision network cameras Network Speed Dome User Manual 98 ...

Страница 111: ...UD23863B A ...

Отзывы: