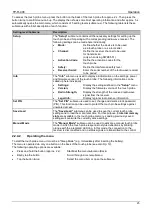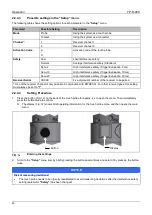
Operation
TP-R-400
28
2.2.5
Aligning Stylus to Spindle Centre
NOTICE
Risk of damage to the equipment!
•
Clean and dry the probe well!
•
Do not use compressed air to clean the touch probe!
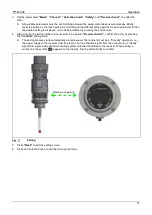
1. Loosen clamping screws "C" (Fig. 14) (2x) then re-tighten with moderate force.
2. Adjust the touch probe with the adjustment screws "A" (Fig. 14) (4x) to less than 20 µm.
3. Tighten the clamping screws "C" (2x) a little more.
4. Adjust the touch probe with the adjustment screws "A" (4x) to less than 5 µm.
5. Tighten clamping screws "C" (Fig. 14) (2x) to the torque specified in Fig. 14.
6. Tighten adjustment screws "A" (Fig. 14) (4x) to the torque specified in Fig. 14 against each other.
7. Check the alignment of the stylus.
8. Calibrate the probe.
Aligning Stylus to Spindle Centre
C = Clamping screw M5x0.5x7
(AF2.5 mm) (2x)
(1351)
M=2 Nm (1.47 lbf.ft)
Hexagon key
AF2.5 mm (1346)
AF2 mm (1097)
A = Adjustment screw M4x8
(AF2 mm) (4x)
(1352)
M=1.5 Nm (1.1 lbf.ft)
Dial gauge
(3079)
Содержание TP-R-400
Страница 1: ......


