


Using the Scheduling Panel Setup Wizard
Acendo Book Scheduling Touch Panels - Instruction Manual
28
Resource Management Suite
To configure the Acendo Book Panel for use with RMS:
4.
In the
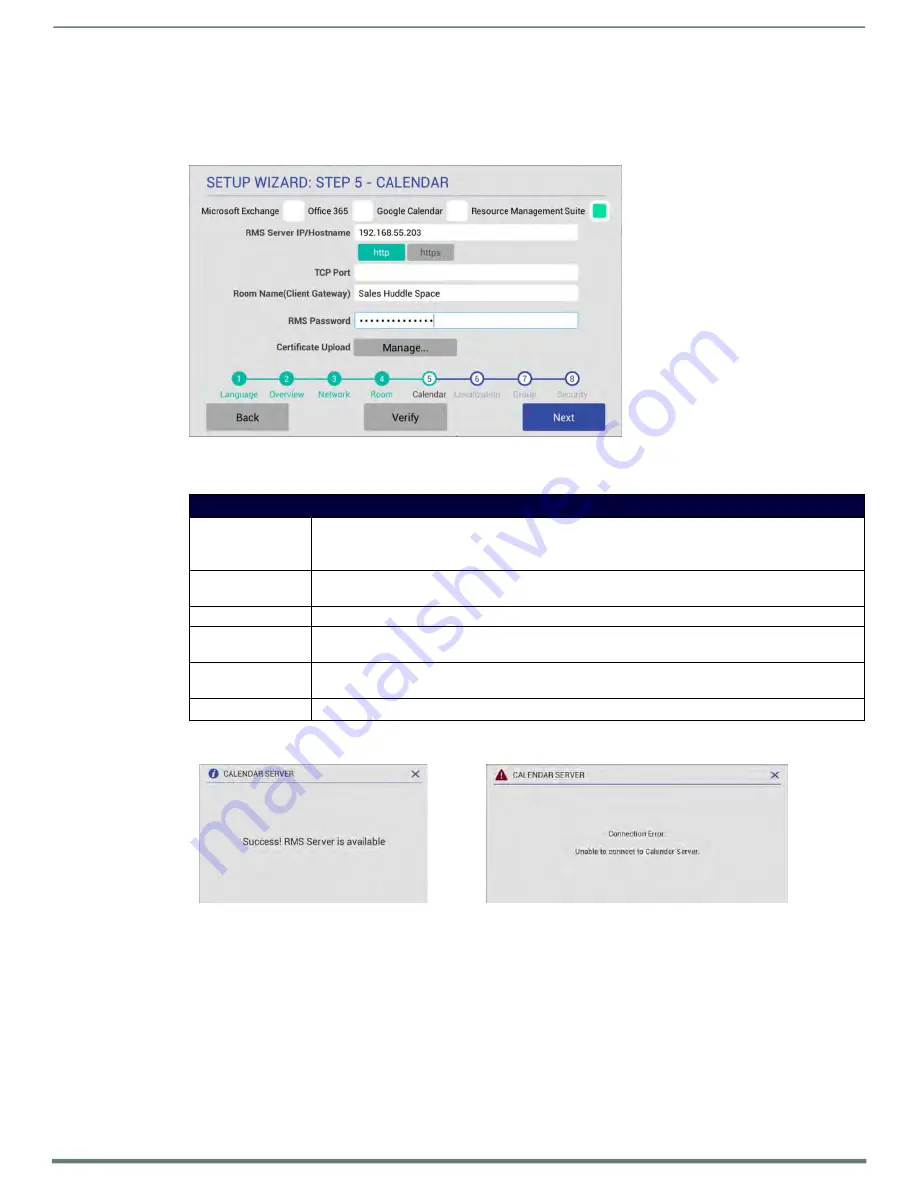
Setup Wizard: Step 4 - Calendar
page, select
Resource Management Suite
to invoke the following options (FIG. 34) :
FIG. 33a
AMX RMS Calendar Configuration Settings
Microsoft Exchange Calendar Configuration Settings
RMS Server IP /
Hostname
Enter the target IP or Hostname for the scheduling
server. Example syntax:
192.168.55.203 or rms.bizcorp.com
Protocol
Select the radio button for either HTTP or HTTPS depending on the RMS server configuration
TCP Port
Enter the TCP Port for the RMS Server (required even if default)
Room Name (Client
Gateway)
Enter the friendly name of the AcendoBook’s managed space as you would
like it to appear in RMS
RMS Password
Enter the client password that has been set on the RMS server for all RMS
client connections including the RMS SDK
Certificate Upload
Upload a certificate if required for a TLS connection to RMS
5.
Fill in these fields and press
Verify
to verify that the scheduling panel can connect to the scheduling system using
the information currently entered on this page. The panel will indicate if the connection attempt was successful (FIG.
27):
Fig 33b
Success and failure results from the Verify button
6.
Click the Next button to proceed. At the end of the Configuration Wizard, the panel will show this dialog box (Fig
36)


