-D2 -134
13
-7
FRAME CONFIRMATION
20_7 M717
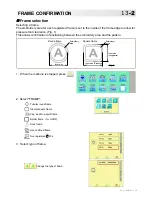
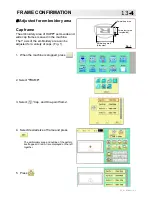
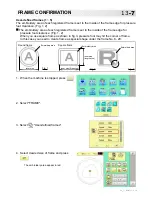
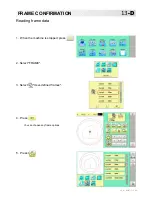
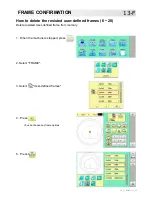
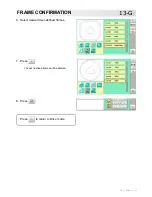
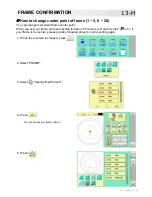
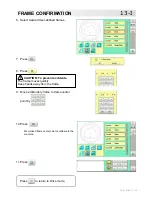
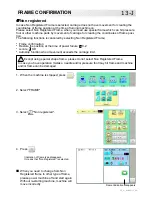
1. When the machine is stopped, press
.
2. Select "FRAME".
3. Select
"User-defined frames".
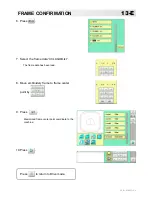
4. Select desired size of frame and press
.
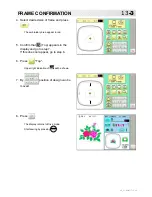
The embroidery area appear in red.
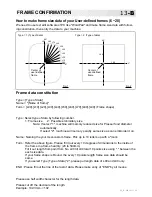
User-defined frames (1 ~ 5)
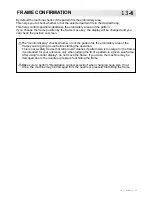
The embroidery area of each registered frame is set to the inside of the frame edge for pressure
foot clearance. (Fig. 1, 2)
The embroidery area of each registered frame is set to the inside of the frame edge for
pressure foot clearance. (Fig. 1, 2)
When you use square frame as shown in fig.3, pressure foot may hit the corner of frame.
In this case you need to create frame as special shape under the frame No.6 - 20.
Fig. 1
Embroidery area
Round frame
Embroidery area
Square frame
Fig. 3
Fig. 2
Embroidery area
Inner size (Sidewise)
Inner size
Inner size
(lengthwise)
Содержание HCH
Страница 2: ......
Страница 87: ...D2 69 11 1b PATTERNS IN MEMORY 5_B M201 5 Press Repeat steps 3 and 5 to unlock Press to return to Menu mode...
Страница 92: ...D2 74 6 Press The pattern name will be changed 11 5b PATTERNS IN MEMORY 11_5 M401 Press to return to Menu mode...
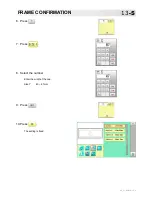
Страница 115: ...D2 133 13 6 FRAME CONFIRMATION 20_5 N101 11 Press Press to return to Drive mode...
Страница 163: ...D2 151 6 Press 7 Press 8 Press The machine will be rebooted The setting is fixed 18 2 OTHER SETTINGS 22_1 M201...
Страница 194: ...SJ 81 Those fonts are created by www i cliqq com 26 3 BUILT IN FONT LIST 26_3 N401...

