


72_
setup
setup
●
Setting the Dhcp ip address of the Broadband router
1.
To access the Broadband Router's configurations, open a web browser on the local PC that is connected to the
Broadband Router and enter the router's address (ex : http://192.168.1.1).
2.
At this stage, make the local PC's windows network configurations to the below example :
example)
IP : 192.168.1.2
Subnet Mask : 255.255.255.0
Gateway : 192.168.1.1
– Once connected to the Broadband Router, it prompts with password. While entering nothing to the User
Name field, enter “
admin
” into the password field and press <
oK
> to access the router configurations.
– Access the router's DHCP configuration menu and set its DHCP server activation, and provide the start and
end address.
■
Start address : 192.168.0.100
■
End address : 192.168.0.200
■
Above steps may differ from the router devices depending on the manufacturer.
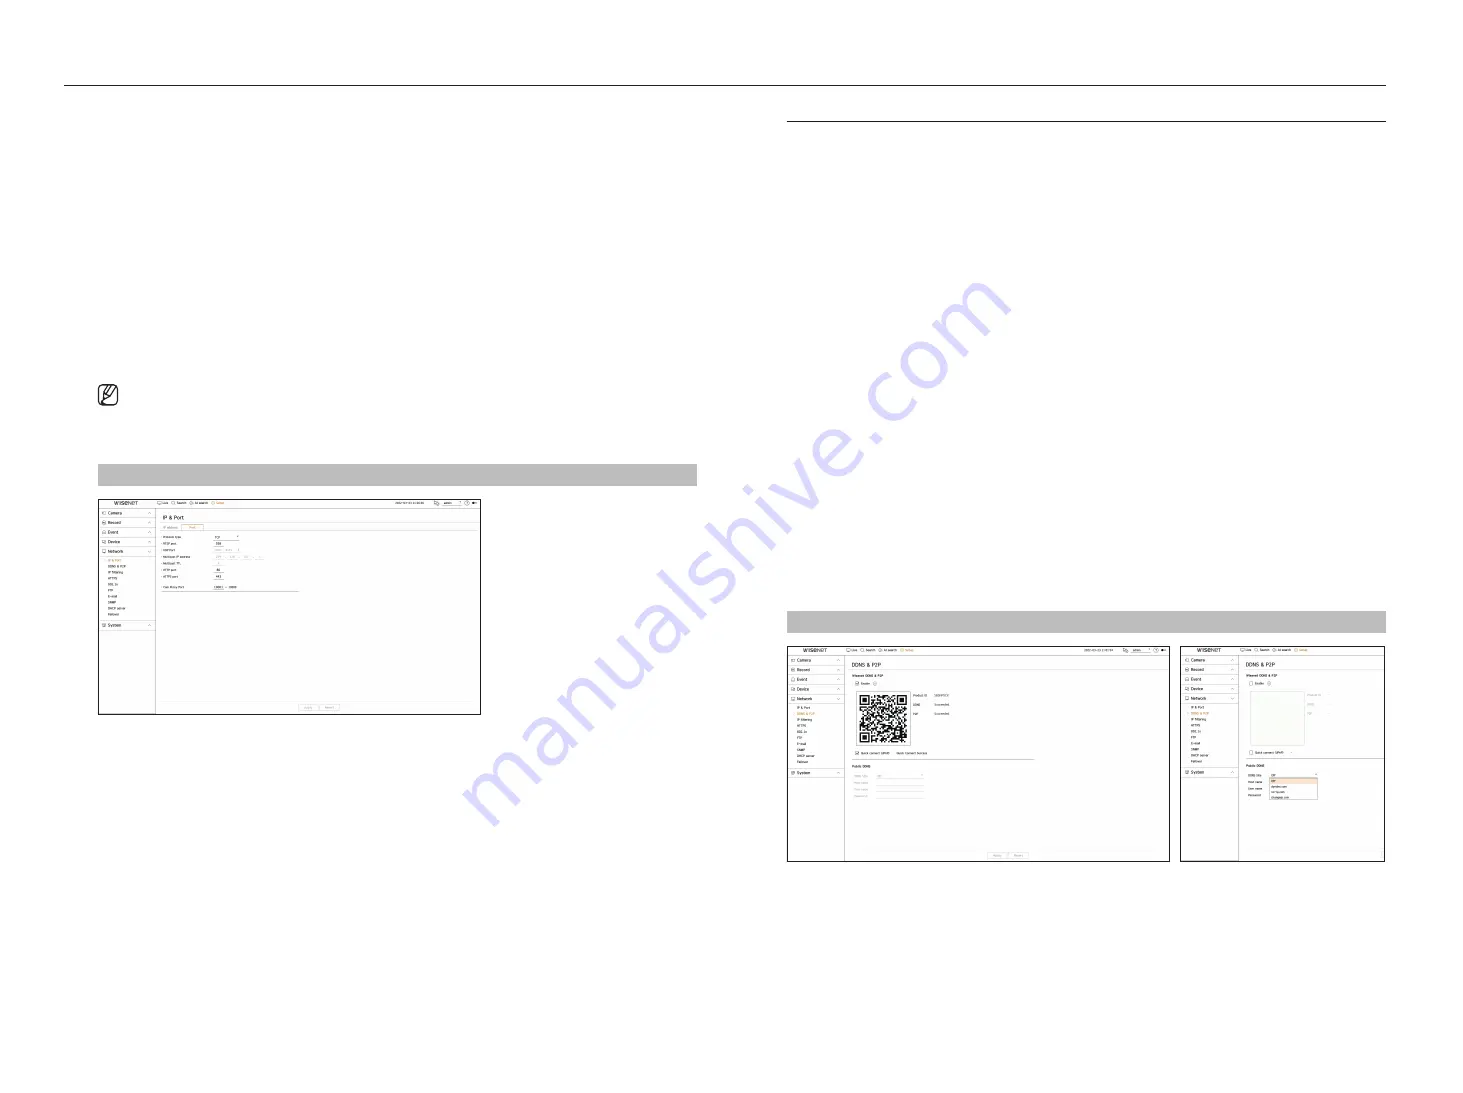
port Setting
Setup > network > ip & port > port
●
Protocol type : Select the protocol type among TCP, UDP Unicast and UDP Multicast.
●
RTSP port : It is used to transmit the video over the network. The initial value is <
558
>.
●
UDP port : Activated when an UDP item is selected in protocol type. The initial value is <
8000-8159
>,
and the setting value changes in 160 units.
– UDP : It has less stability and faster speed when compared to TCP, and recommended for local area network
(LAN) environments.
●
Multicast IP address : Enter the IP address directly when selecting an UDP Multicast.
●
Multicast TTL : Enter the TTL value when selecting an UDP Multicast. The initial value is set to <
5
>, and enter a
value between 0 and 255.
●
HTTP port : Enter the port value for the HTTP web viewer. The initial value is set to <
80
>.
●
HTTPS port : Enter the port value for the HTTPS web viewer. The initial value is set to <
443
>.
■
HTTPS is an enhanced version of the HTTP web communication protocol. If security is important when accessing the web viewer, enable the HTTPS
port.
●
Cam proxy port : Sets the camera proxy port. The initial value is set to <
10001
>.
DDnS & p2p
A remote user can network a recorder using a DDNS address in a dynamic IP system. If you cannot connect with a
dynamic IP, you can easily access using a P2P service.
accessing using DDnS address in the dynamic ip environment
In the dynamic IP environment such as xDSL/Cable modem, the router's WAN IP can be changed, so we provide
DDNS (Dynamic Domain Name Server) service so that you can always access the recorder with only the DDNS
address even in the dynamic IP environment.
Before using Wisenet DDNS & P2P, please set up the network connection and DDNS first.
DDnS Setting
Setting DDnS in the recorder
Set <
protocol type
> to <
tcp
> in the "
Setup
>
network
>
ip & port
>
port
" menu of the connected recorder.
DDnS Settings of the router
Select the corresponding menu for the network transfer protocol of the router.
Setting up upnp of router
Refer to the router's documentation to enable the UPnP function of the router.
Setting the Wisenet DDnS & p2p
Setup > network > DDnS & p2p
●
Enable : Click <
enable
> to test the connection to see if the current recorder can be connected remotely.
When the connection is successful, a QR code is created.
■
It connects to Wisenet DDNS first. If it does not connect to DDNS, it automatically connects to P2P.
Содержание XRN-3210B4
Страница 1: ...NETWORKVIDEO RECORDER User Manual Wisenet NVR...
Страница 131: ......


