background image

23 / 35 

Hakki Pilke XL - Conveyor 

Translated 

version 4-2021 


2.4.


Using the out-feed conveyor 

 
The out-feed conveyor is used with the control panel of the Hakki Pilke machine. 
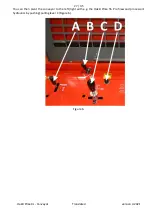
The running speed of the out-feed conveyor can be freely adjusted with adjustment screw C (Figure 3). If 
the  conveyor  is  jammed  for  any  reason,  the  conveyor  must  be  stopped  with  lever  B  (Figure  1)  and  the 
machine shut down before the cause is removed. If the issue is at the end of the conveyor (a piece of wood 
is stuck between the conveyor and possible extension conveyor), the conveyor belt can be reversed for a 
short distance with lever B (Figure 1).   


Figure 3. 


Содержание XL Conveyor 1

Страница 1: ...for assembly operation and maintenance EC Declaration of Conformity Safety instructions Guarantee terms TP Silva Oy Valimotie 1 FI 85800 Haapaj rvi Finland Tel 358 0 8 772 7300 info hakkipilke fi www...

Страница 2: ...bly 5 2 1 Delivery inspection 5 2 2 Assembling the conveyor 6 2 3 Connecting the conveyor to a firewood processor 21 2 4 Using the out feed conveyor 23 2 5 Adjusting the conveyor belt 24 2 6 Turning t...

Страница 3: ...Pilke firewood processor to where the firewood is intended to be deposited sacks for example The conveyor must be attached to the Hakki Pilke firewood processor during operation 1 3 Machine models and...

Страница 4: ...um speed is 10 km h The operator may not modify the structure or functionalities of the conveyor The operator must wear ear protectors sufficiently tight fitting work clothing and gloves protective go...

Страница 5: ...zone Lubrication point 2 Receipt and assembly 2 1 Delivery inspection Dispose of the machine s packaging material in an environmentally friendly manner Check that the conveyor has not sustained any d...

Страница 6: ...9 Instructions In the drawing below number A indicates the part number in the parts table of page 8 and number B indicates the quantity i e how many of the parts in question must be installed in the p...

Страница 7: ...ith rods Lock the rods with pins as shown in Section 4 5 Install debris removal as shown in Section 5 4 m conveyor as shown in Section 5 1 6 m and 8 m conveyor as shown in Section 5 2 6 Connect the co...

Страница 8: ...n runko Base frame 1 1 1 B V lilevy Spacer PL6 d36 D60 2 2 2 C1 Vetorengas Drive wheel 1 1 1 C2 Rengas Wheel 1 1 1 D Vinssi Winch 1 1 1 E1 Jatkopalkki vasen Extension bar left 0 0 1 E2 Jatkopalkki oik...

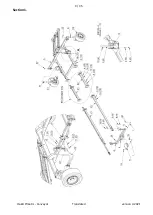
Страница 9: ...9 35 Hakki Pilke XL Conveyor Translated version 4 2021 Section 1...

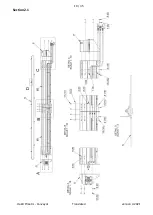
Страница 10: ...10 35 Hakki Pilke XL Conveyor Translated version 4 2021 Section 2 1...

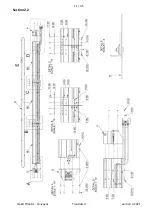
Страница 11: ...11 35 Hakki Pilke XL Conveyor Translated version 4 2021 Section 2 2...

Страница 12: ...12 35 Hakki Pilke XL Conveyor Translated version 4 2021 Section 2 3...

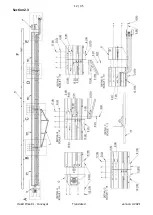
Страница 13: ...13 35 Hakki Pilke XL Conveyor Translated version 4 2021 Section 3...

Страница 14: ...14 35 Hakki Pilke XL Conveyor Translated version 4 2021 Section 4...

Страница 15: ...15 35 Hakki Pilke XL Conveyor Translated version 4 2021 Section 5 1...

Страница 16: ...16 35 Hakki Pilke XL Conveyor Translated version 4 2021 Section 5 2...

Страница 17: ...17 35 Hakki Pilke XL Conveyor Translated version 4 2021 Section 6 1...

Страница 18: ...18 35 Hakki Pilke XL Conveyor Translated version 4 2021 Section 6 2...

Страница 19: ...19 35 Hakki Pilke XL Conveyor Translated version 4 2021 Section 6 3...

Страница 20: ...20 35 Hakki Pilke XL Conveyor Translated version 4 2021 Section 7...

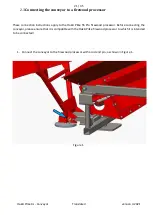
Страница 21: ...nection instructions apply to the Hakki Pilke 55 Pro firewood processor Before connecting the conveyor please ensure that it is compatible with the Hakki Pilke firewood processor to which it is intend...

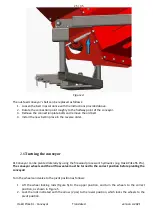
Страница 22: ...attach XL Conveyor s pressure hose to quick coupling A Figure 2 3 Connect hydraulic hose B Figure 2 to XL Conveyor s return hose female quick coupling 4 Connect XL Conveyor s overflow hose to quick co...

Страница 23: ...can be freely adjusted with adjustment screw C Figure 3 If the conveyor is jammed for any reason the conveyor must be stopped with lever B Figure 1 and the machine shut down before the cause is remov...

Страница 24: ...lt The tightness and alignment of the conveyor belt can be adjusted as follows 1 Loosen the tightening nut upper indicated by the arrow in Figure 4 from both sides 2 Tighten loosen the belt with the l...

Страница 25: ...the reverse order 2 6 Turning the conveyor XL Conveyor can be pivoted laterally by using the firewood processor s hydraulics e g Hakki Pilke 55 Pro The conveyor wheels and the oil flow valve must be...

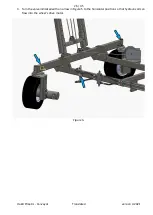
Страница 26: ...35 Hakki Pilke XL Conveyor Translated version 4 2021 3 Turn the valve indicated with an arrow in Figure 5 to the horizontal position so that hydraulic oil can flow into the wheel s drive motor Figure...

Страница 27: ...akki Pilke XL Conveyor Translated version 4 2021 You can then pivot the conveyor to the left right with e g the Hakki Pilke 55 Pro firewood processor s hydraulics by pushing pulling lever C Figure 6 F...

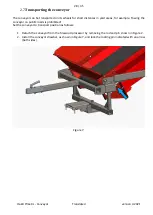
Страница 28: ...nces in yard areas for example Towing the conveyor on public roads is prohibited Set the conveyor to transport position as follows 1 Detach the conveyor from the firewood processor by removing the rod...

Страница 29: ...ion 4 2021 3 Straighten the conveyor wheels and lock them in place with the locking rods as shown in Figure 8 4 Turn the valve in Figure 8 to the lower position so that the hydraulic oil can flow free...

Страница 30: ...plate can be changed with the chain links Figure 8a 2 9 After use 5 After you have finished making firewood stop the out feed conveyor and remove the firewood from the conveyor 6 Ensure that the mach...

Страница 31: ...or your retailer If the guards of the machine have to be removed for maintenance they must always be reattached before the machine is activated After maintenance and adjustment measures the machine mu...

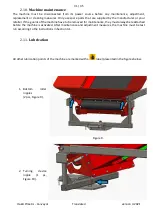
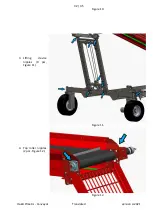
Страница 32: ...32 35 Hakki Pilke XL Conveyor Translated version 4 2021 3 Lifting device nipples 9 pcs Figure 11 4 Top roller nipples 2 pcs Figure 12 Figure 10 Figure 11 Figure 12...

Страница 33: ...rea are sufficiently clean during operation The machine must always be cleaned after use Clean the machine at suitable intervals and always before storing the machine for a prolonged time After washin...

Страница 34: ...er via the retailer The guarantee does not cover Damage caused by normal wear and tear such as saw blades and belts improper use or failure to observe the instruction manual Damage caused by negligenc...

Страница 35: ...the technical file Name Timo Jussila Address Valimotie 1 FI 85800 Haapaj rvi Finland The aforementioned person assures that Hakki Pilke XL Conveyor firewood conveyor accessory to Hakki Pilke firewood...

Отзывы: