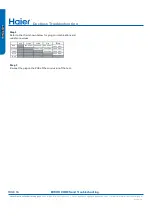
Ductless Troubleshooting
Phone: 866.814.3633 (option 3) Email: [email protected] Online: www.HaierDuctlessHelp.com
Rev. 04-20
PAGE 54
●
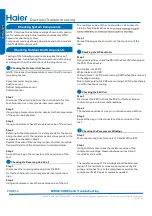
Checking System Components
Checking Outdoor Unit Components
NOTE: Component resistance readings shown in this section
are for reference only. Actual resistance values may
based on model being tested.
Component readings shown below are based on the models
of 1U*EH2VHD outdoor unit.
Step 3
Re-seat the plug on the connector at the conclusion of the
test.
Checking the EEV Coil
Step 1
Disconnect the EEV coil from the PCB for this test. Failure
to do so may provide inaccurate readings.
Step 2
The resistance values of plus pin combinations are 46 Ohm.
Step 3
Re-seat the plug on the connector at the conclusion of the
test.
Testing of the following components requires the use of
needle probes. Avoid testing the connector end of the plug,
as damage to the internal sections of the plug can occur.
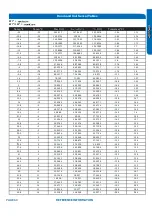
Checking the Outdoor Unit Sensors
NOTE: Use respective temperature / sensor chart for sensor
type being tested.
Compressor discharge sensor
Suction sensor
Defrost temperature sensor
Ambient sensor
Step 1
Disconnect the sensor plug from the control board for this
test. Failure to do so may provide inaccurate readings.
Step 2
Using k-type temperature probe, determine the temperature
of the sensor being tested.
Step 3
Using an ohmmeter, check the resistance value of the sensor.
Step 4
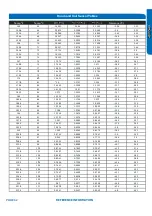
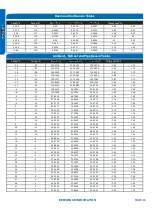
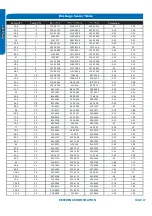
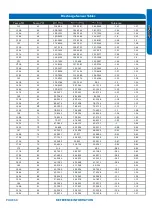
Referring to the temperature / resistance table for the sensor
being checked, verify the resistance value corresponds to the
temperature checked in Step 2.
Replace the sensor if the reading is open, shorted, or outside
Step 5
Re-seat the plug on the connector at the conclusion of the
test.
Checking the Reversing Valve Coil
Step 1
Disconnect the reversing valve plug from the PCB
for this test. Failure to do so may provide inaccurate read-
ings.
Step 2
Using an ohmmeter, check the resistance value of the coil.
The resistance value of the coil should be 1.2 kilo ohms to
1.8 kilo ohms. Replace the valve c
ERROR CODES and Troubleshooting
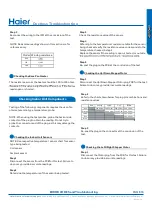
Checking the DC Fan Motor
Step 1
Using needle probes, check the DCV at the back of the fan plug on
the PCB. The values are:
Red to black: +310 VDC
White to black: +15 VDC
Yellow to black: 1-4 VDC when running; 0 VDC when there is no call
for heating or cooling
Blue to black: pulsing 0-8 VDC when running; 14 VDC when there is
no call for heating or cooling
Checking the Compressor Windings
Step 1
Disconnect wiring from terminals U, V and W of the IPM.
Step 1
Using an Ohmmeter, check the resistance value of the
compressor windings. Measure between wires U and V,
U and W, and V, and W.
The resistance value of the windings should be balanced
(equal). If the resistance values are not equal, verify the
wiring and connections to the compressor as well as the
compressor itself. Repair or replace as needed.
Содержание AW09EH2VHD
Страница 2: ... This page intentionally left blank ...
Страница 4: ...Failure to follow any CAUTION may in some cases result in grave consequences ...
Страница 6: ...PAGE 6 ...
Страница 9: ...5VDC and 15VDC pulsing communication connection between the PCB and the IPM ...
Страница 10: ......
Страница 11: ......
Страница 12: ......
Страница 13: ......
Страница 14: ......
Страница 15: ...Connector for coil temperature sensor and room temperature sensor ...
Страница 17: ......
Страница 19: ......
Страница 22: ......
Страница 23: ......
Страница 26: ...PAGE 32 ...
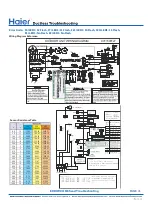
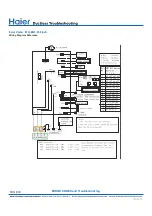
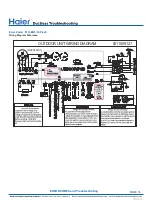
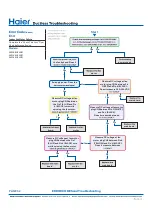
Страница 50: ...Error Code E7 LED1 15 Flash Wiring Diagram Reference PAGE 50 ERROR CODES and Troubleshooting ...
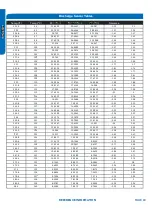
Страница 57: ...PAGE 57 Ambient Defrost and Pipe Sensor Tables Discharge Sensor Tables ...

