


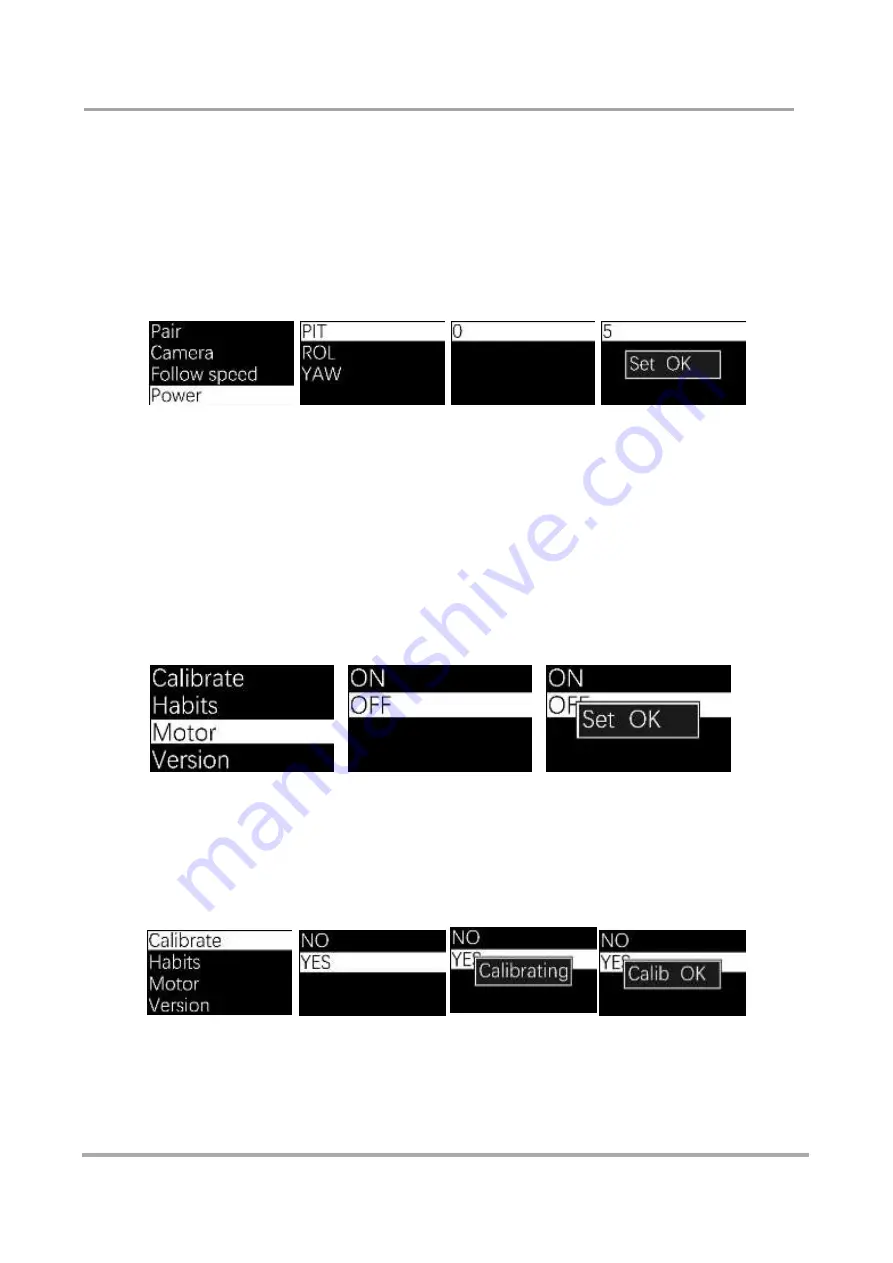
Adjusting the motor’s output power
When the loaded camera is light and the torque is high, the gimbal may jerk and make noise.
On the contrary, when the loaded camera is heavy and the torque is low, the gimbal cannot
keep stable and the wireless thumb con
troller fails to control the gimbal’s movement.
In such cases, enter the main menu and click ‘Power’.
The three-motor torque can be adjusted separately. Choose the motor that needs adjustment,
and move the joystick up or down to resize the data. Turn the joystick rightwards to save.
If the screen reads "Set OK", it means you were successful. "Set ERR" means the save was
unsuccessful.
Calibrating the Sensor
Sensor calibration is necessary if each axis of the gimbal starts to drift when the
MOZA Pro turns on.
Enter the menu, choose Motor, and click OFF. The motor will stop working and the wireless
thumb controller will show
‘
Set OK
’
. Choose ON when you need the motor to work.
Place the MOZA Pro on a sturdy and stationary surface. Turn on the wireless thumb controller
and enter the main menu. Click
‘C
alibrate
.’
Then choose YES. The wireless thumb
controller screen will display
‘
Calibrating
’.
The gimbal should remain stable during the
calibration process. Restart the MOZA Pro once the thumb controller shows
‘
Calibration
OK
’
to finish the calibration.
Содержание MOZA Pro
Страница 1: ...User manual...
Страница 14: ...Balance 1 2...
Страница 20: ...OLEO SPEED OPTION S ROLLER Interface Diagram LOGO JOYSTICK ON OFF Wireless Thumb Controller...
Страница 43: ...Please retain this user manual Website www gudsen com Customer Service support gudsen com...
Страница 44: ......