GROWSPAN
™
GOTHIC PREMIUM HIGH TUNNELS
34
108179_80_81_82_83_84H Revision date: 01.08.21
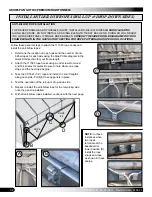
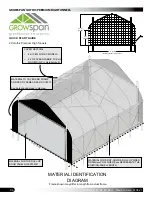
Diagrams may show a different frame and panel assembly.
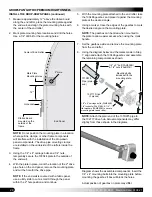
Drop-Down Panel
End Panel
Ground Level
Baseboard and
Retaining Board
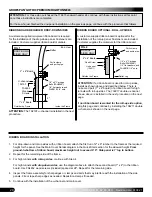
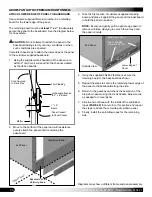
ATTACH LOWER EDGE OF PANEL TO BASEBOARD
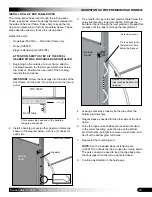
Use customer-supplied dimension lumber as a retaining
board for the lower edge of the panel.
The retaining board must be
at least 1" x 2"
to adequately
secure the panel to the baseboard. See the diagram below
for an example.
CAUTION:
Do not attempt to attach the panel to the
baseboard during stormy or windy conditions or when
such conditions are expected.
Complete these steps to attach the lower edge of the panel
to the customer-supplied baseboard.
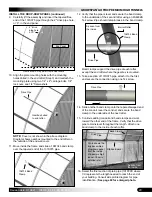
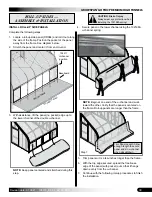
1. Using the supplied-crank handle, roll the panel up to
within 2" of where it will seat into the channel created
by the ribbon boards.
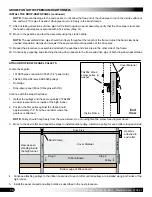
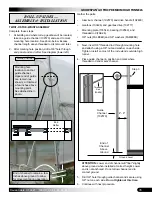
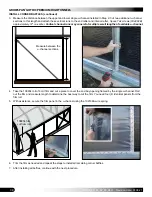
2. Move to the bottom of the panel and with assistance,
evenly stretch the panel end-to-end along the
baseboard.
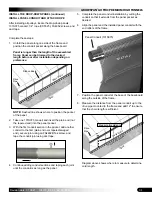
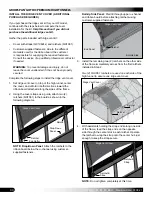
3. Take the first section of customer-supplied retaining
board and place it against the panel and the baseboard
to hold the panel in position.
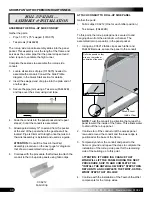
NOTE:
Evenly and gently pull the panel edge down to
remove wrinkles.
Applying too much force may bend
the panel conduit.
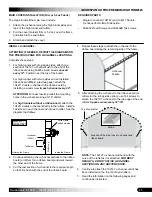
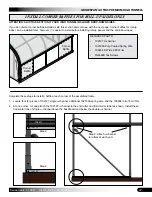
Retaining Board
Lower Edge of
Panel
Space FA4652
screws at 24" m/l
Outside View
Rafter
Cord Secured
to Drive Pipe
Panel Conduit
in Panel Pocket
2"
U-channel attached
to 2" x 6" Board
Film Cladding
1" x 4"
Board
End Panel
Drop-Down Panel
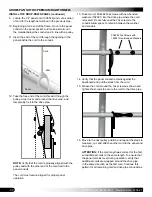
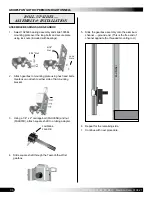
4. Using the supplied FA4652 fasteners, secure the
retaining board to the baseboard as shown.
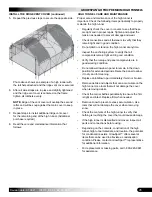
5. Repeat the steps to secure the remaining lower edge of
the panel to the baseboard along the side.
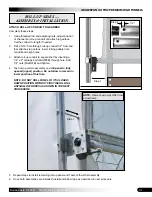
6. Return to the gearbox and check the operation of the
drop-down panel using the crank handle. Adjust cords
as needed for a level panel.
7. Skip to and continue with the install of the anti-billow
ropes
(PAGE 42)
then return to this section and repeat
the steps to attach the remaining drop-down panel.
8. Finally, install the anti-billow ropes for the remaining
side.

